Students in this course studied how human factor data can be applied to the design of body support, task support, storage and systems, construction drawings, and scale models. Students learned advanced millwork design and materials and manufacturing processes. The course began with case studies in the form of prejudice and segregation in seating.
RESEARCH PHASE
Students began by researching chosen topics in groups; my group focused on women in seating. Our research showed that chairs are visually distinct, easily recognizable signifiers for humans. They provide the illusion of activity and use difference in chair characteristics draws clear connection between perception of activities and employee position. Chairs are inherently gendered; gender discrimination and bias is in every part of our life, from the large scale, institutional examples (inequity) to the hidden and unnoticed displays in the workplace.
After establishing a base-line of knowledge about discrimination in seating, students dove into seating during the Civil Rights Movement in the American 1960s. Cases studied include Peterson v. City of Greenville, Barr v. City of Columbia, Robinson v. Florida, Bouie v. City of Columbia, and Katzenbach v. McClung. These cases show how seating can be used to dehumanize minority groups and how precedents shifted over time. Students were then challenged to think about ways their projects can disrupt discriminatory norms in seating today.
PROCESS
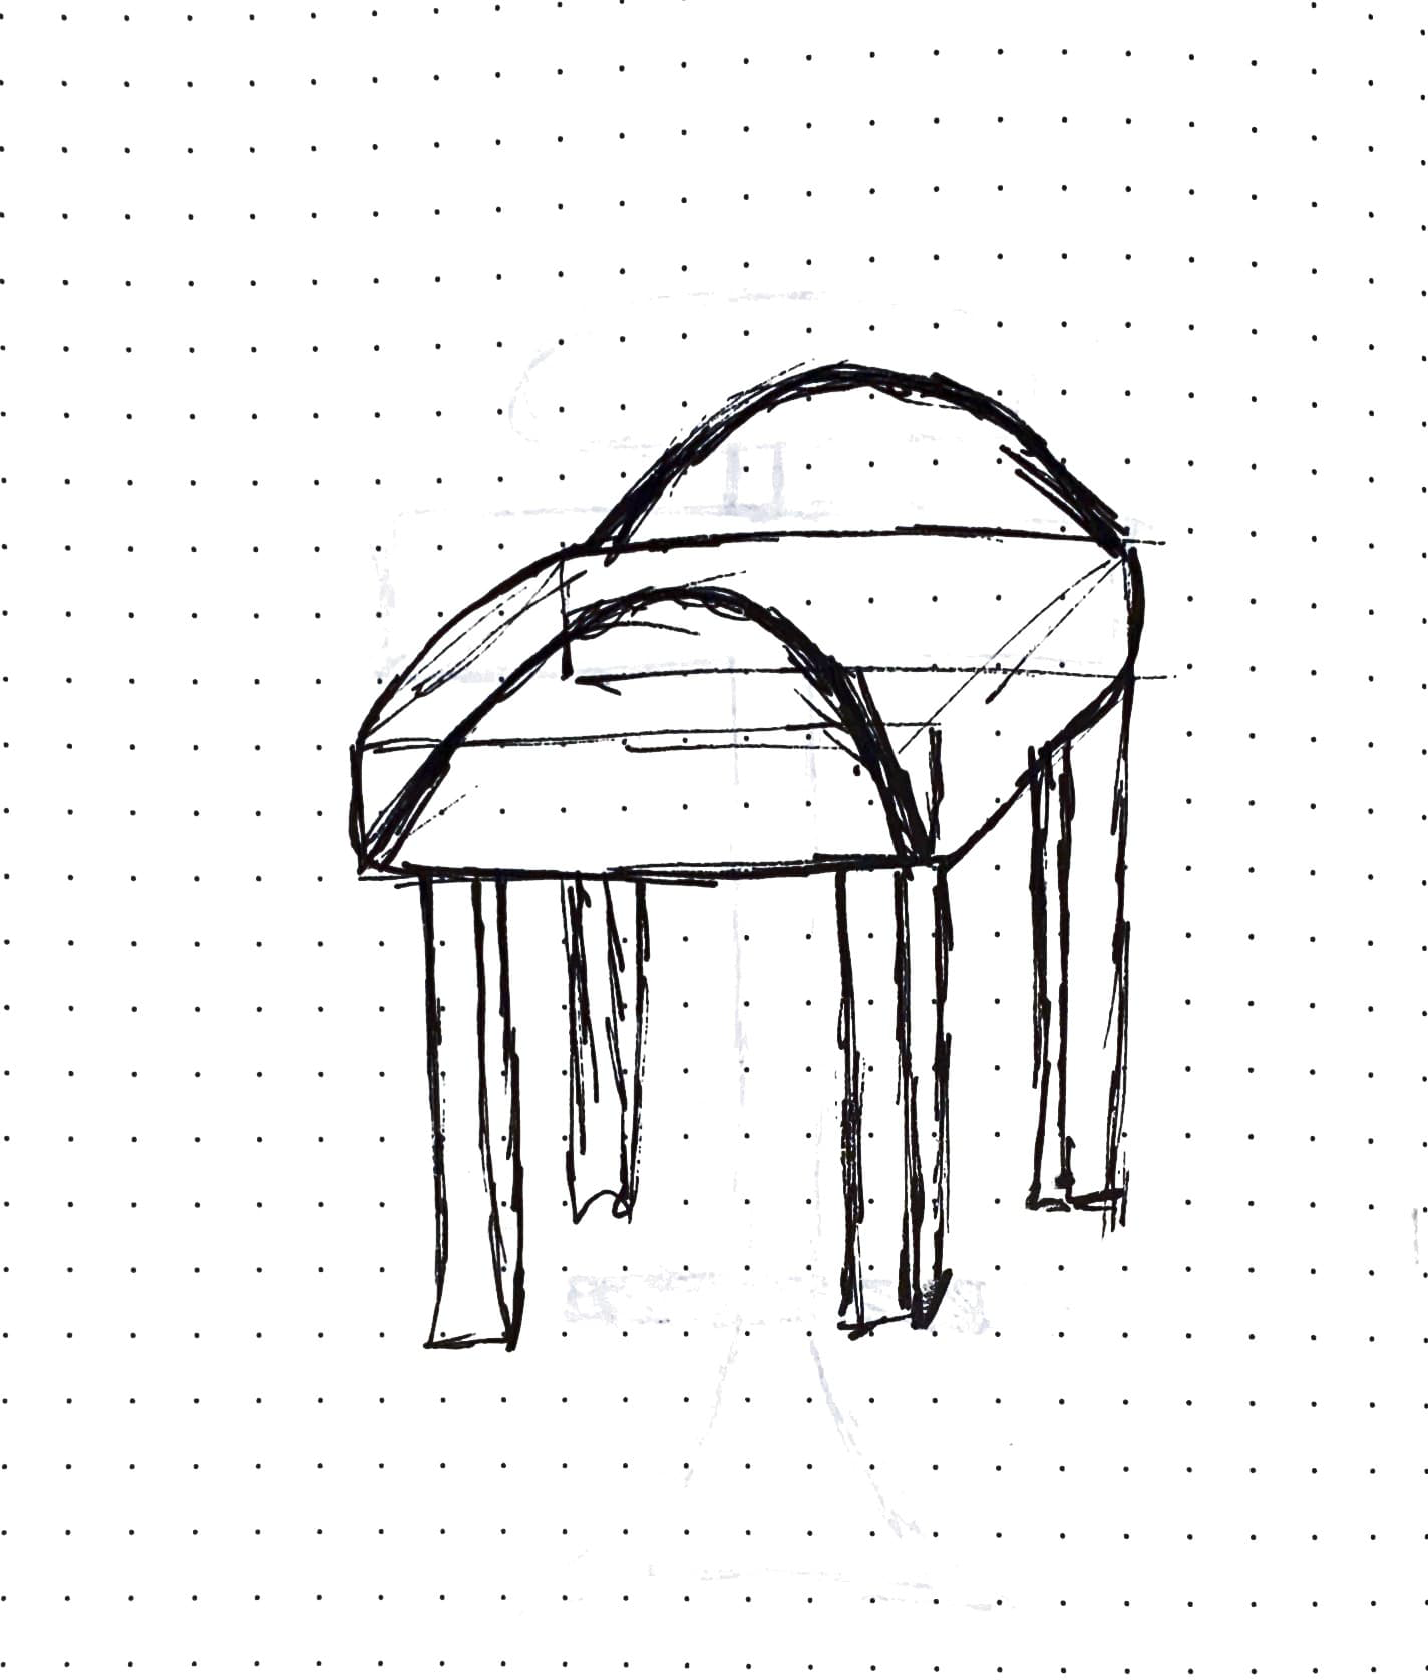
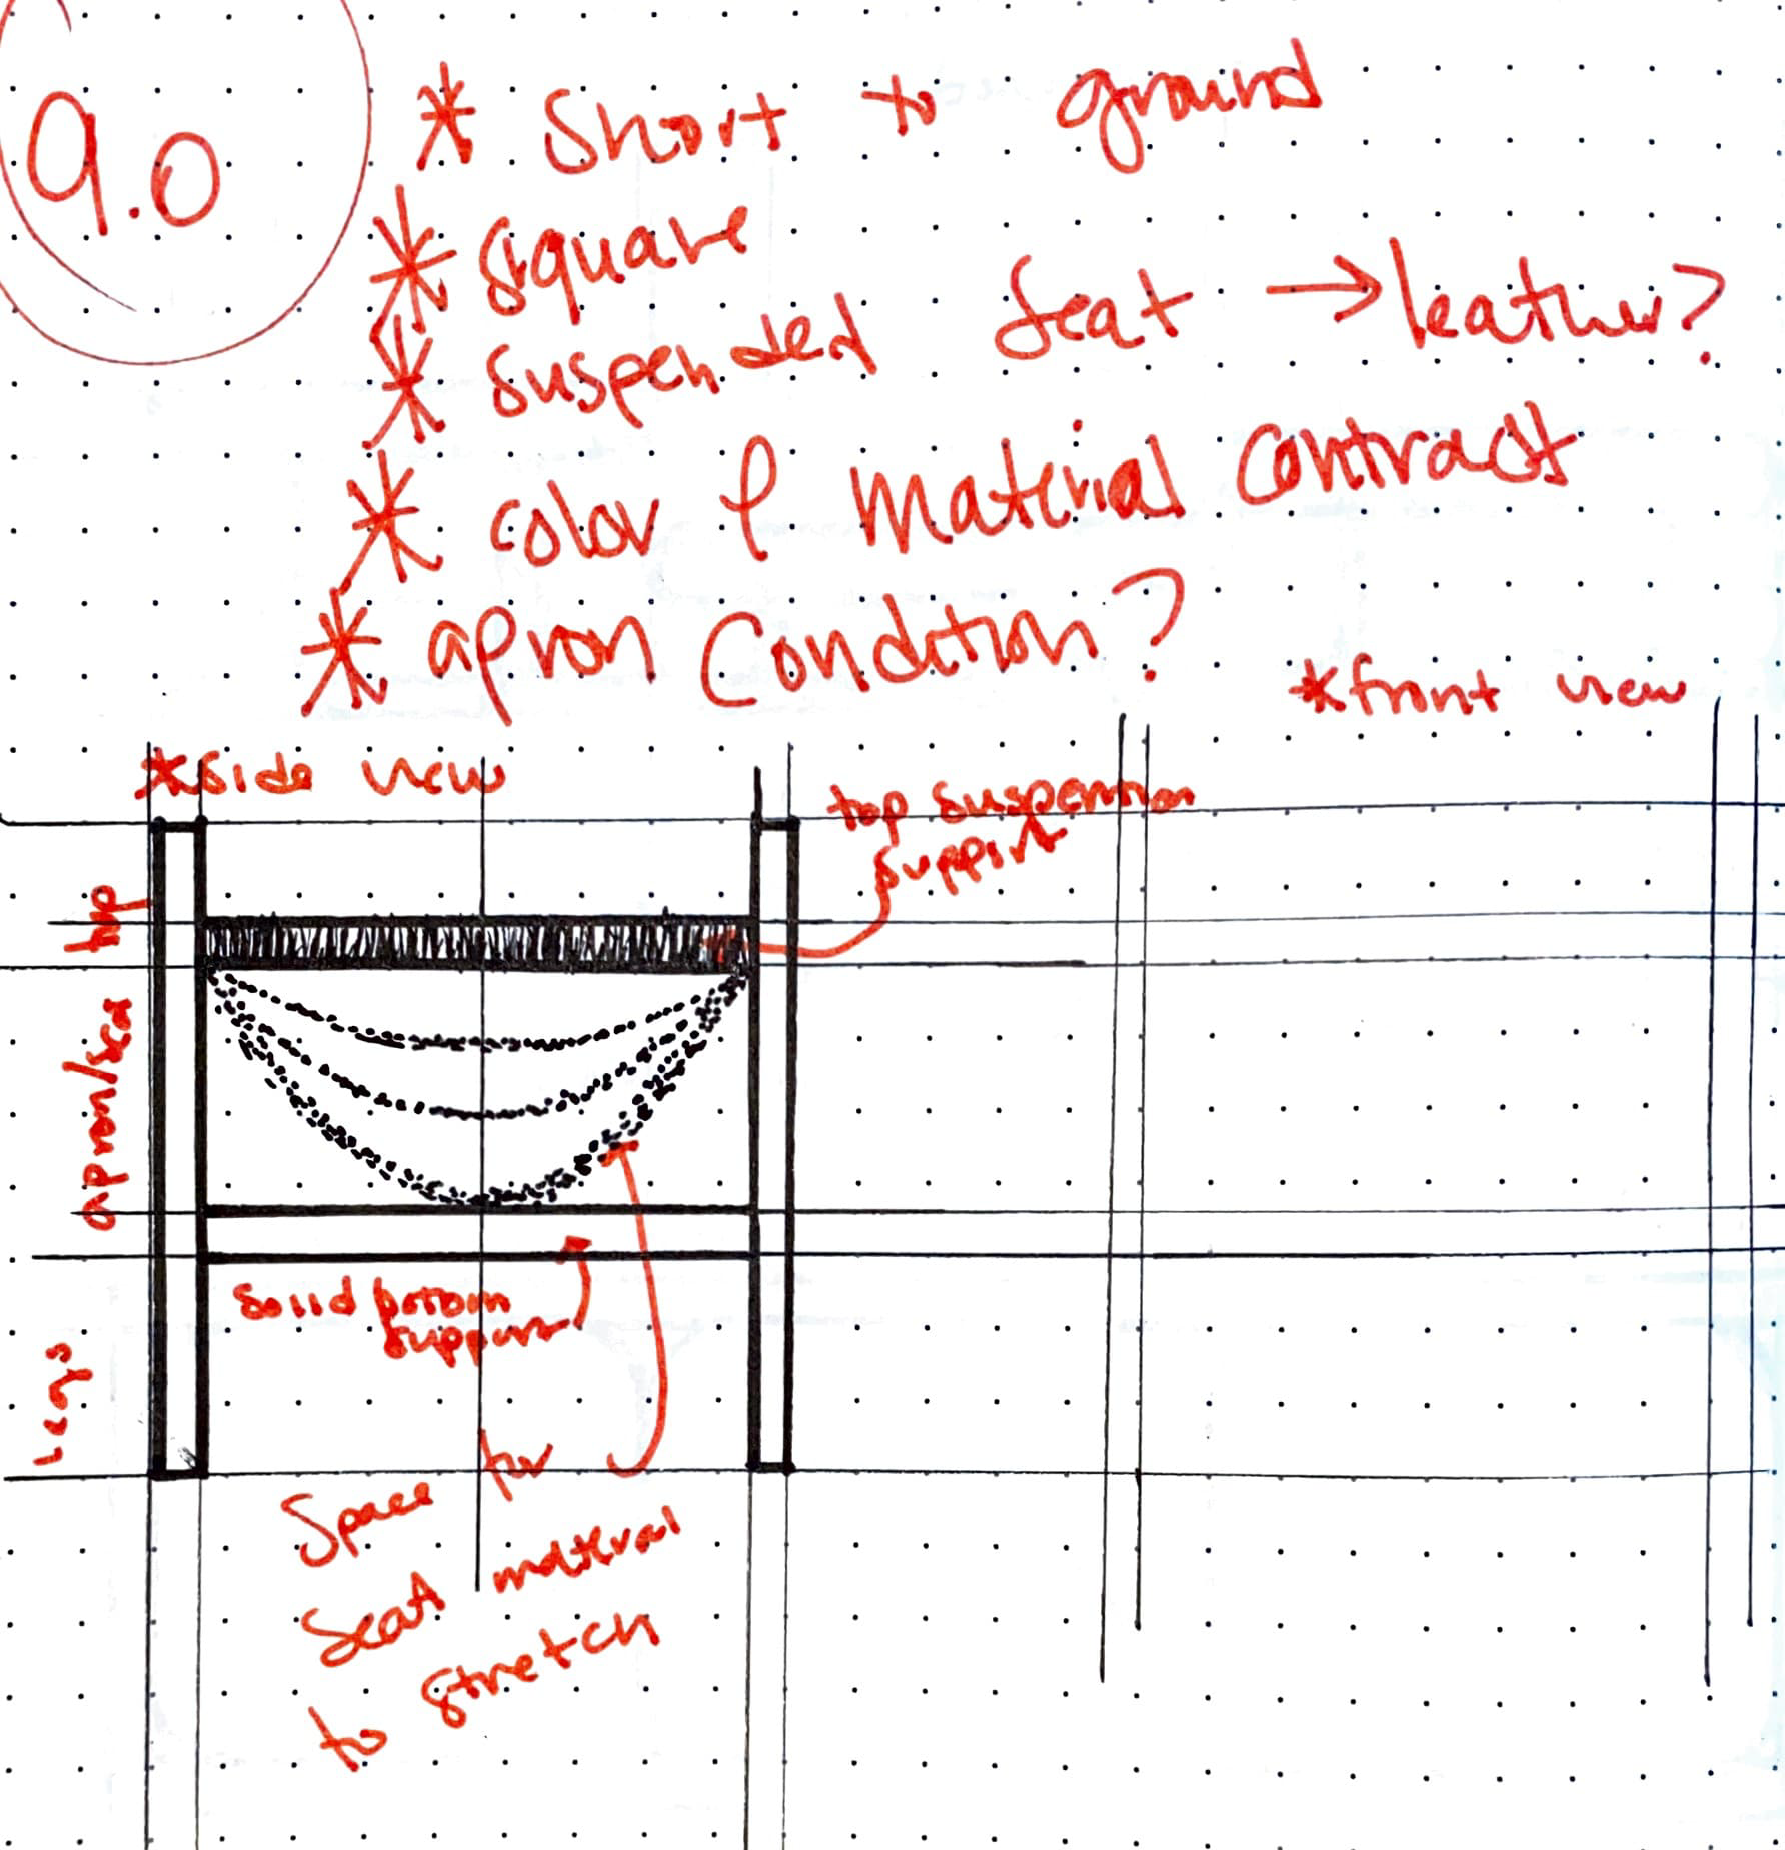
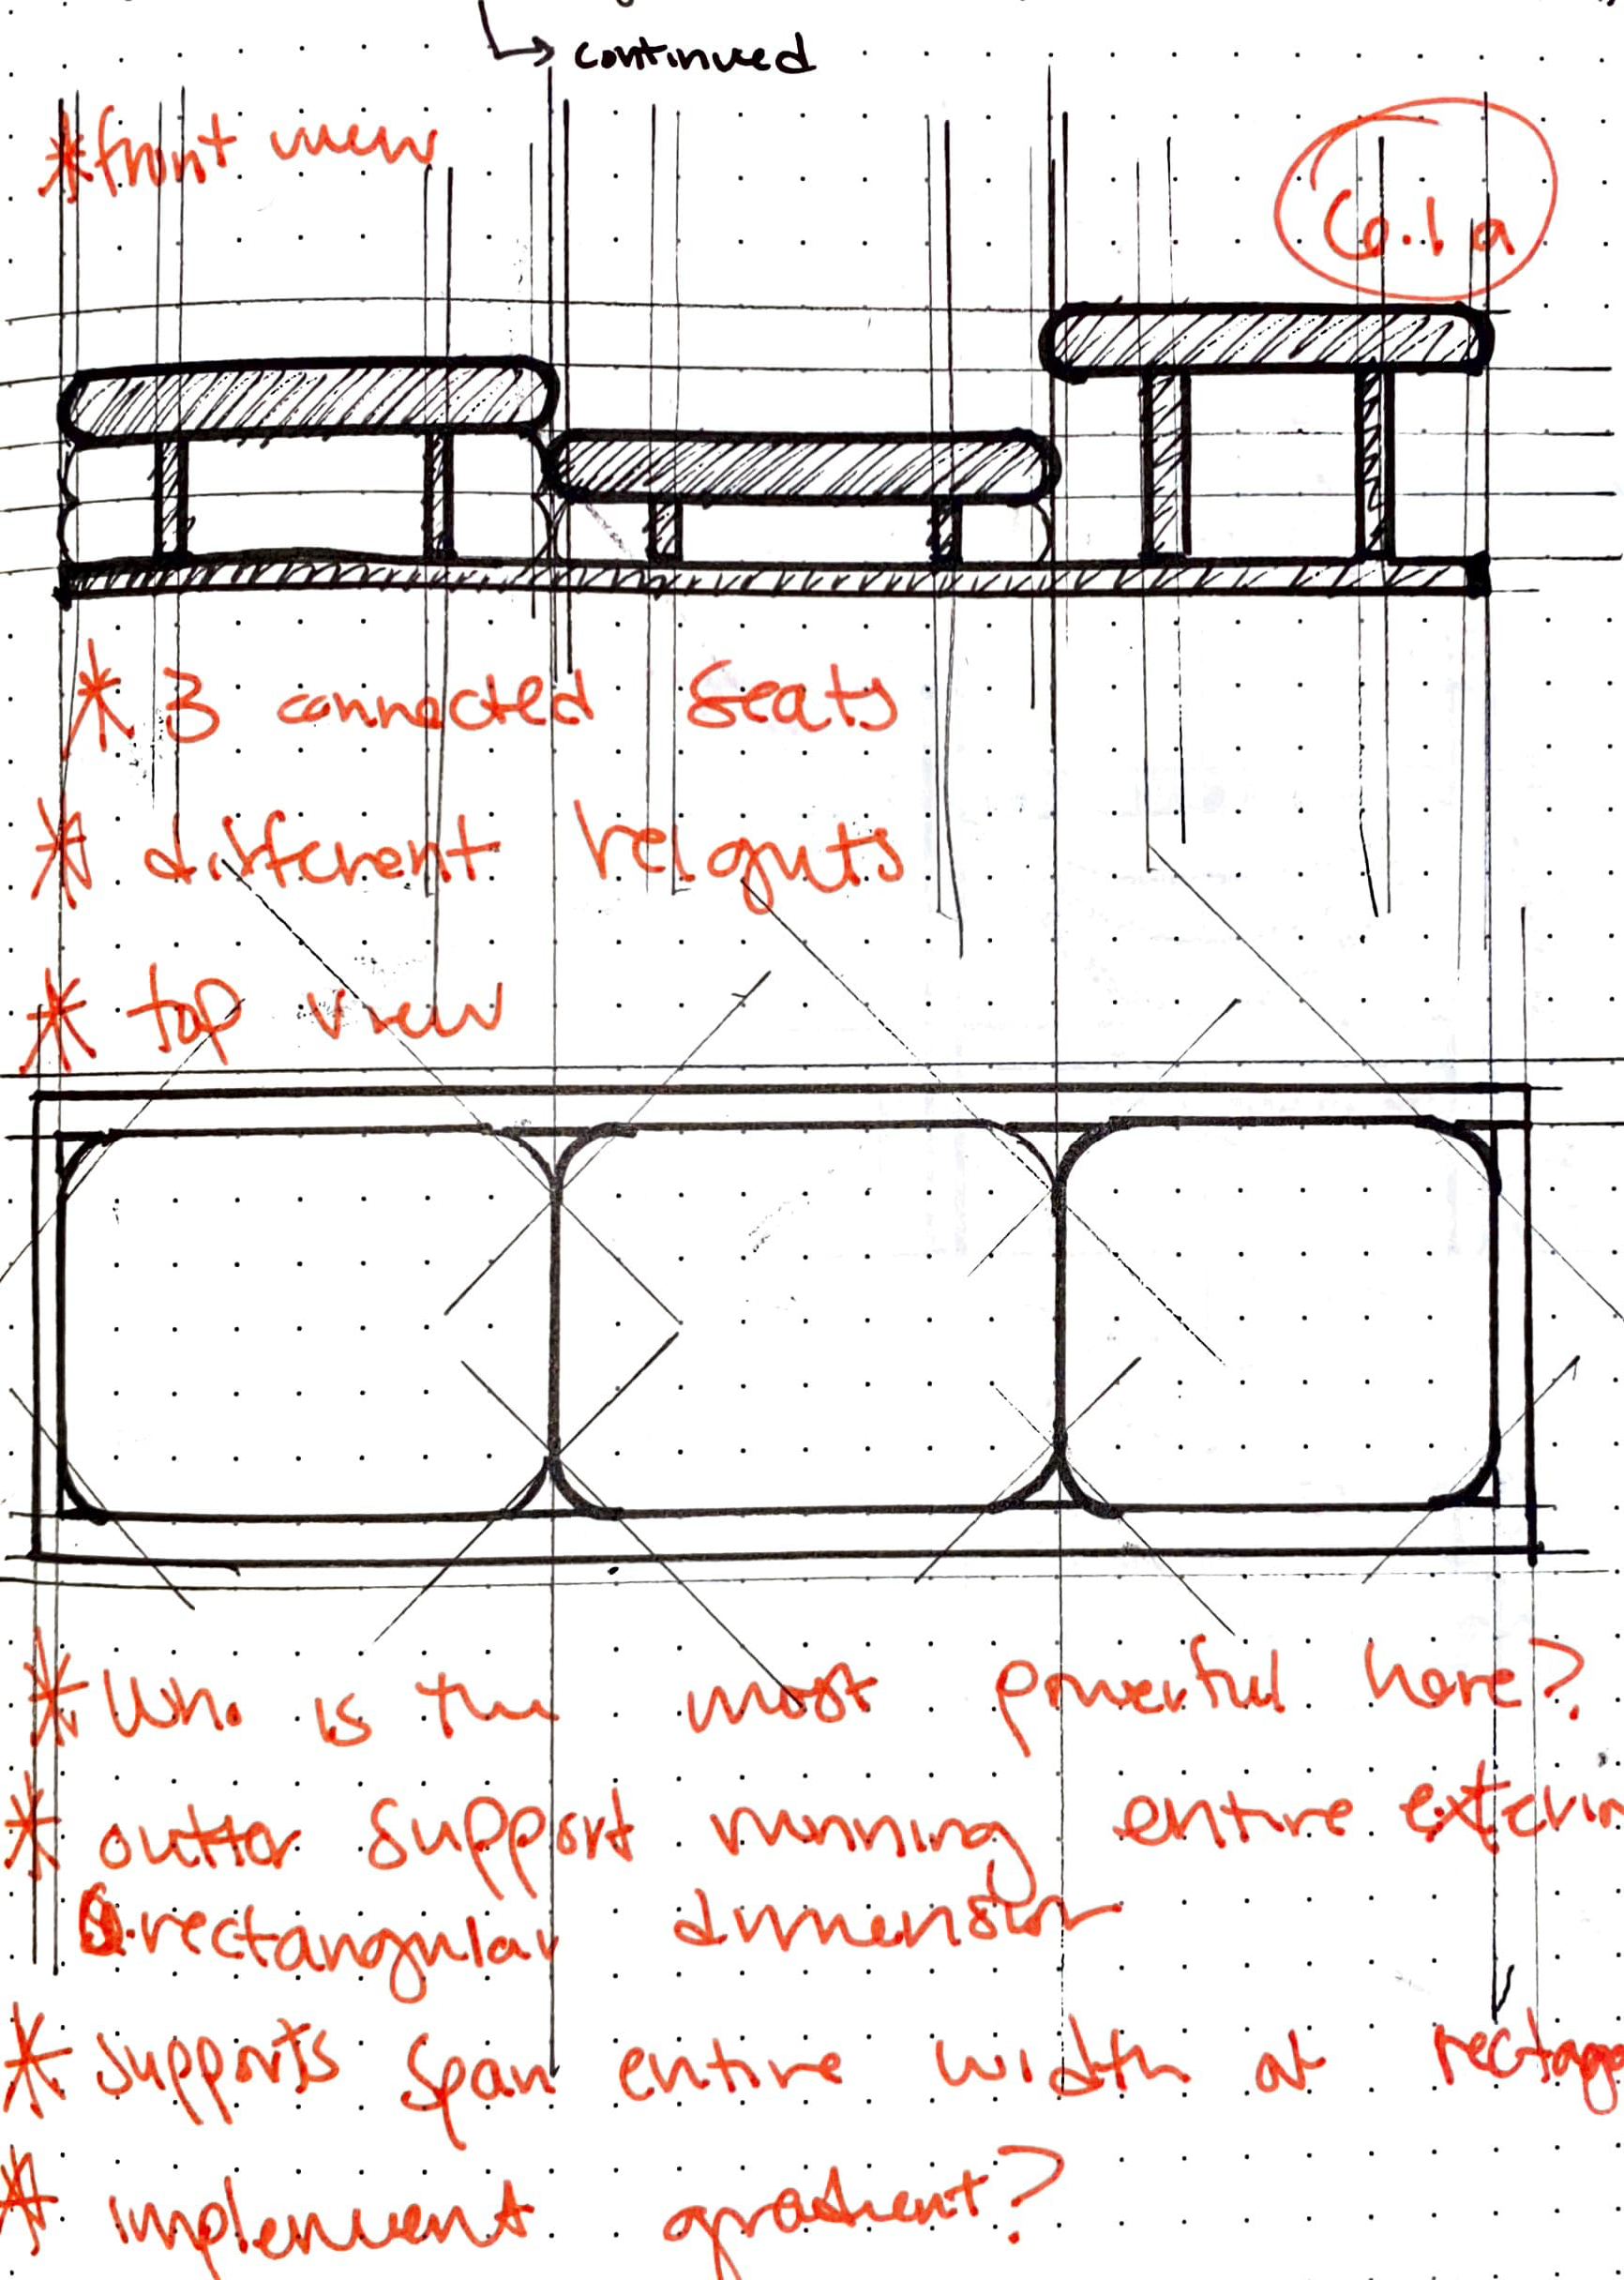
Students were tasked with brainstorming as many designs as possible; from there, it was narrowed to the three strongest design options. Students were tasked with first brainstorming on paper then bringing their thoughts into a digital drawing.
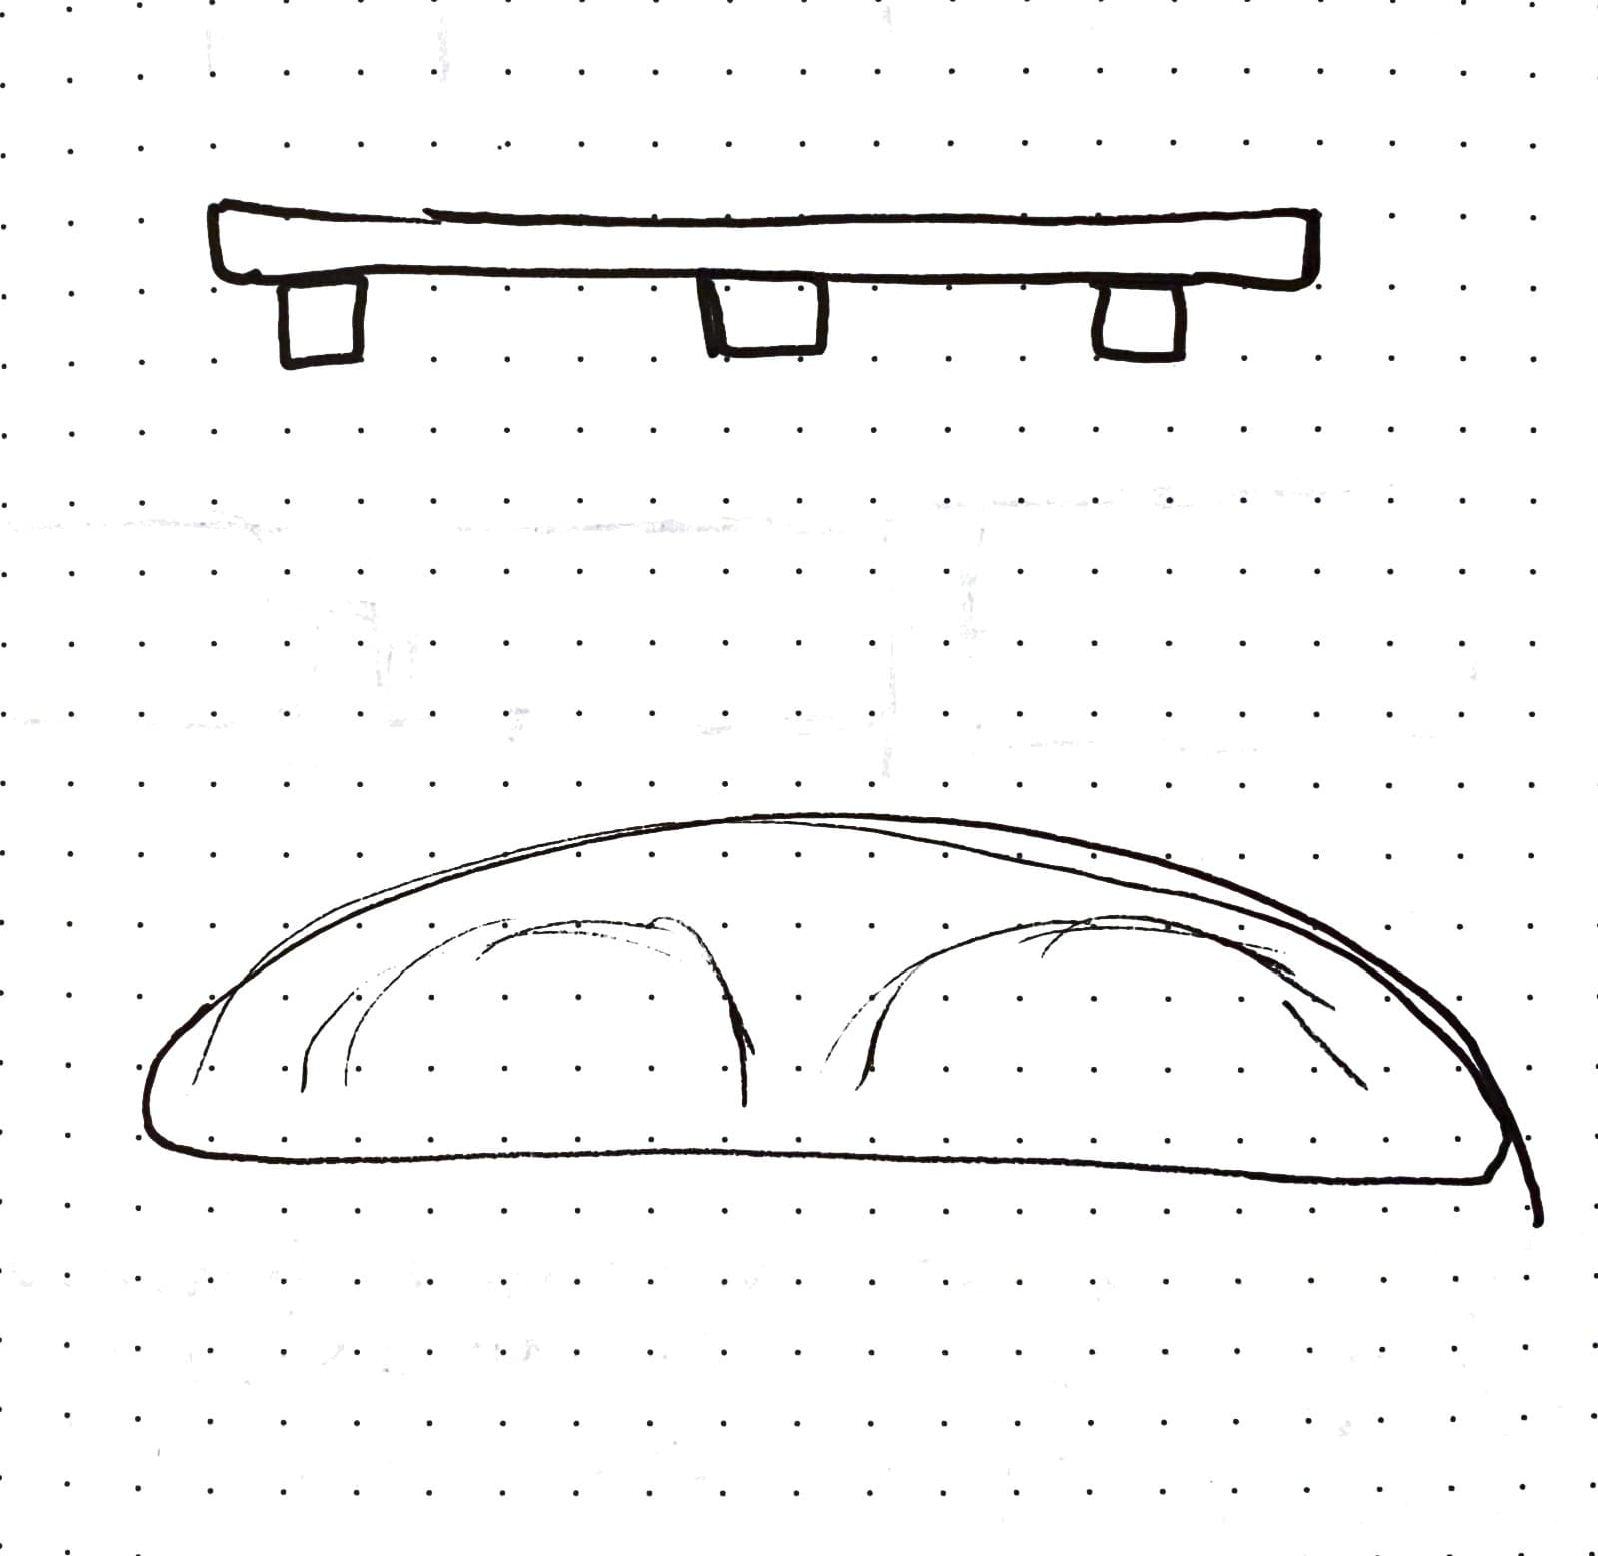
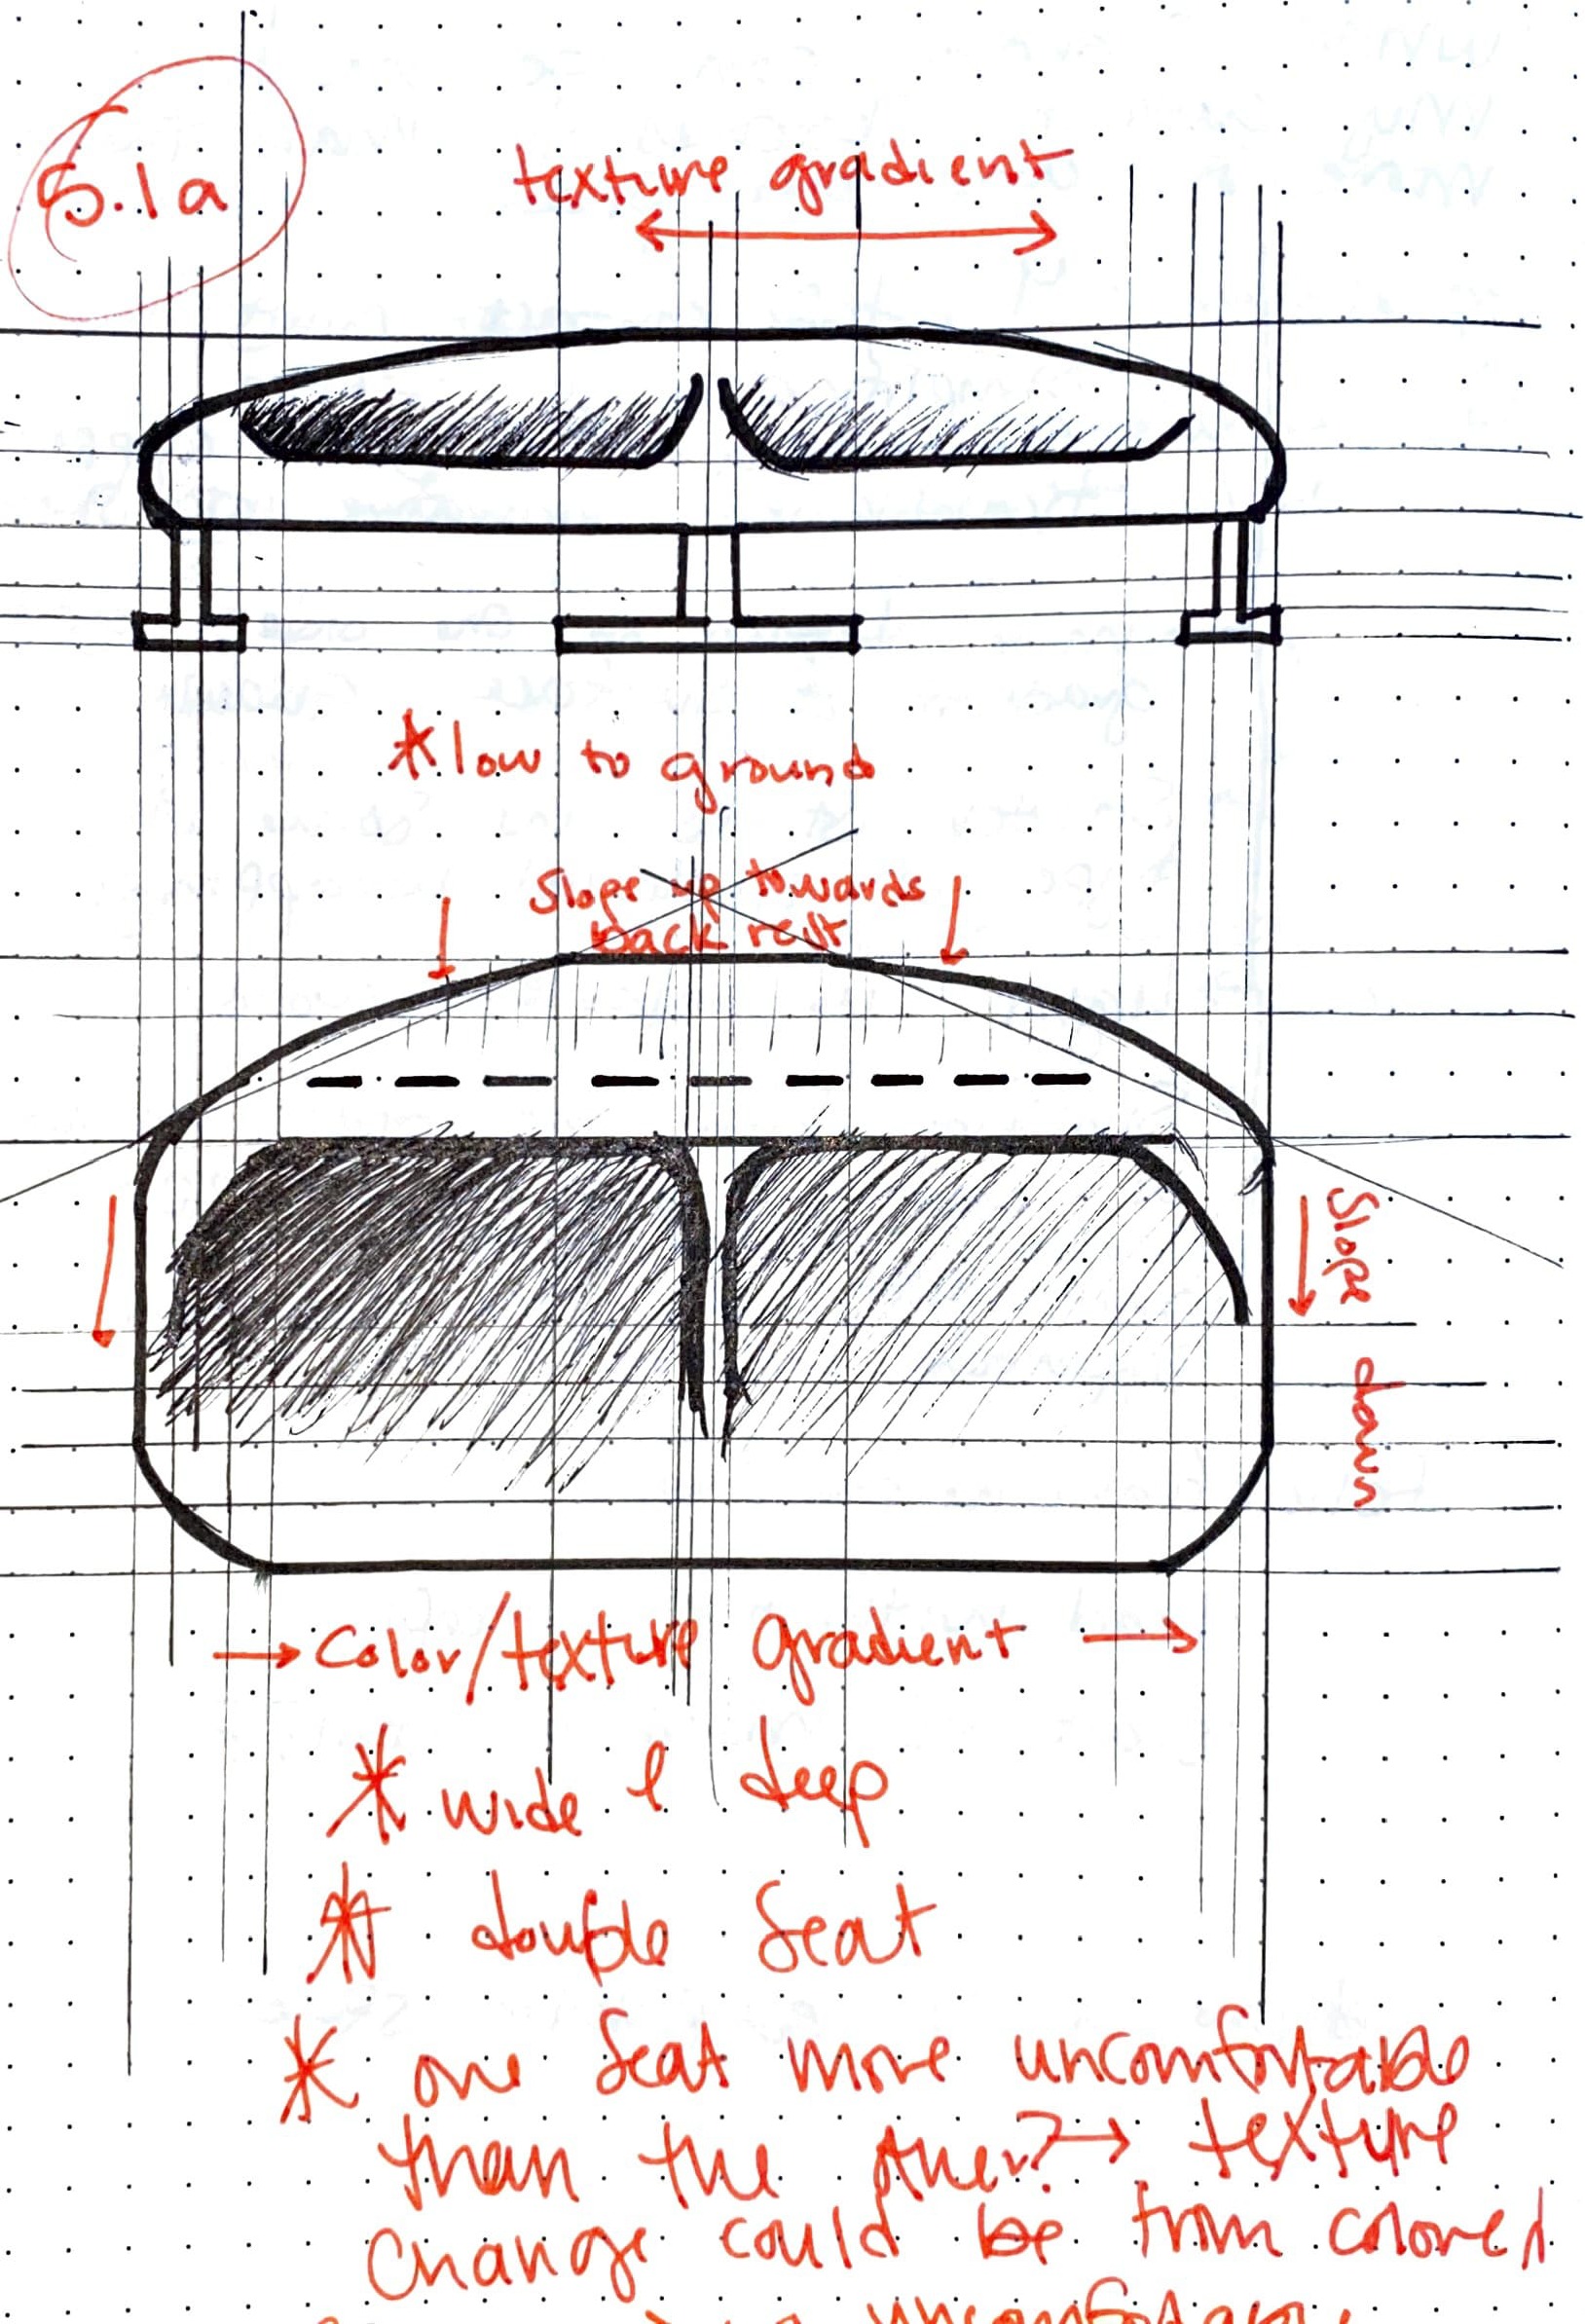
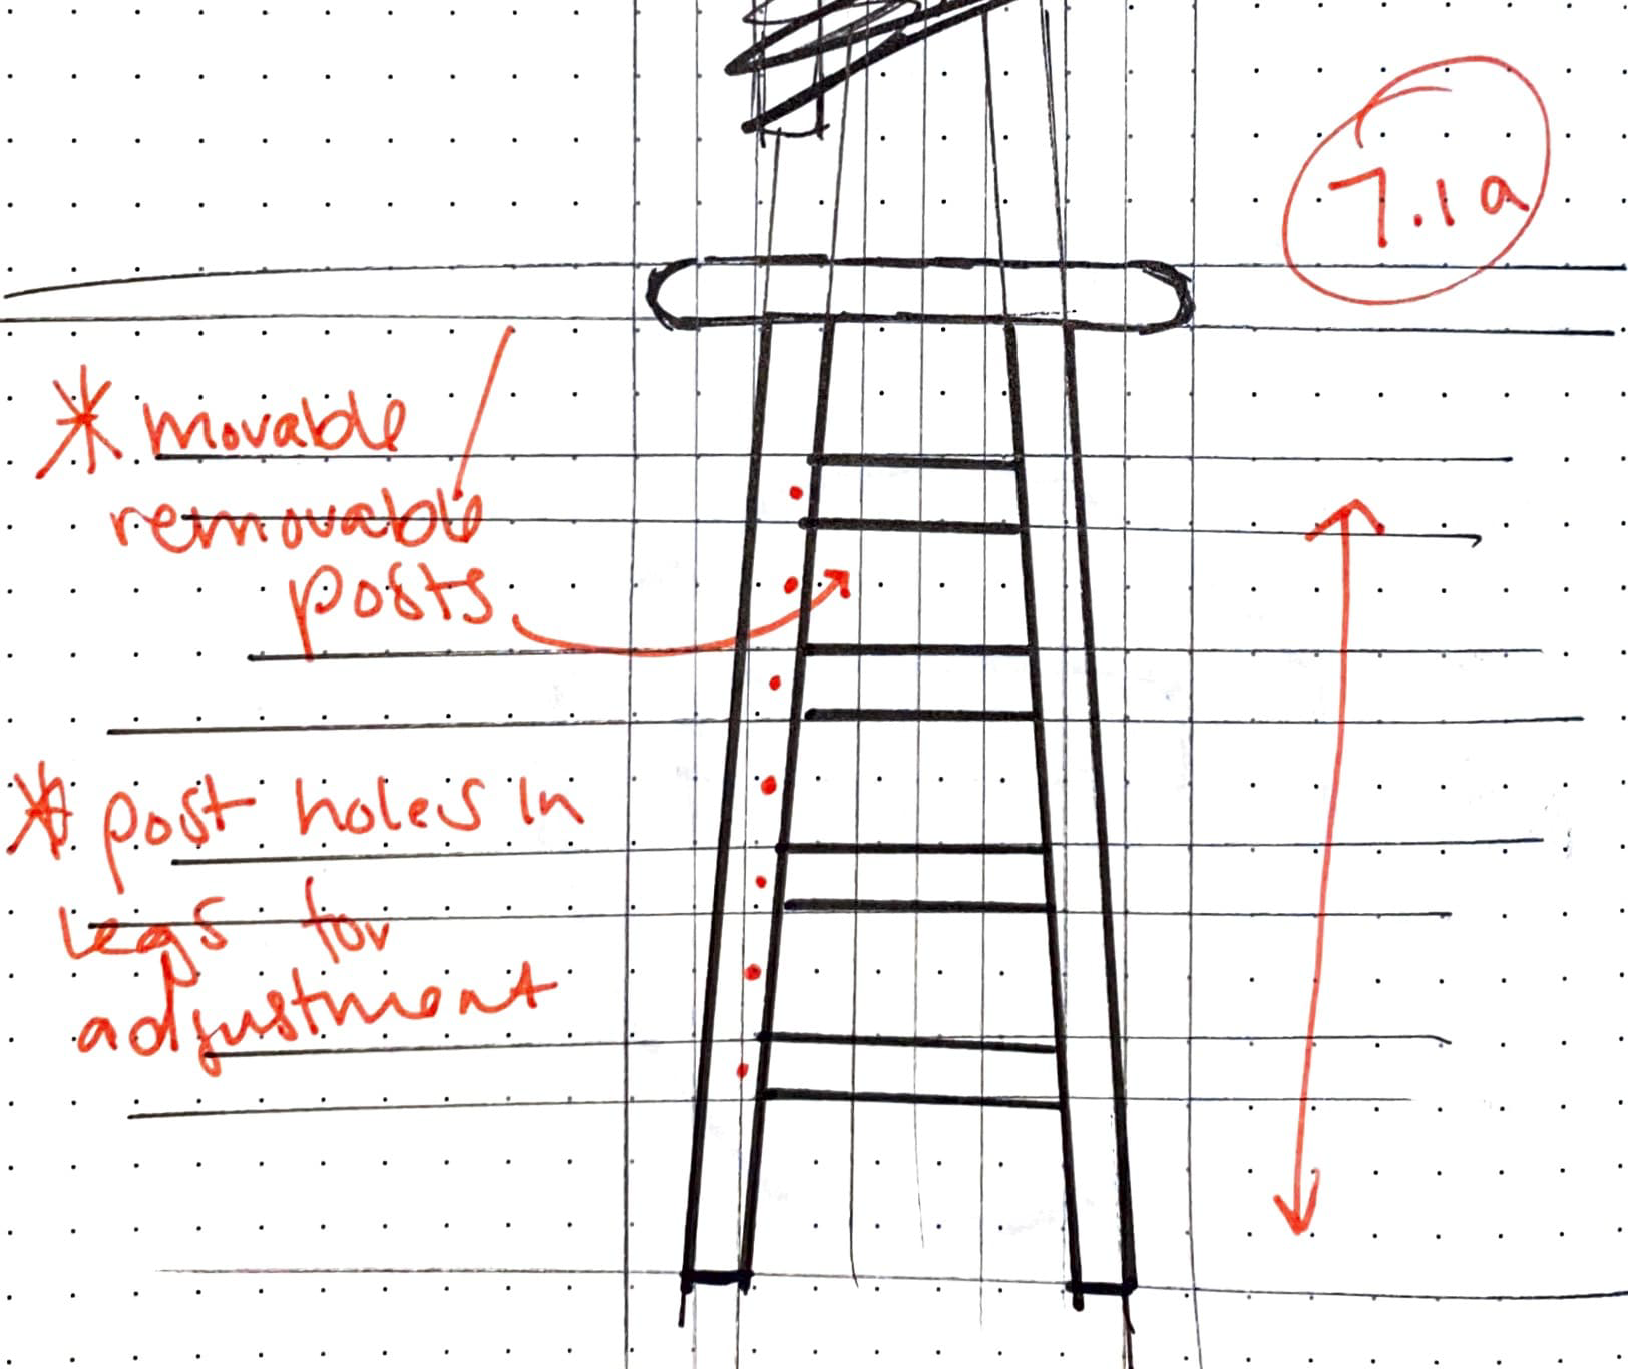
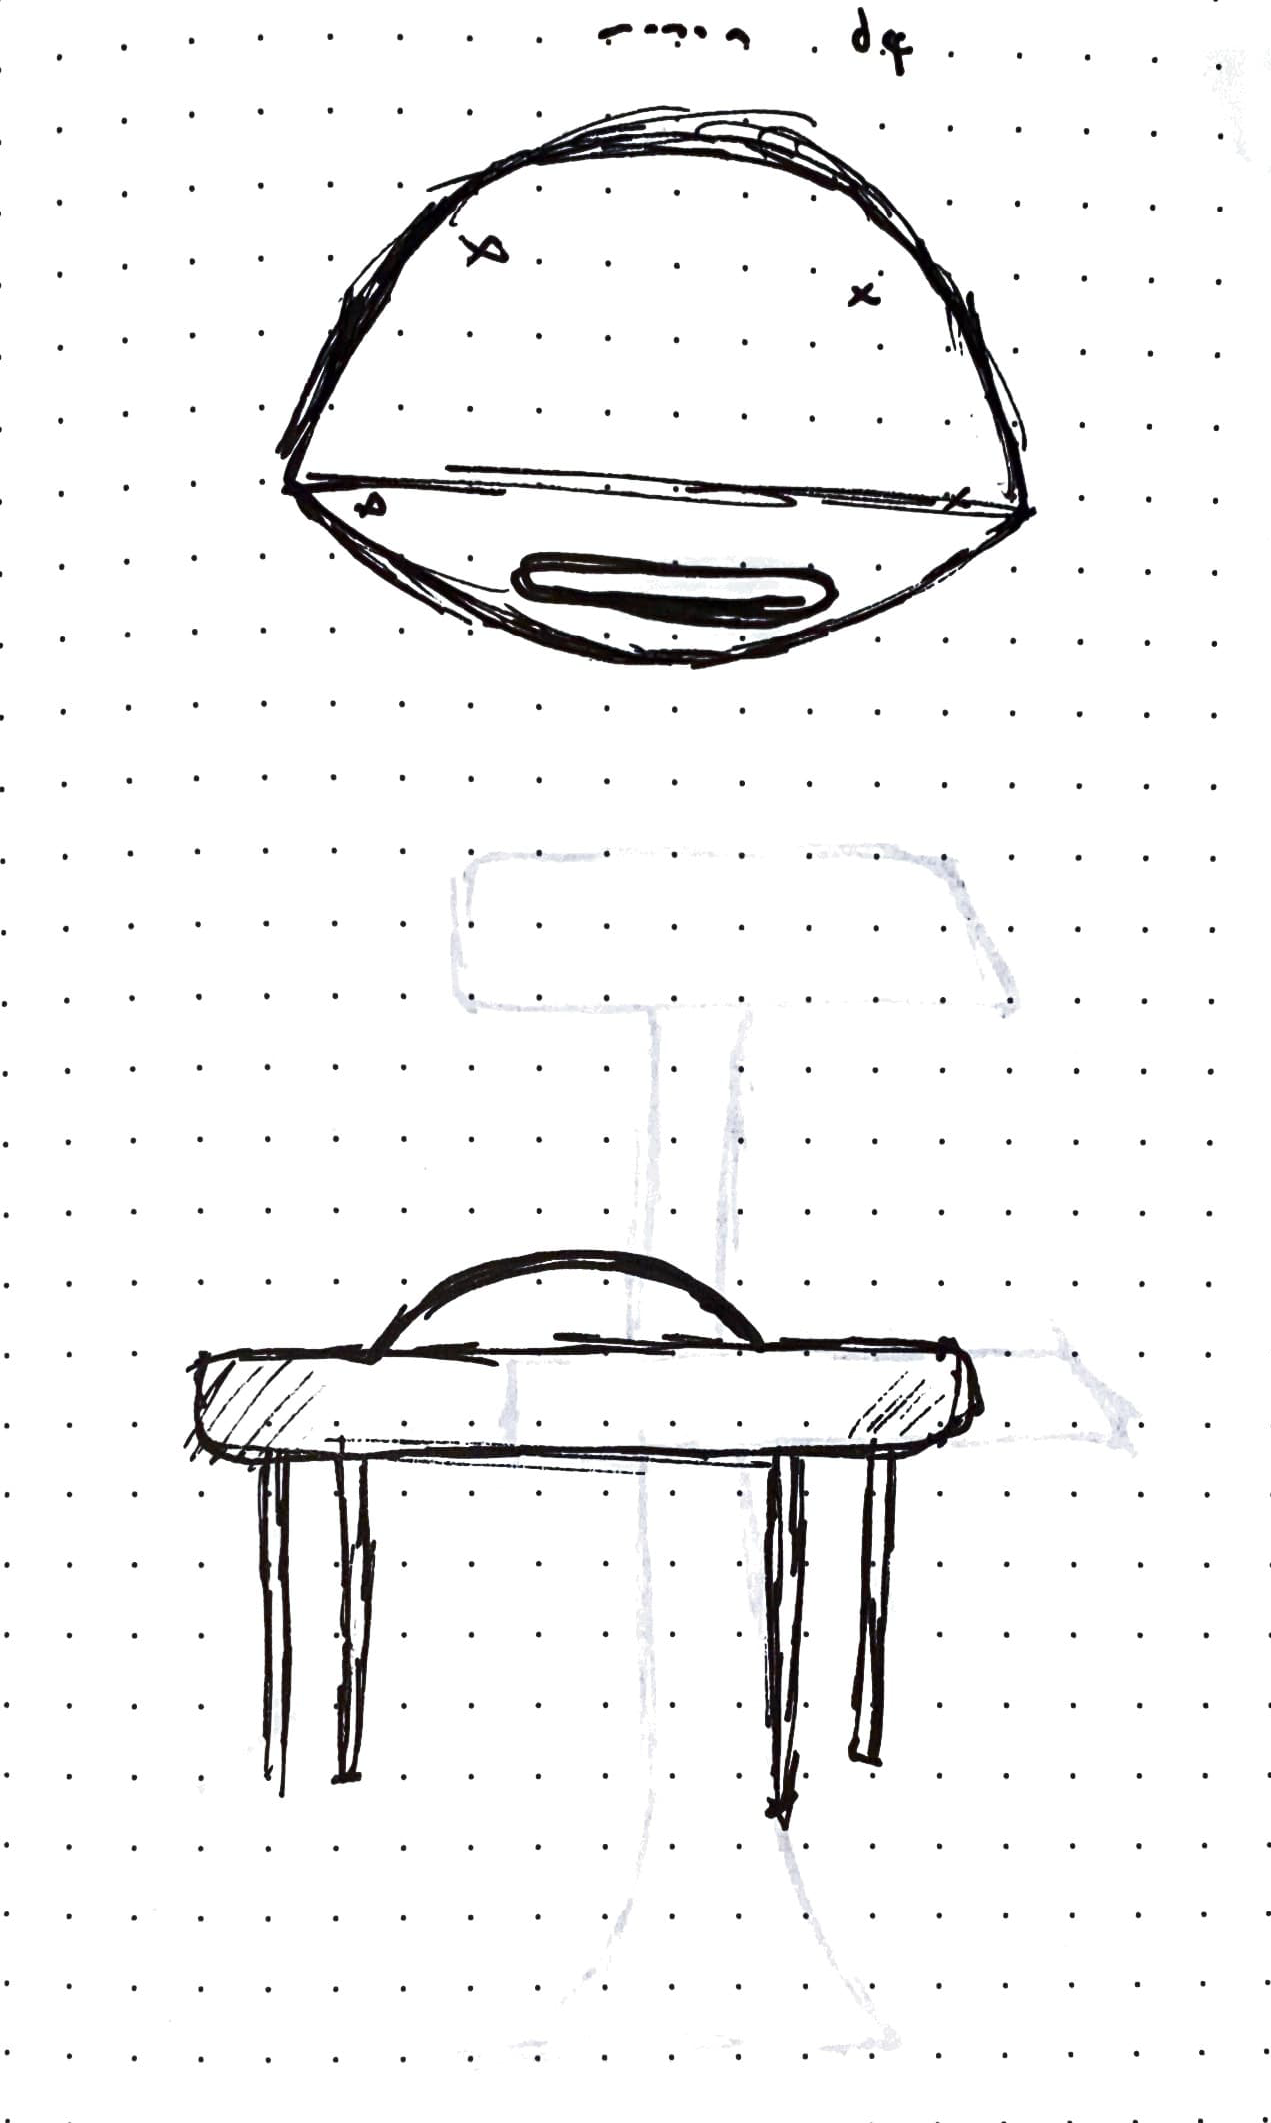
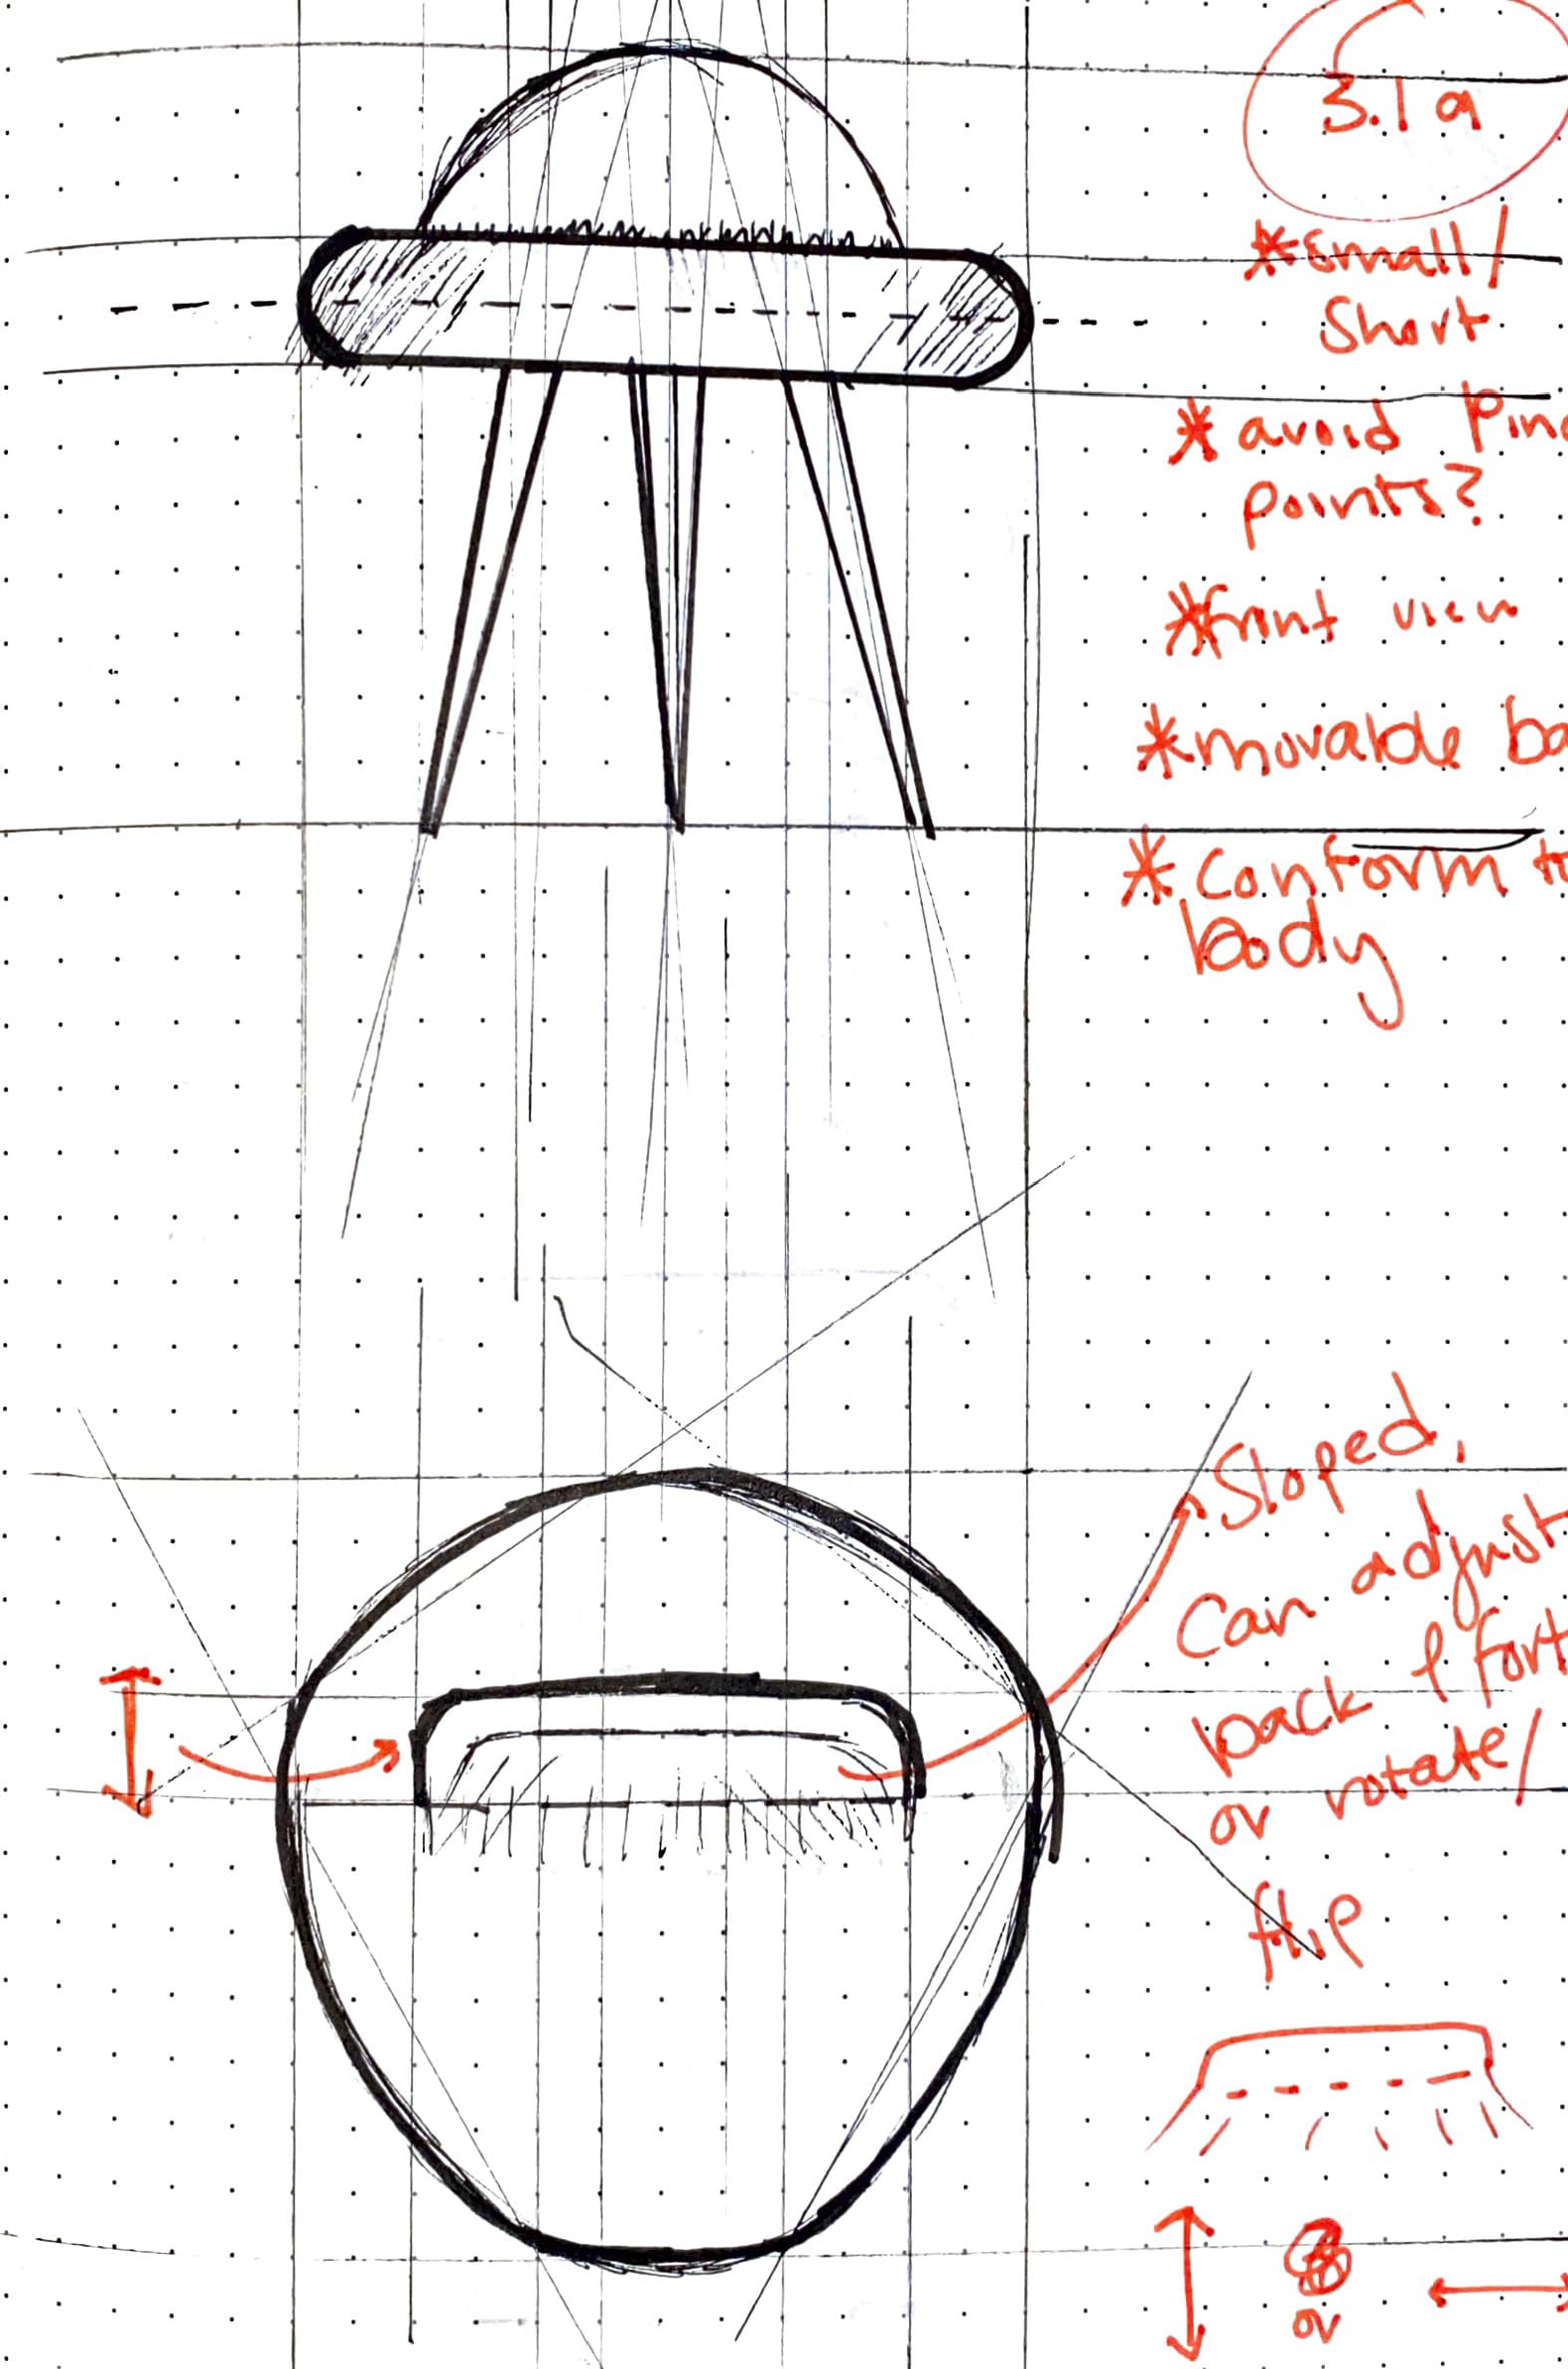
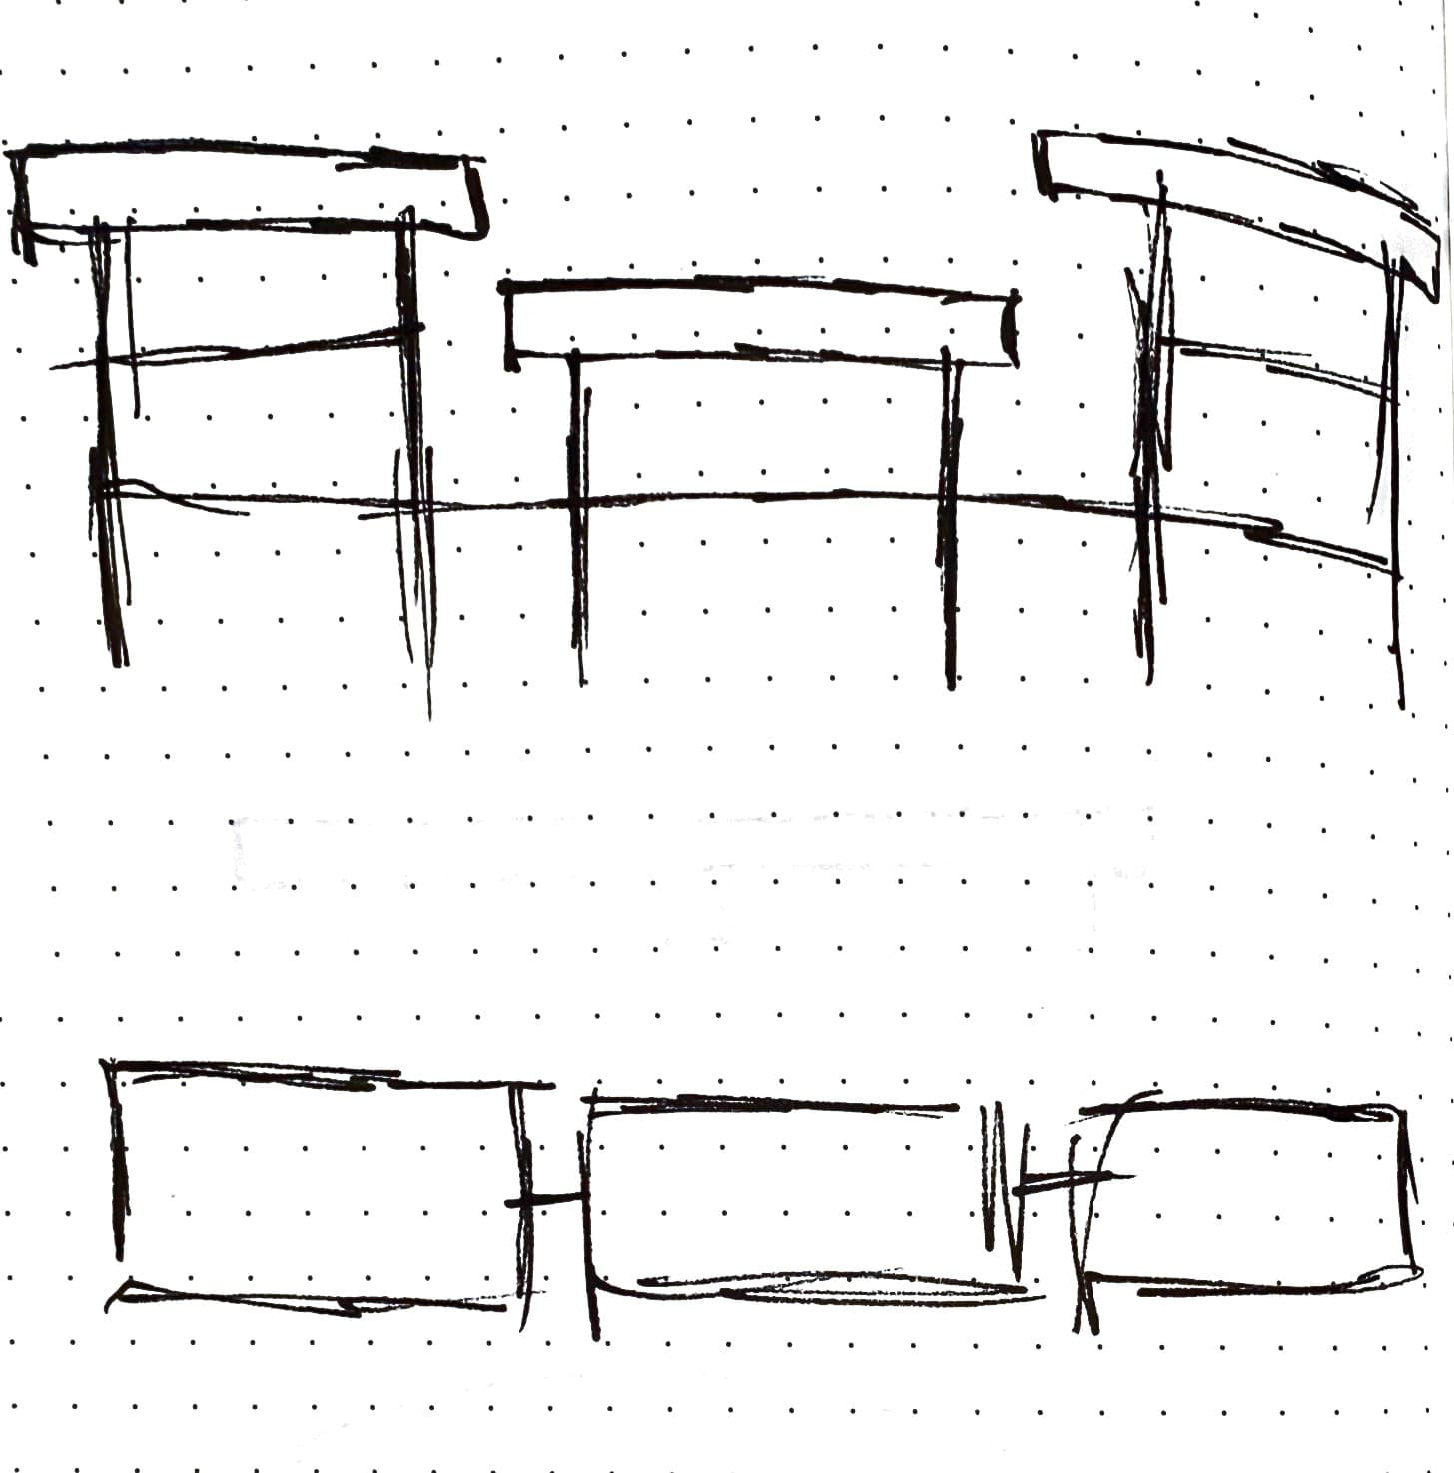
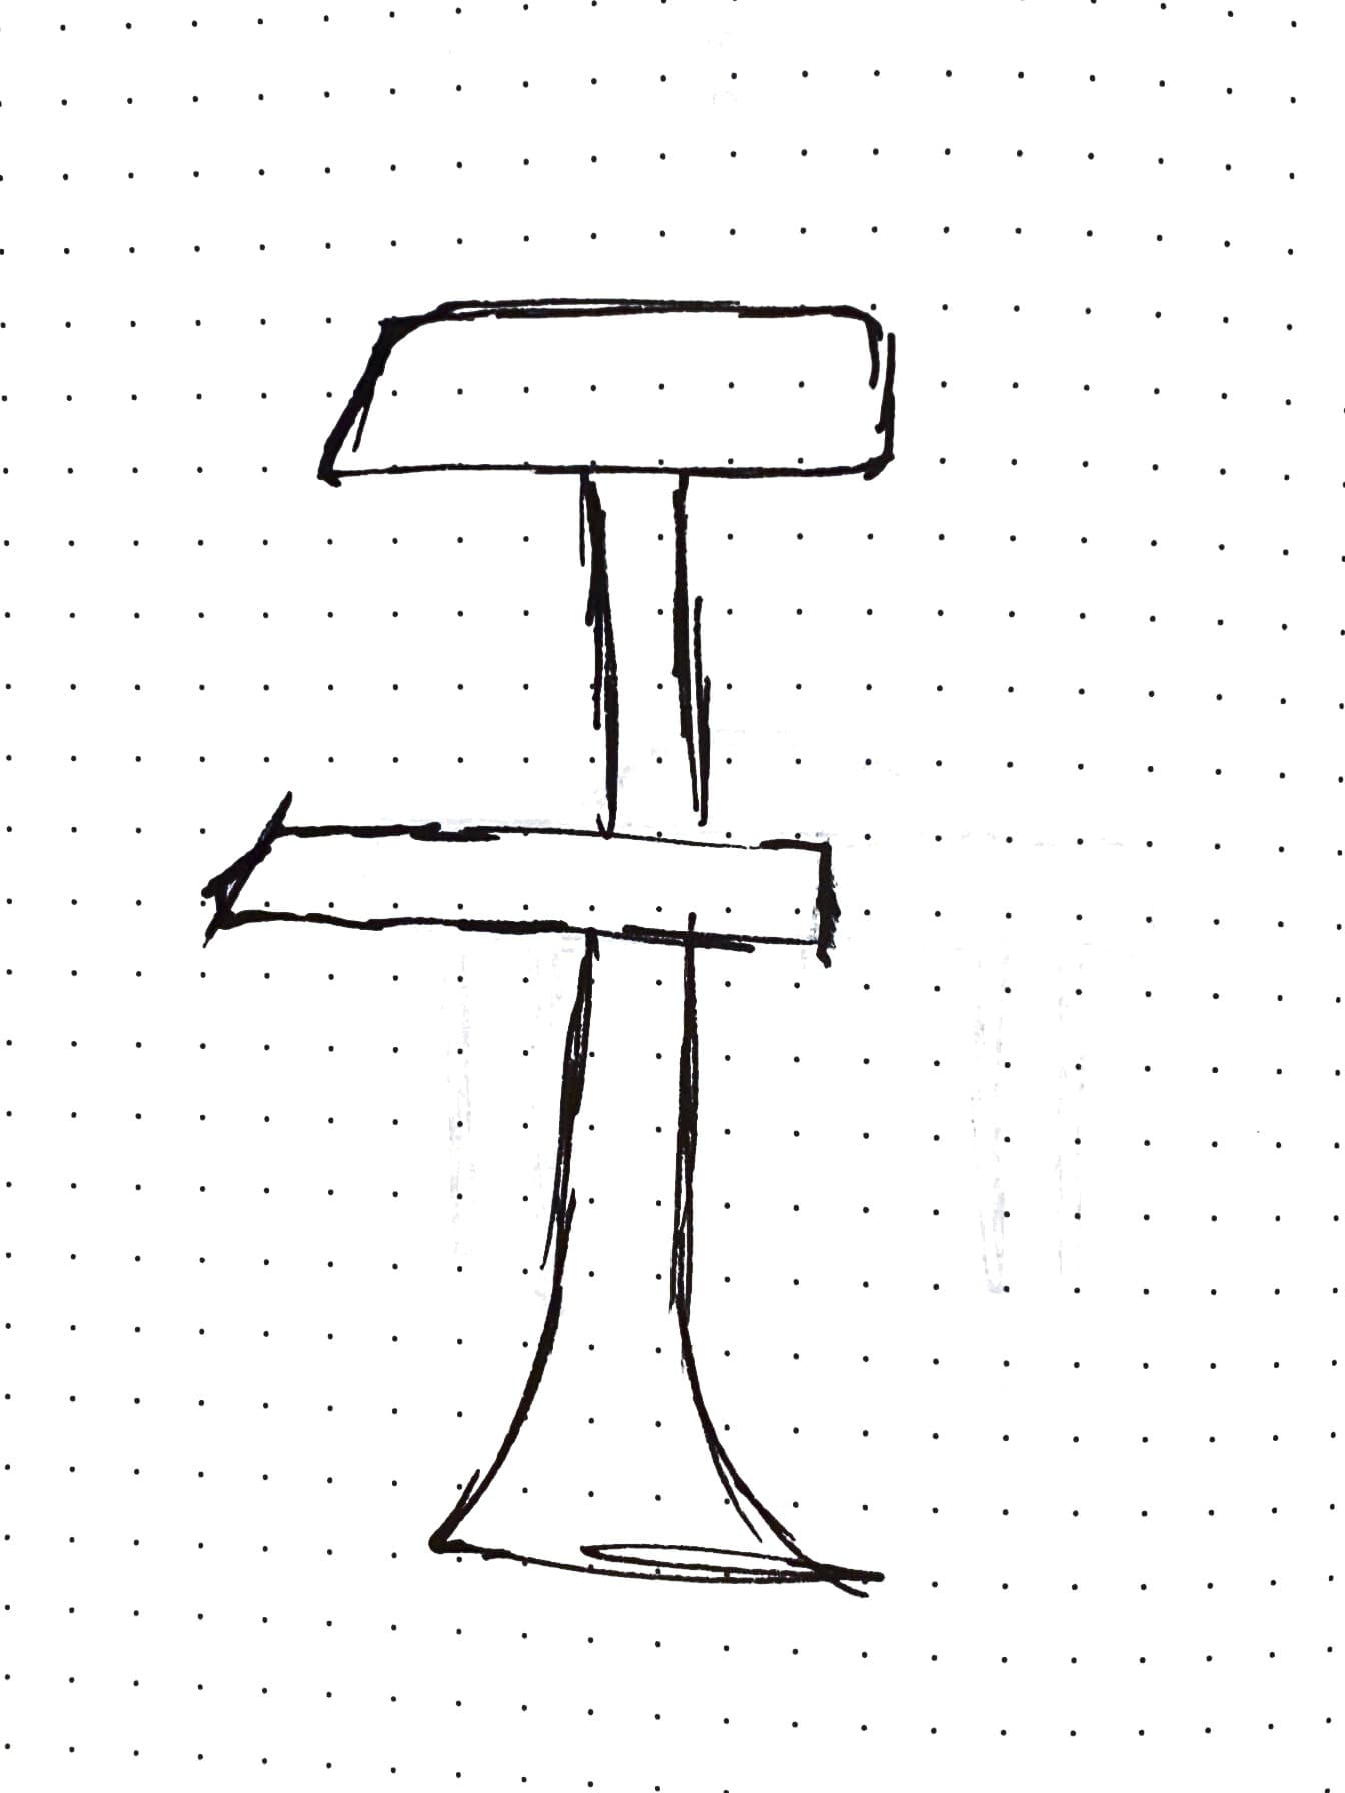
HAND SKETCHES


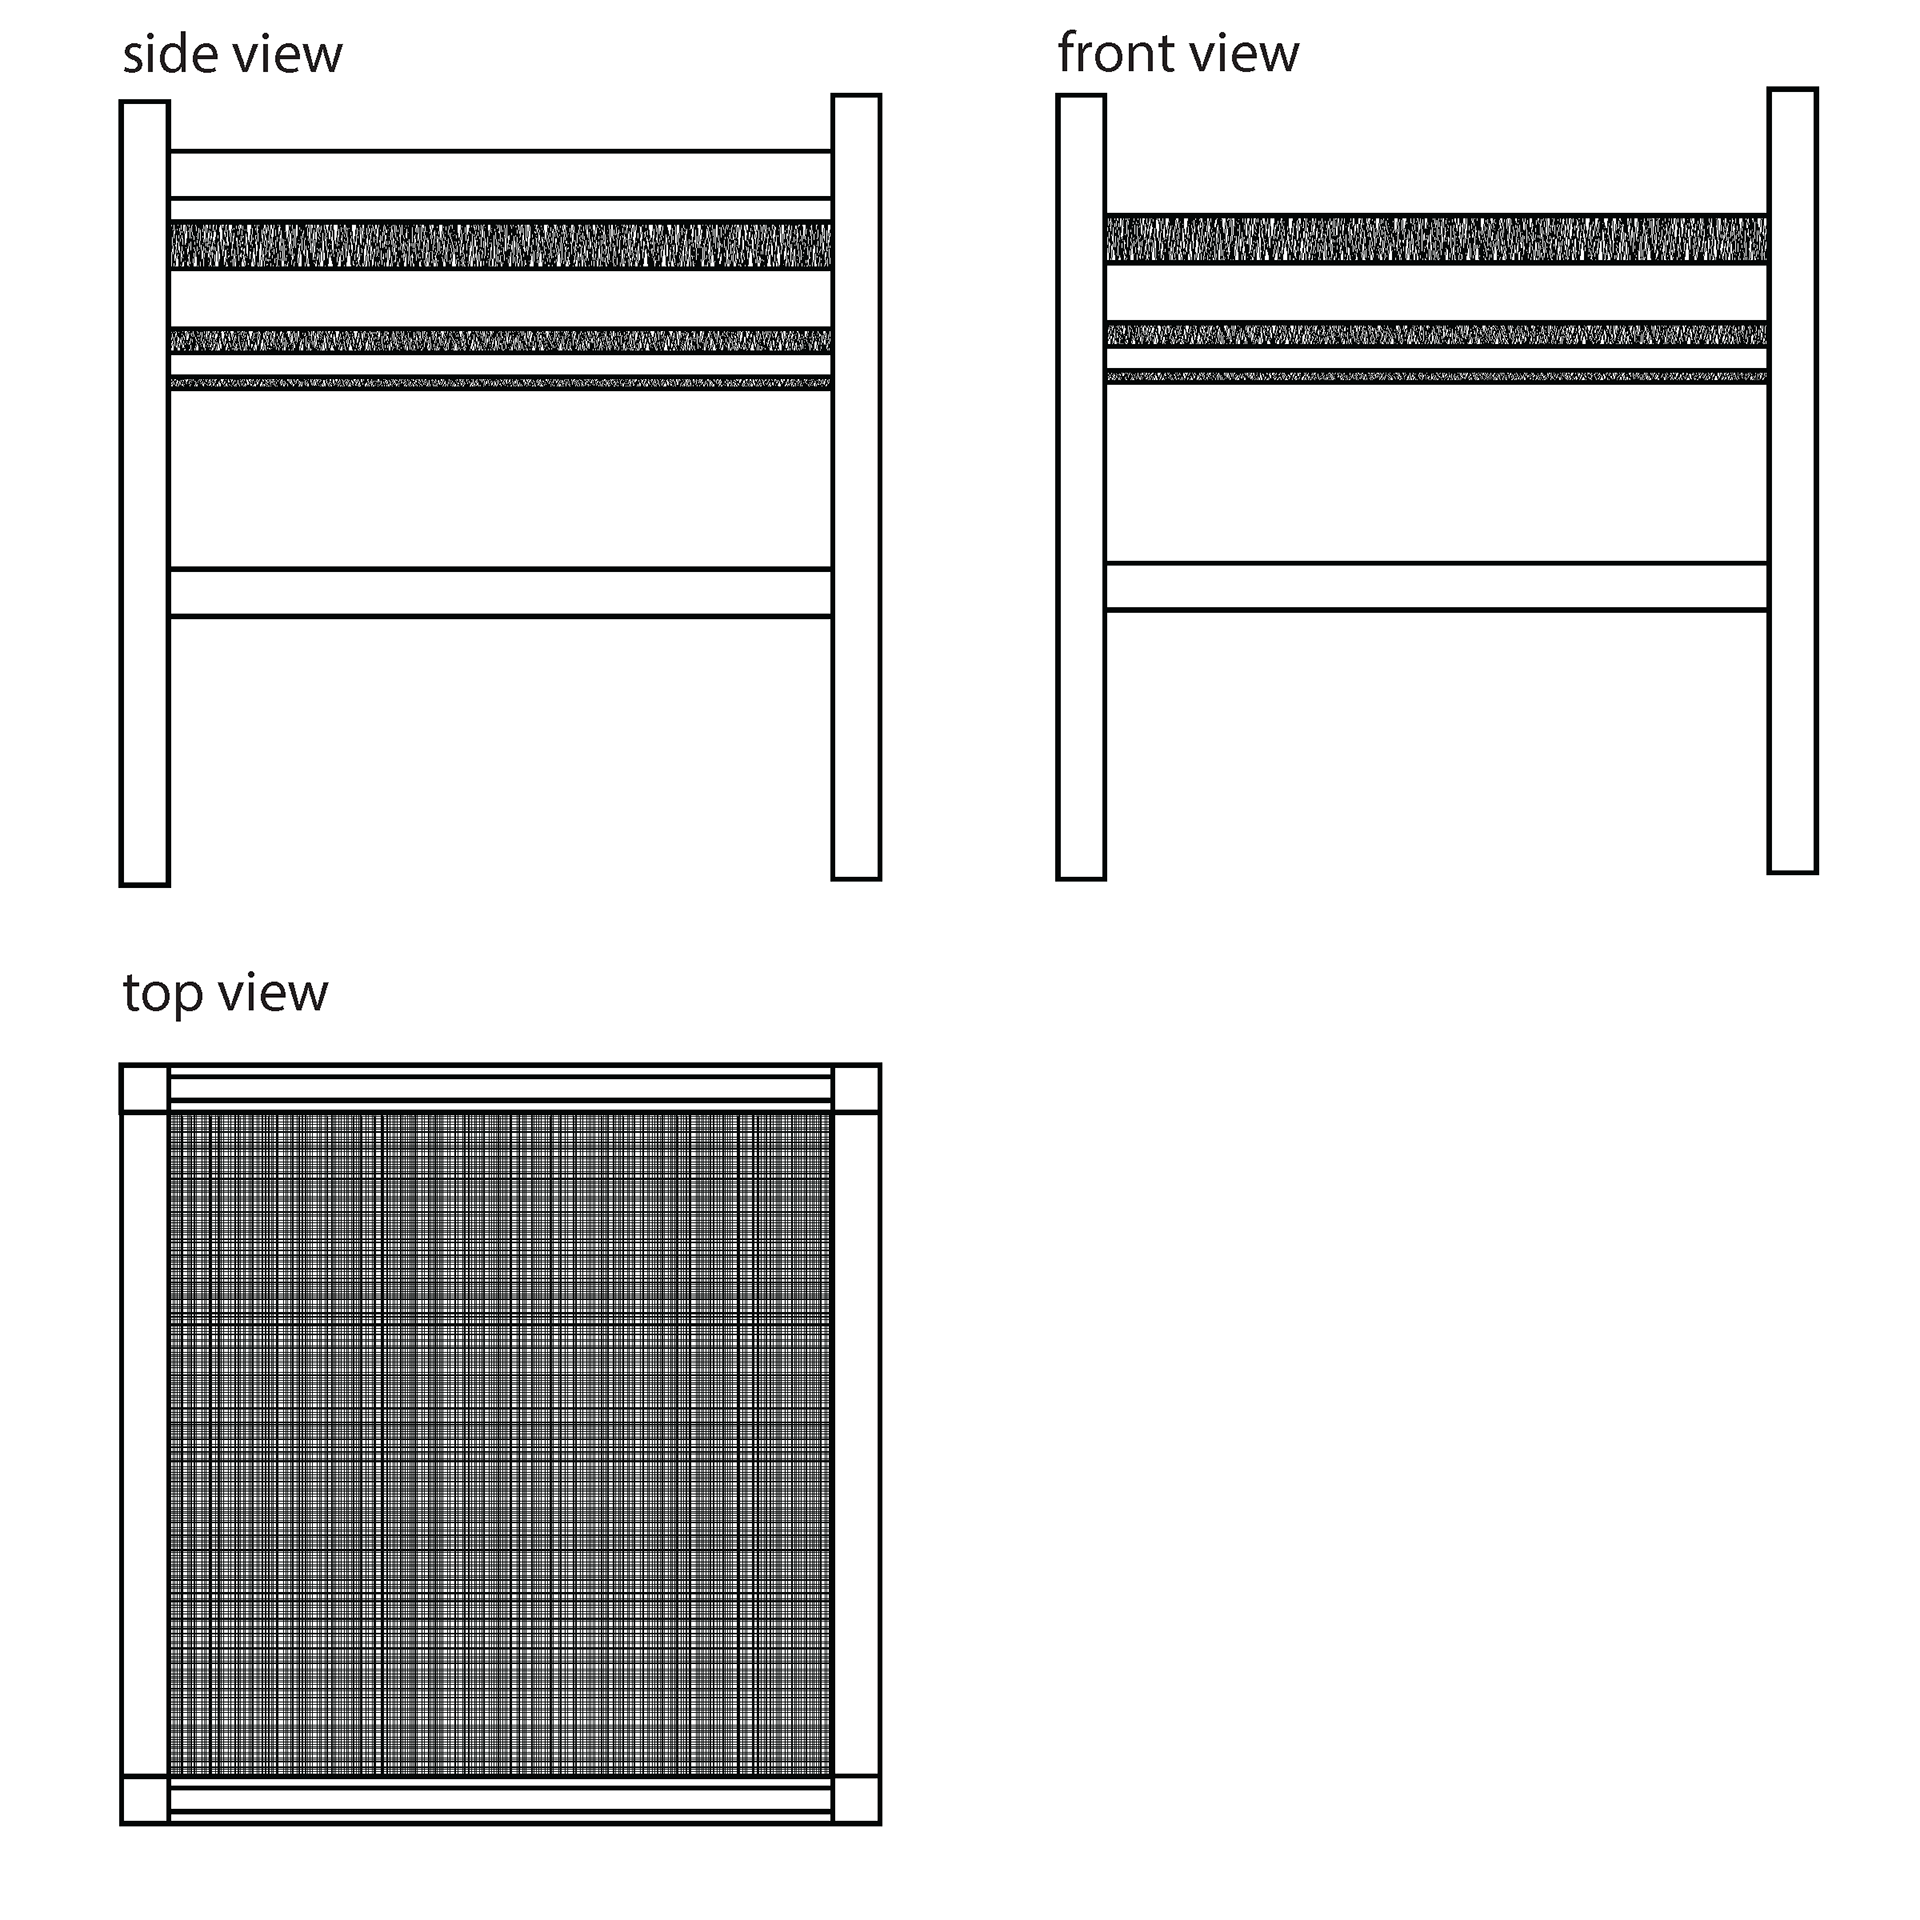
DIGITAL SKETCHING
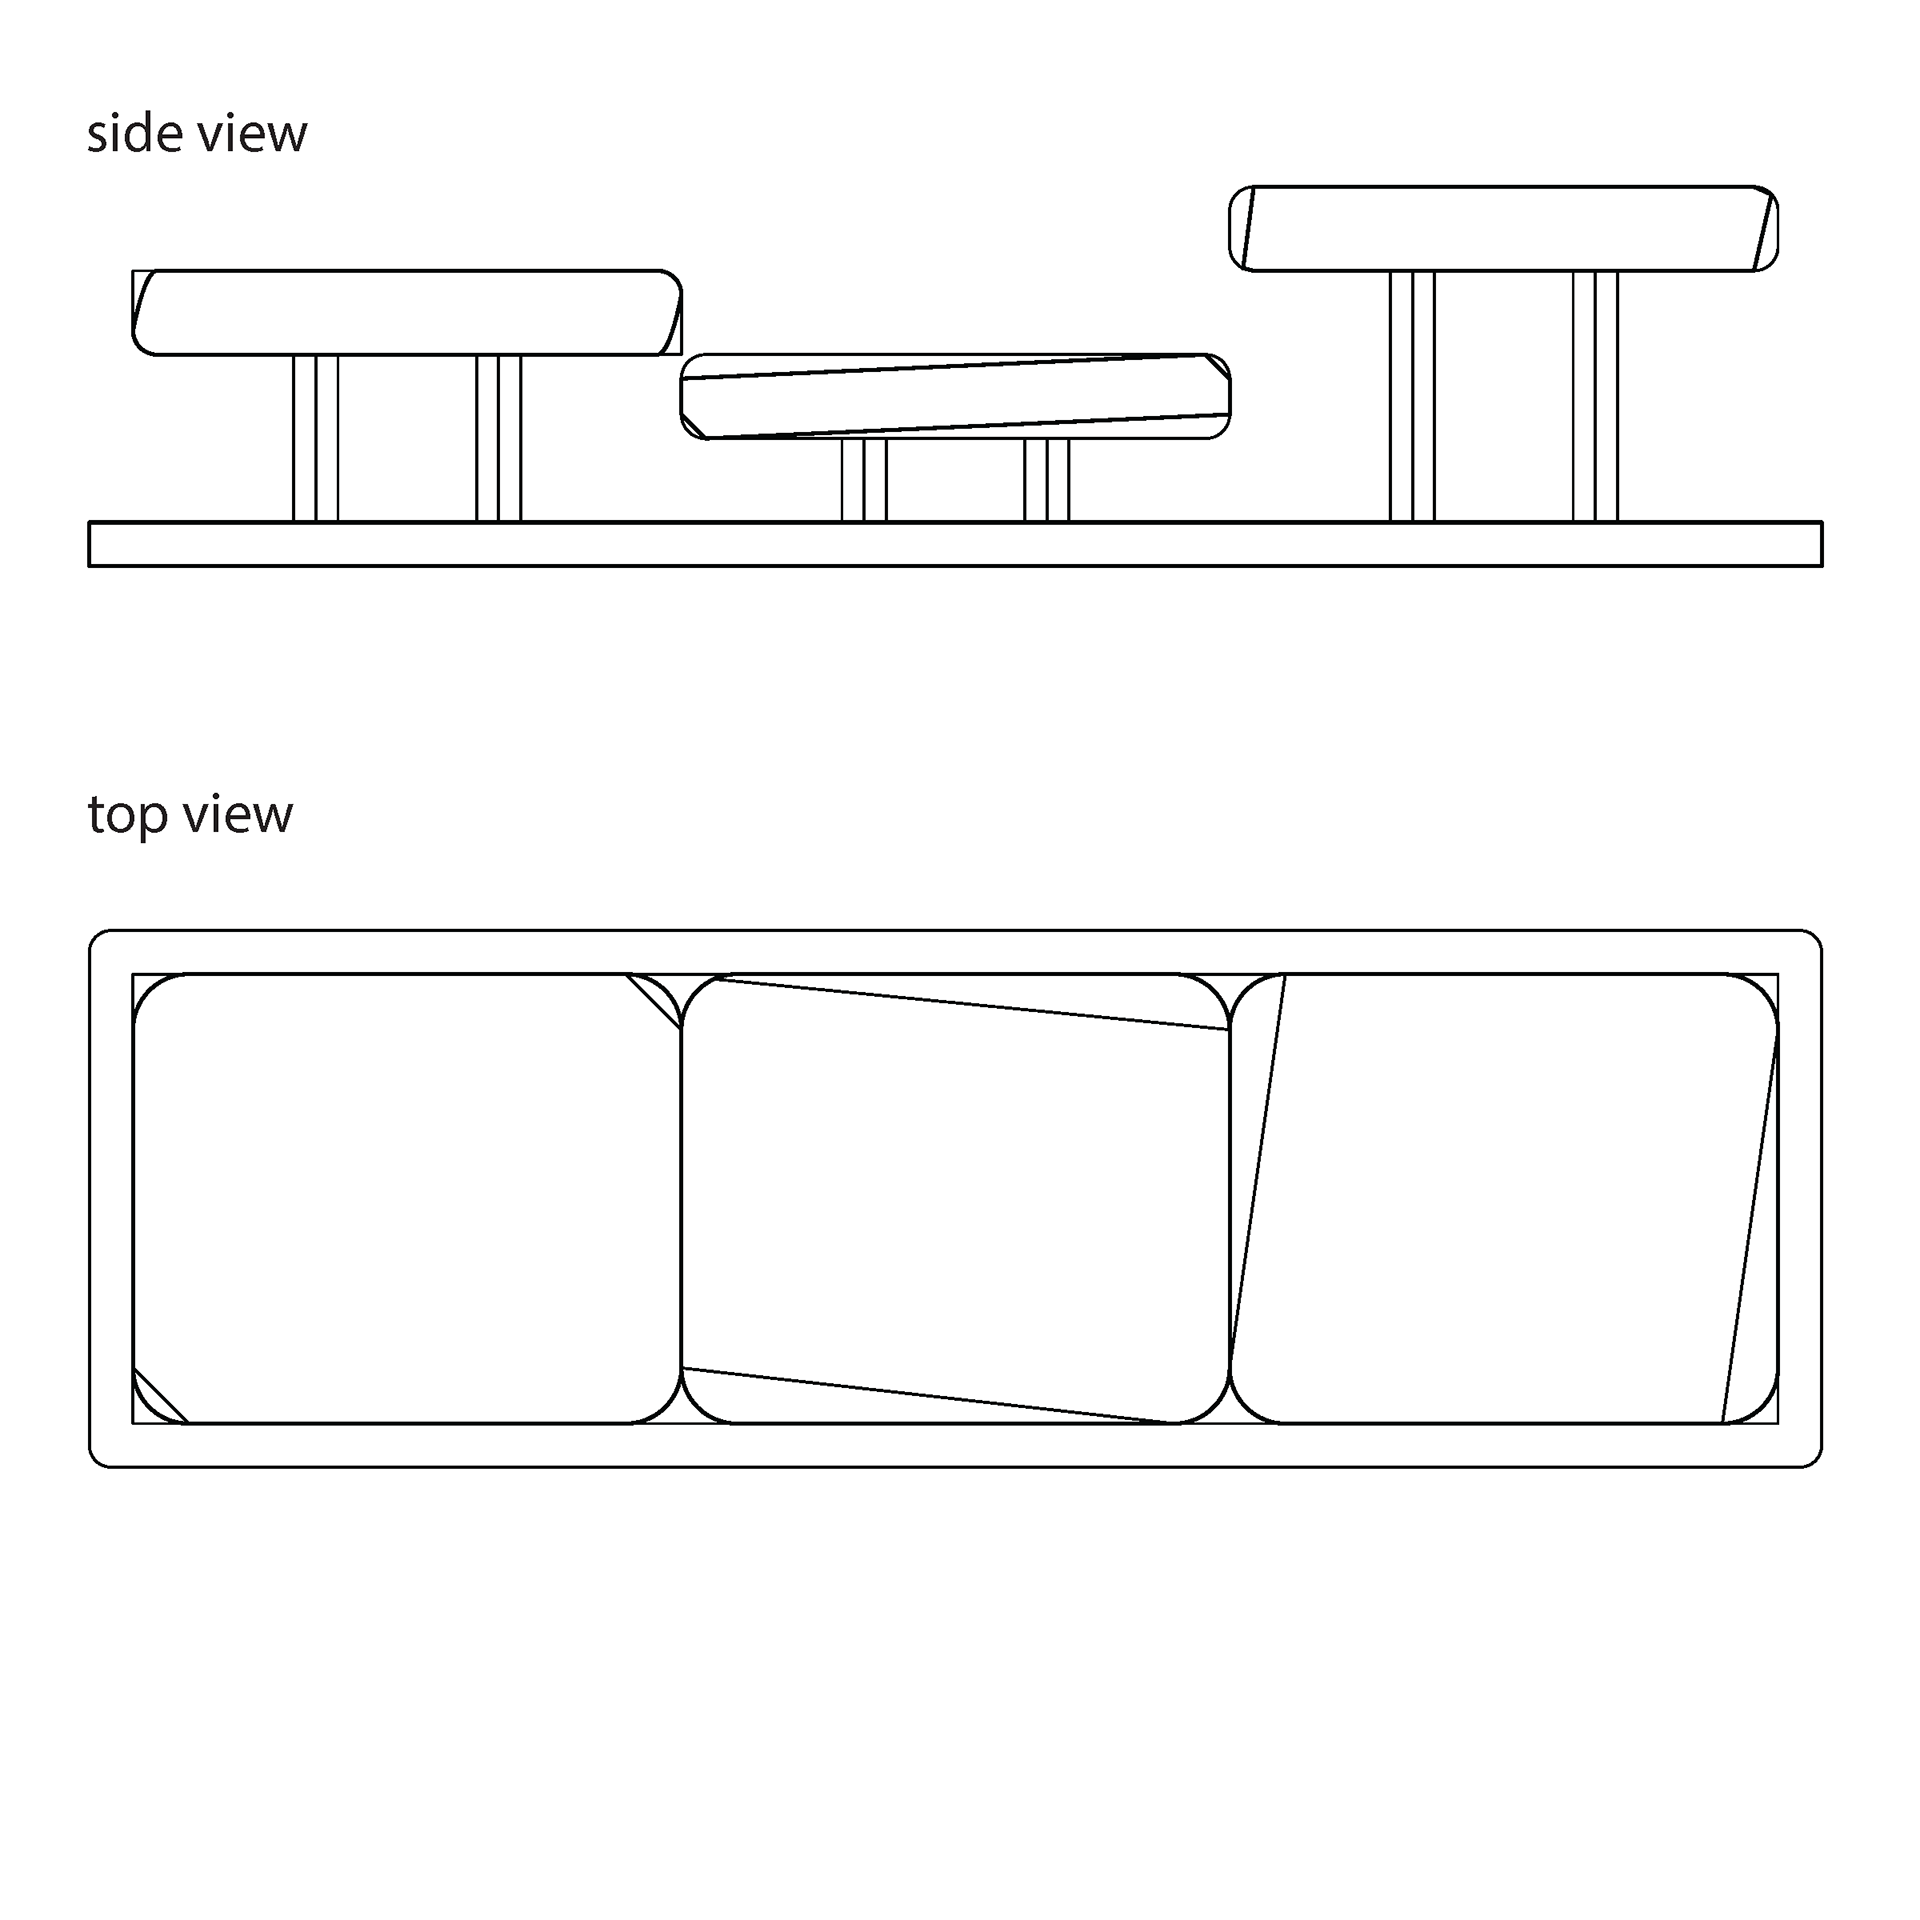
DIGITAL MODELING
After group critique and feedback from the instructor, students selected one design concept (or combined aspects from multiple) and began modeling that concept digitally, most commonly in Rhino.
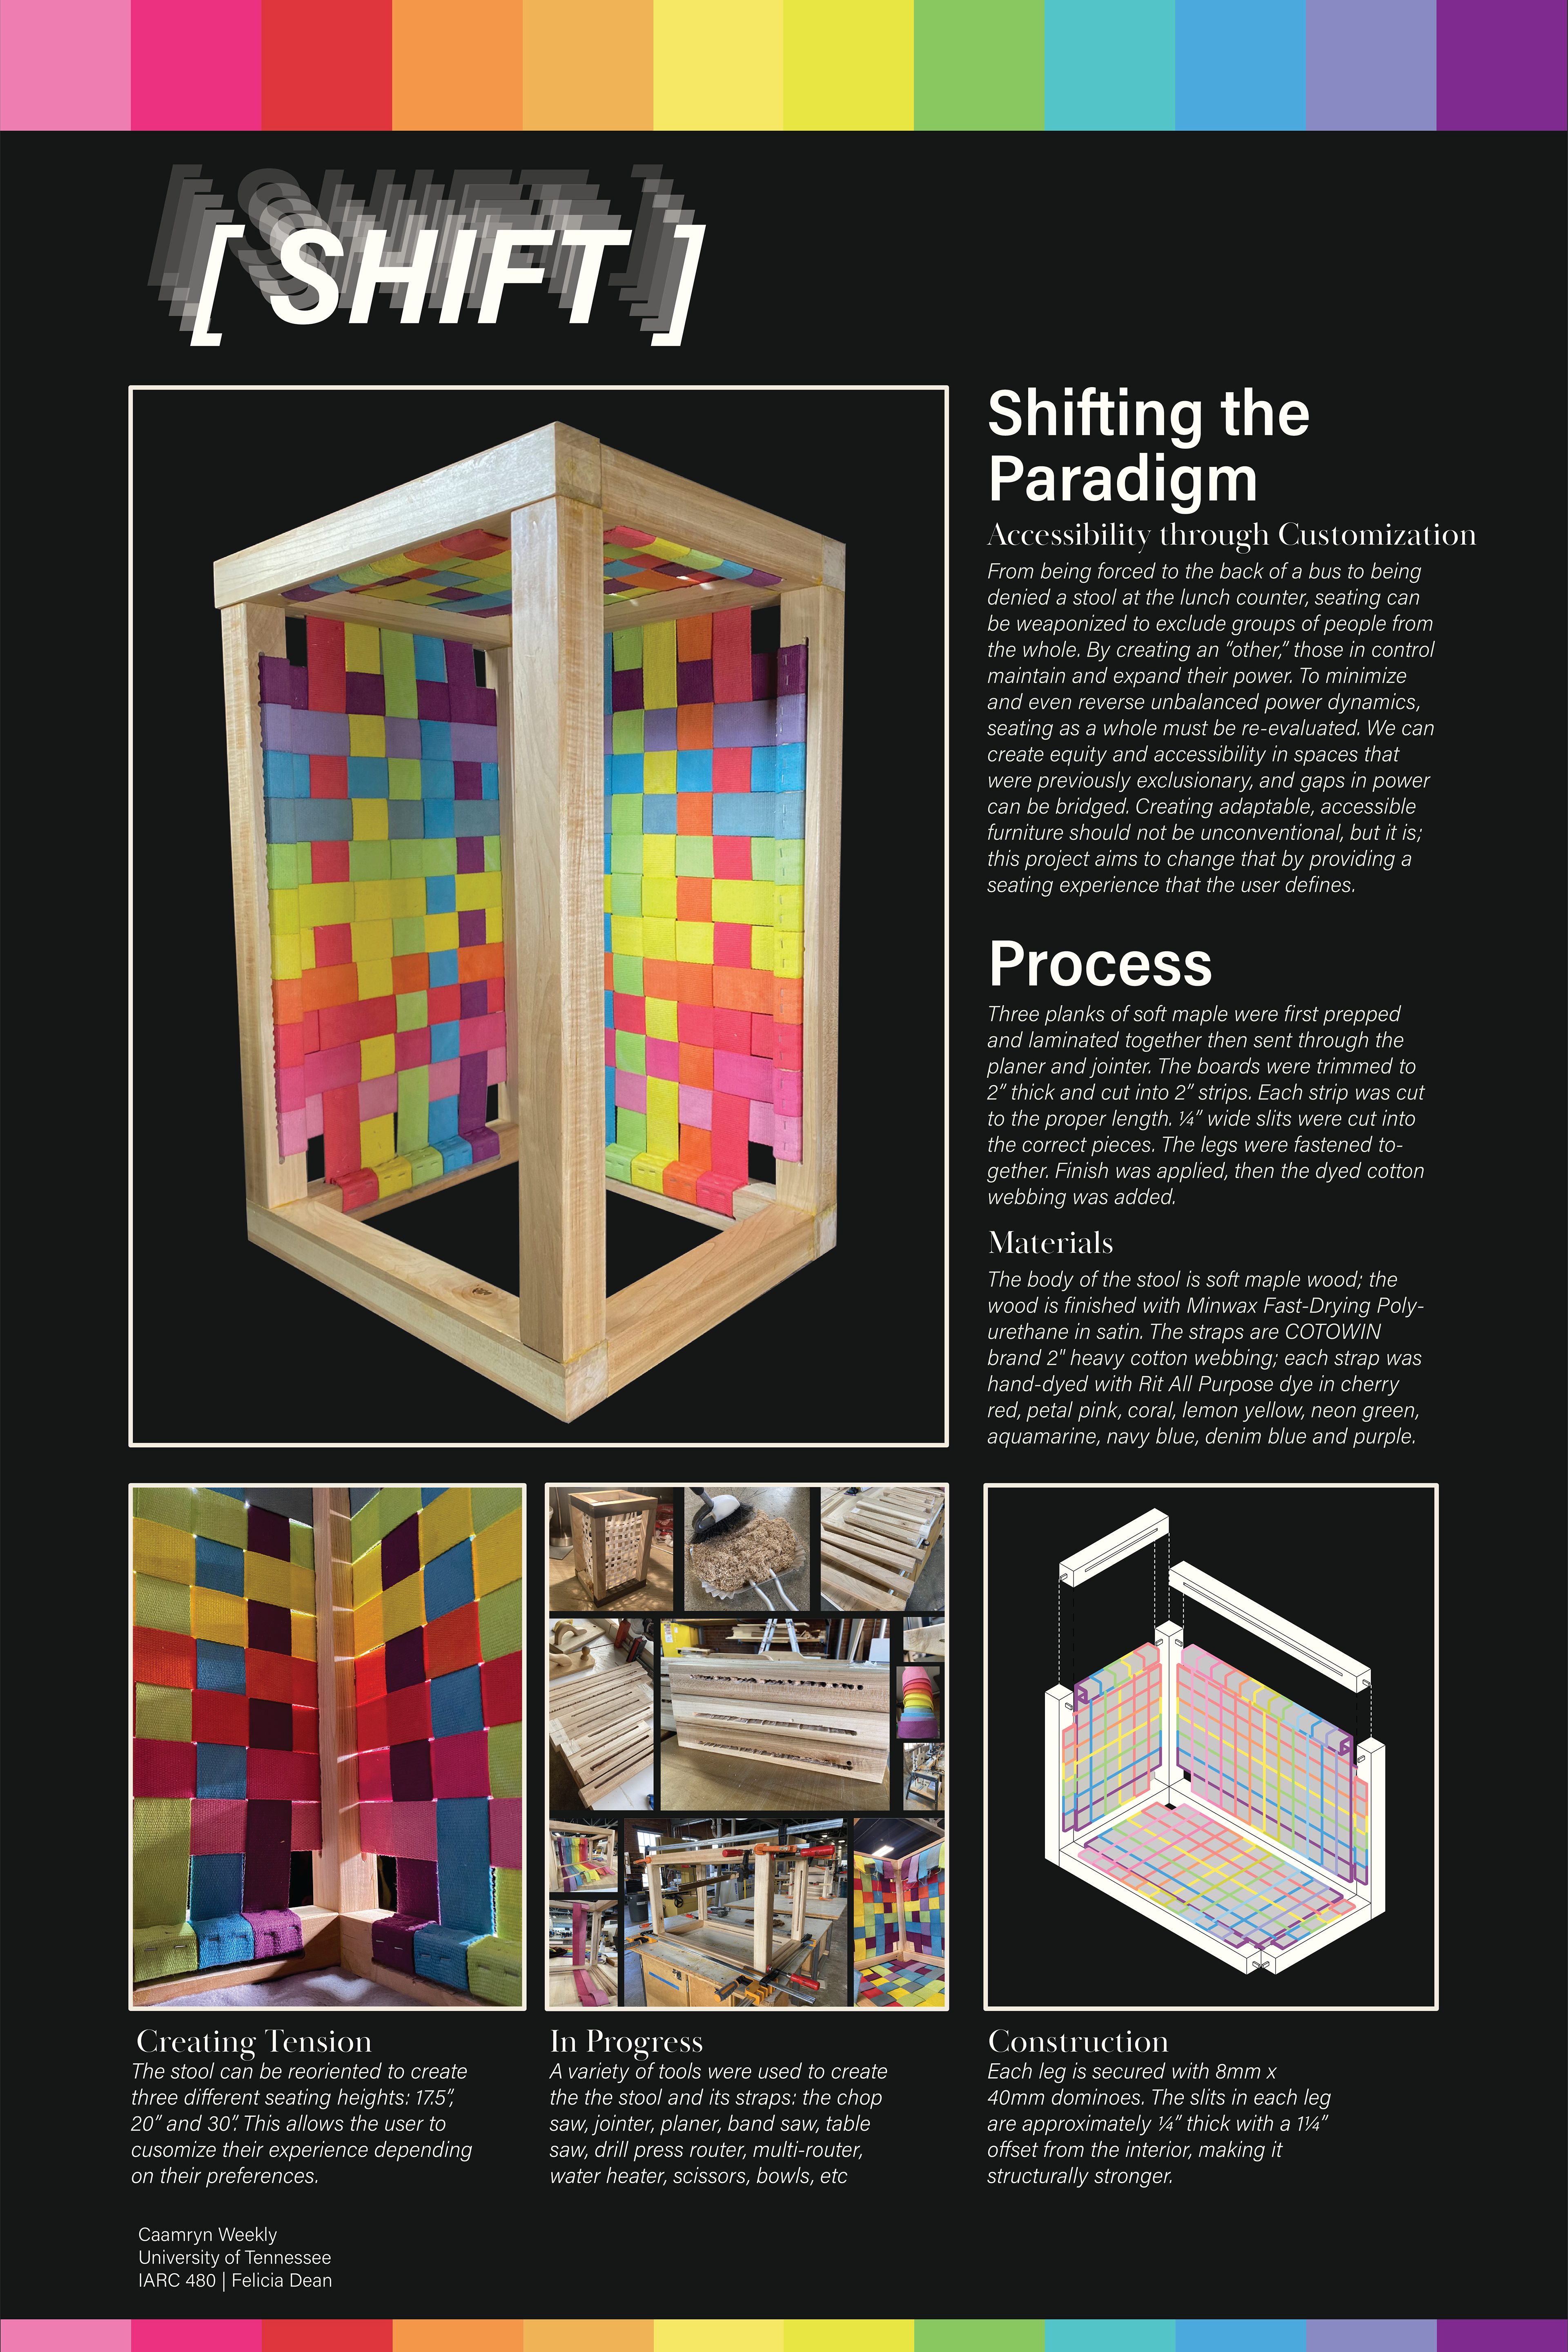
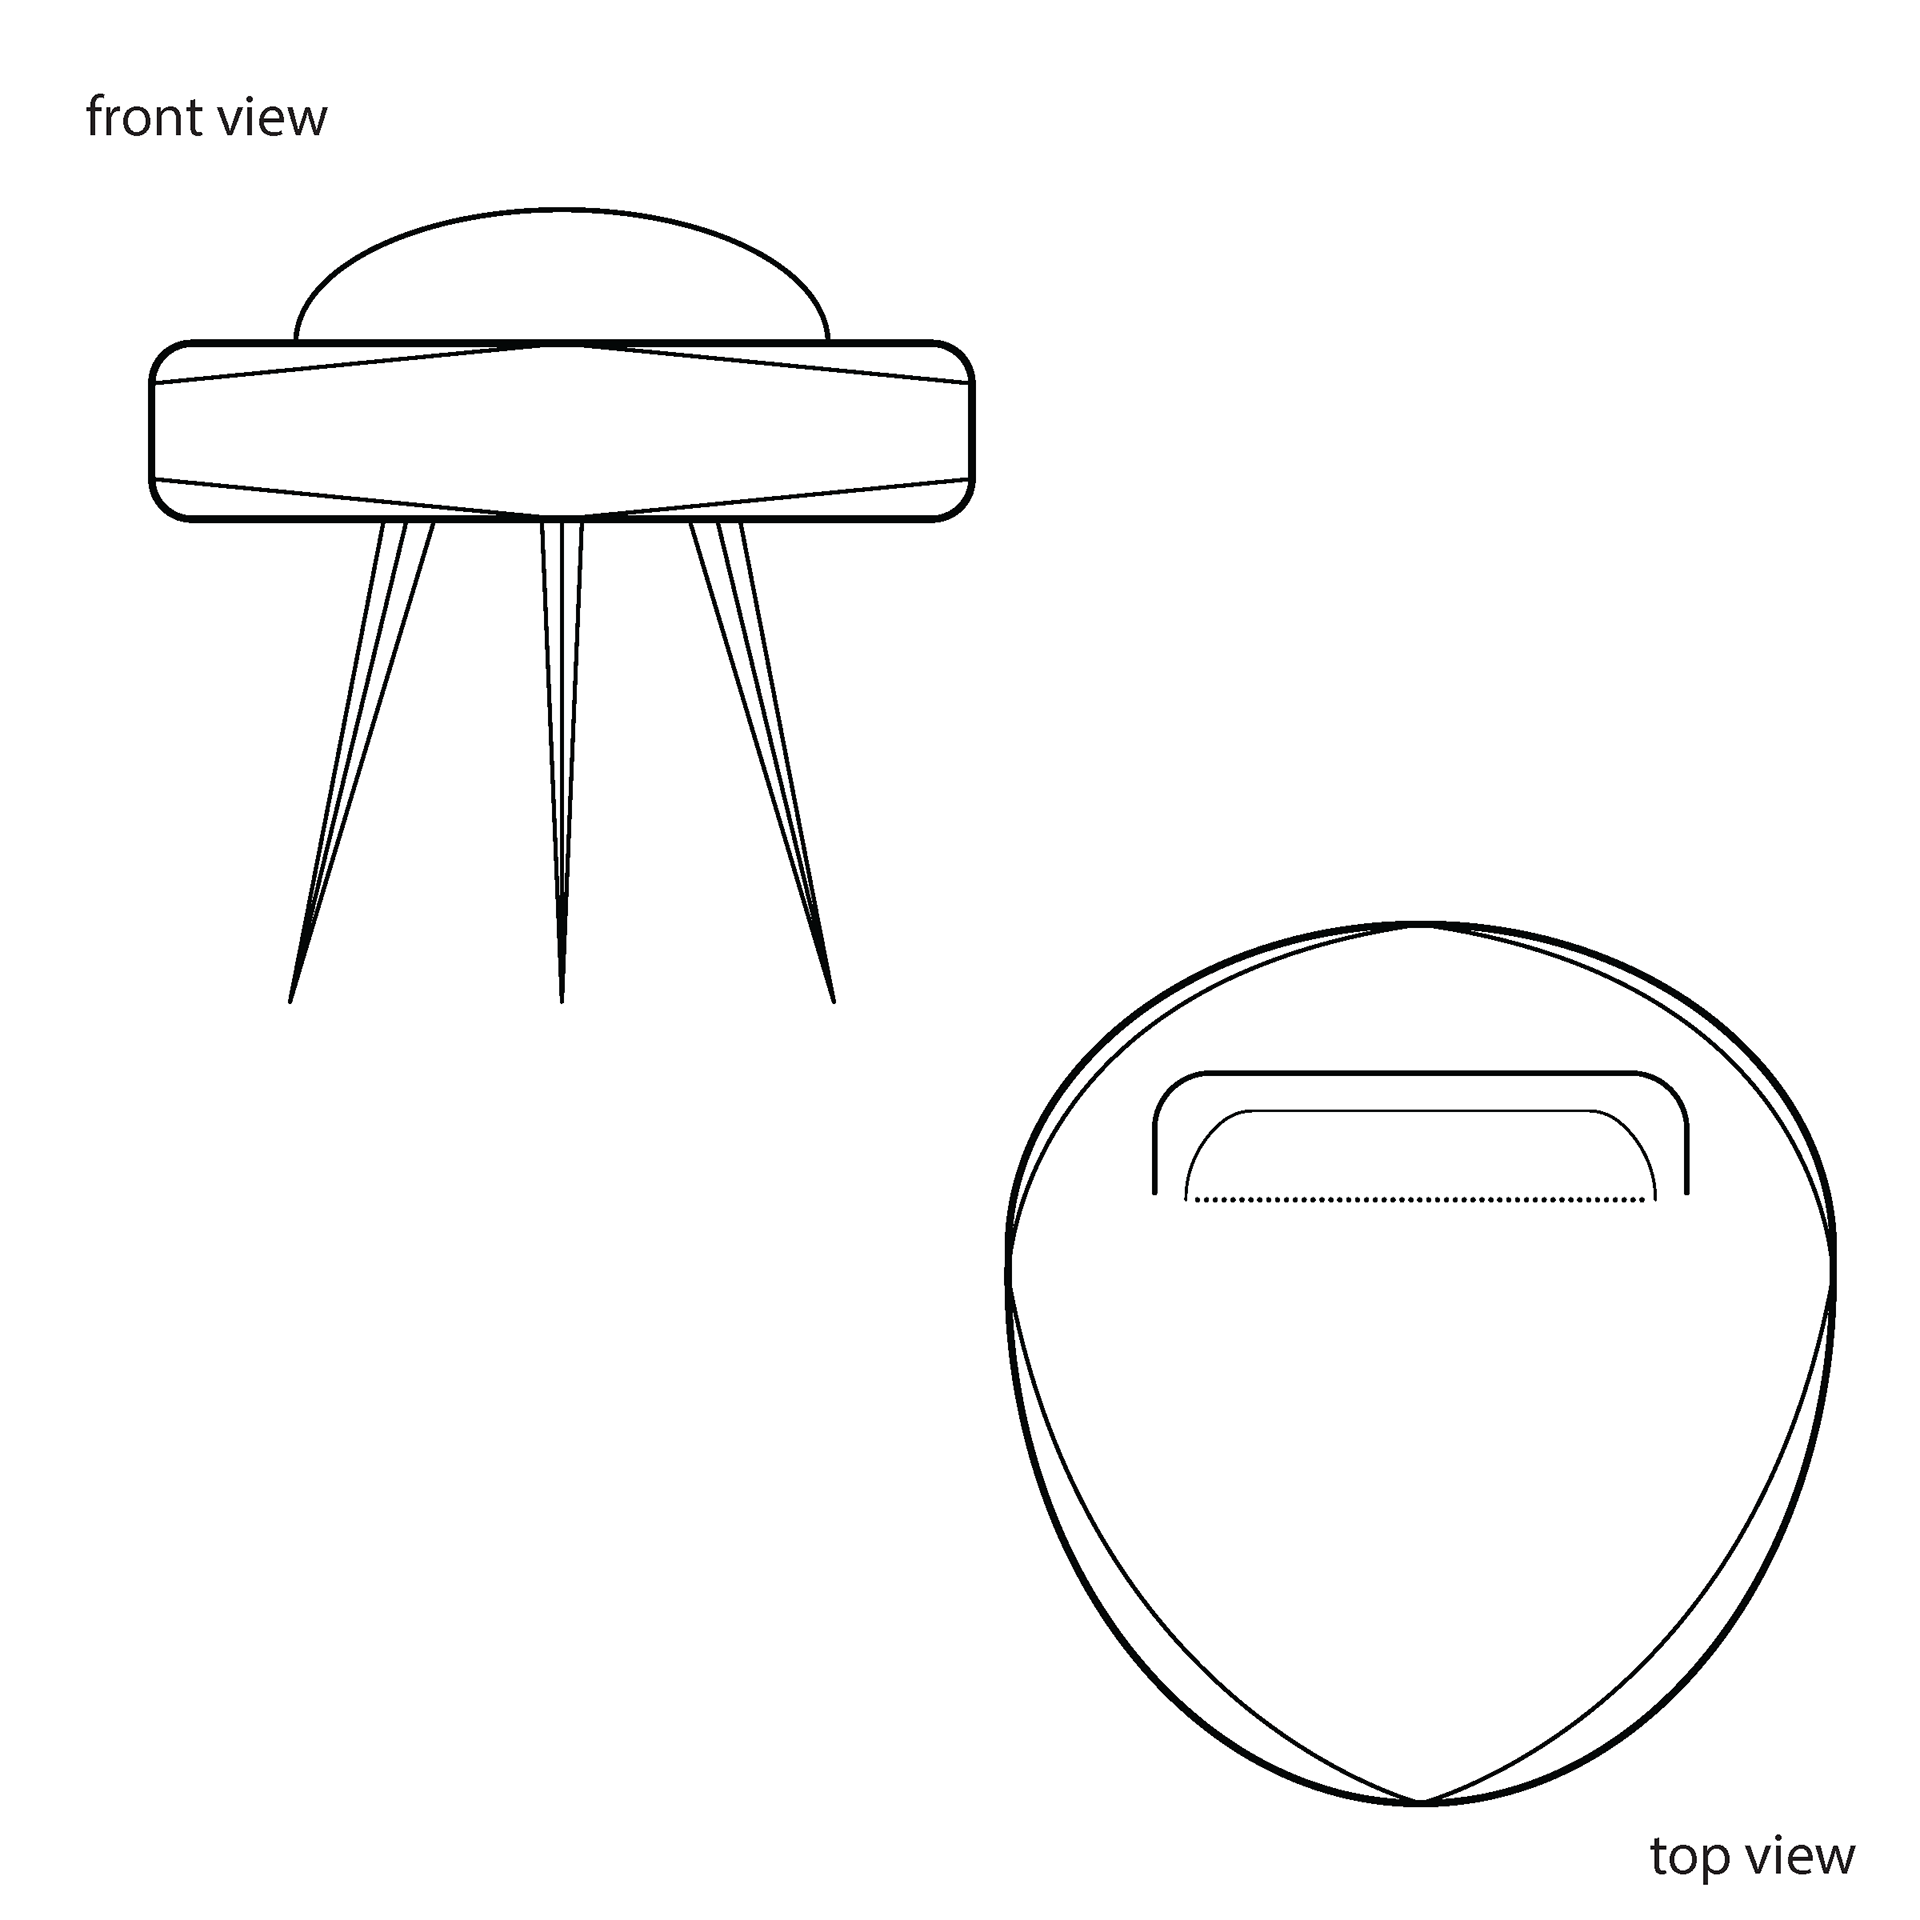
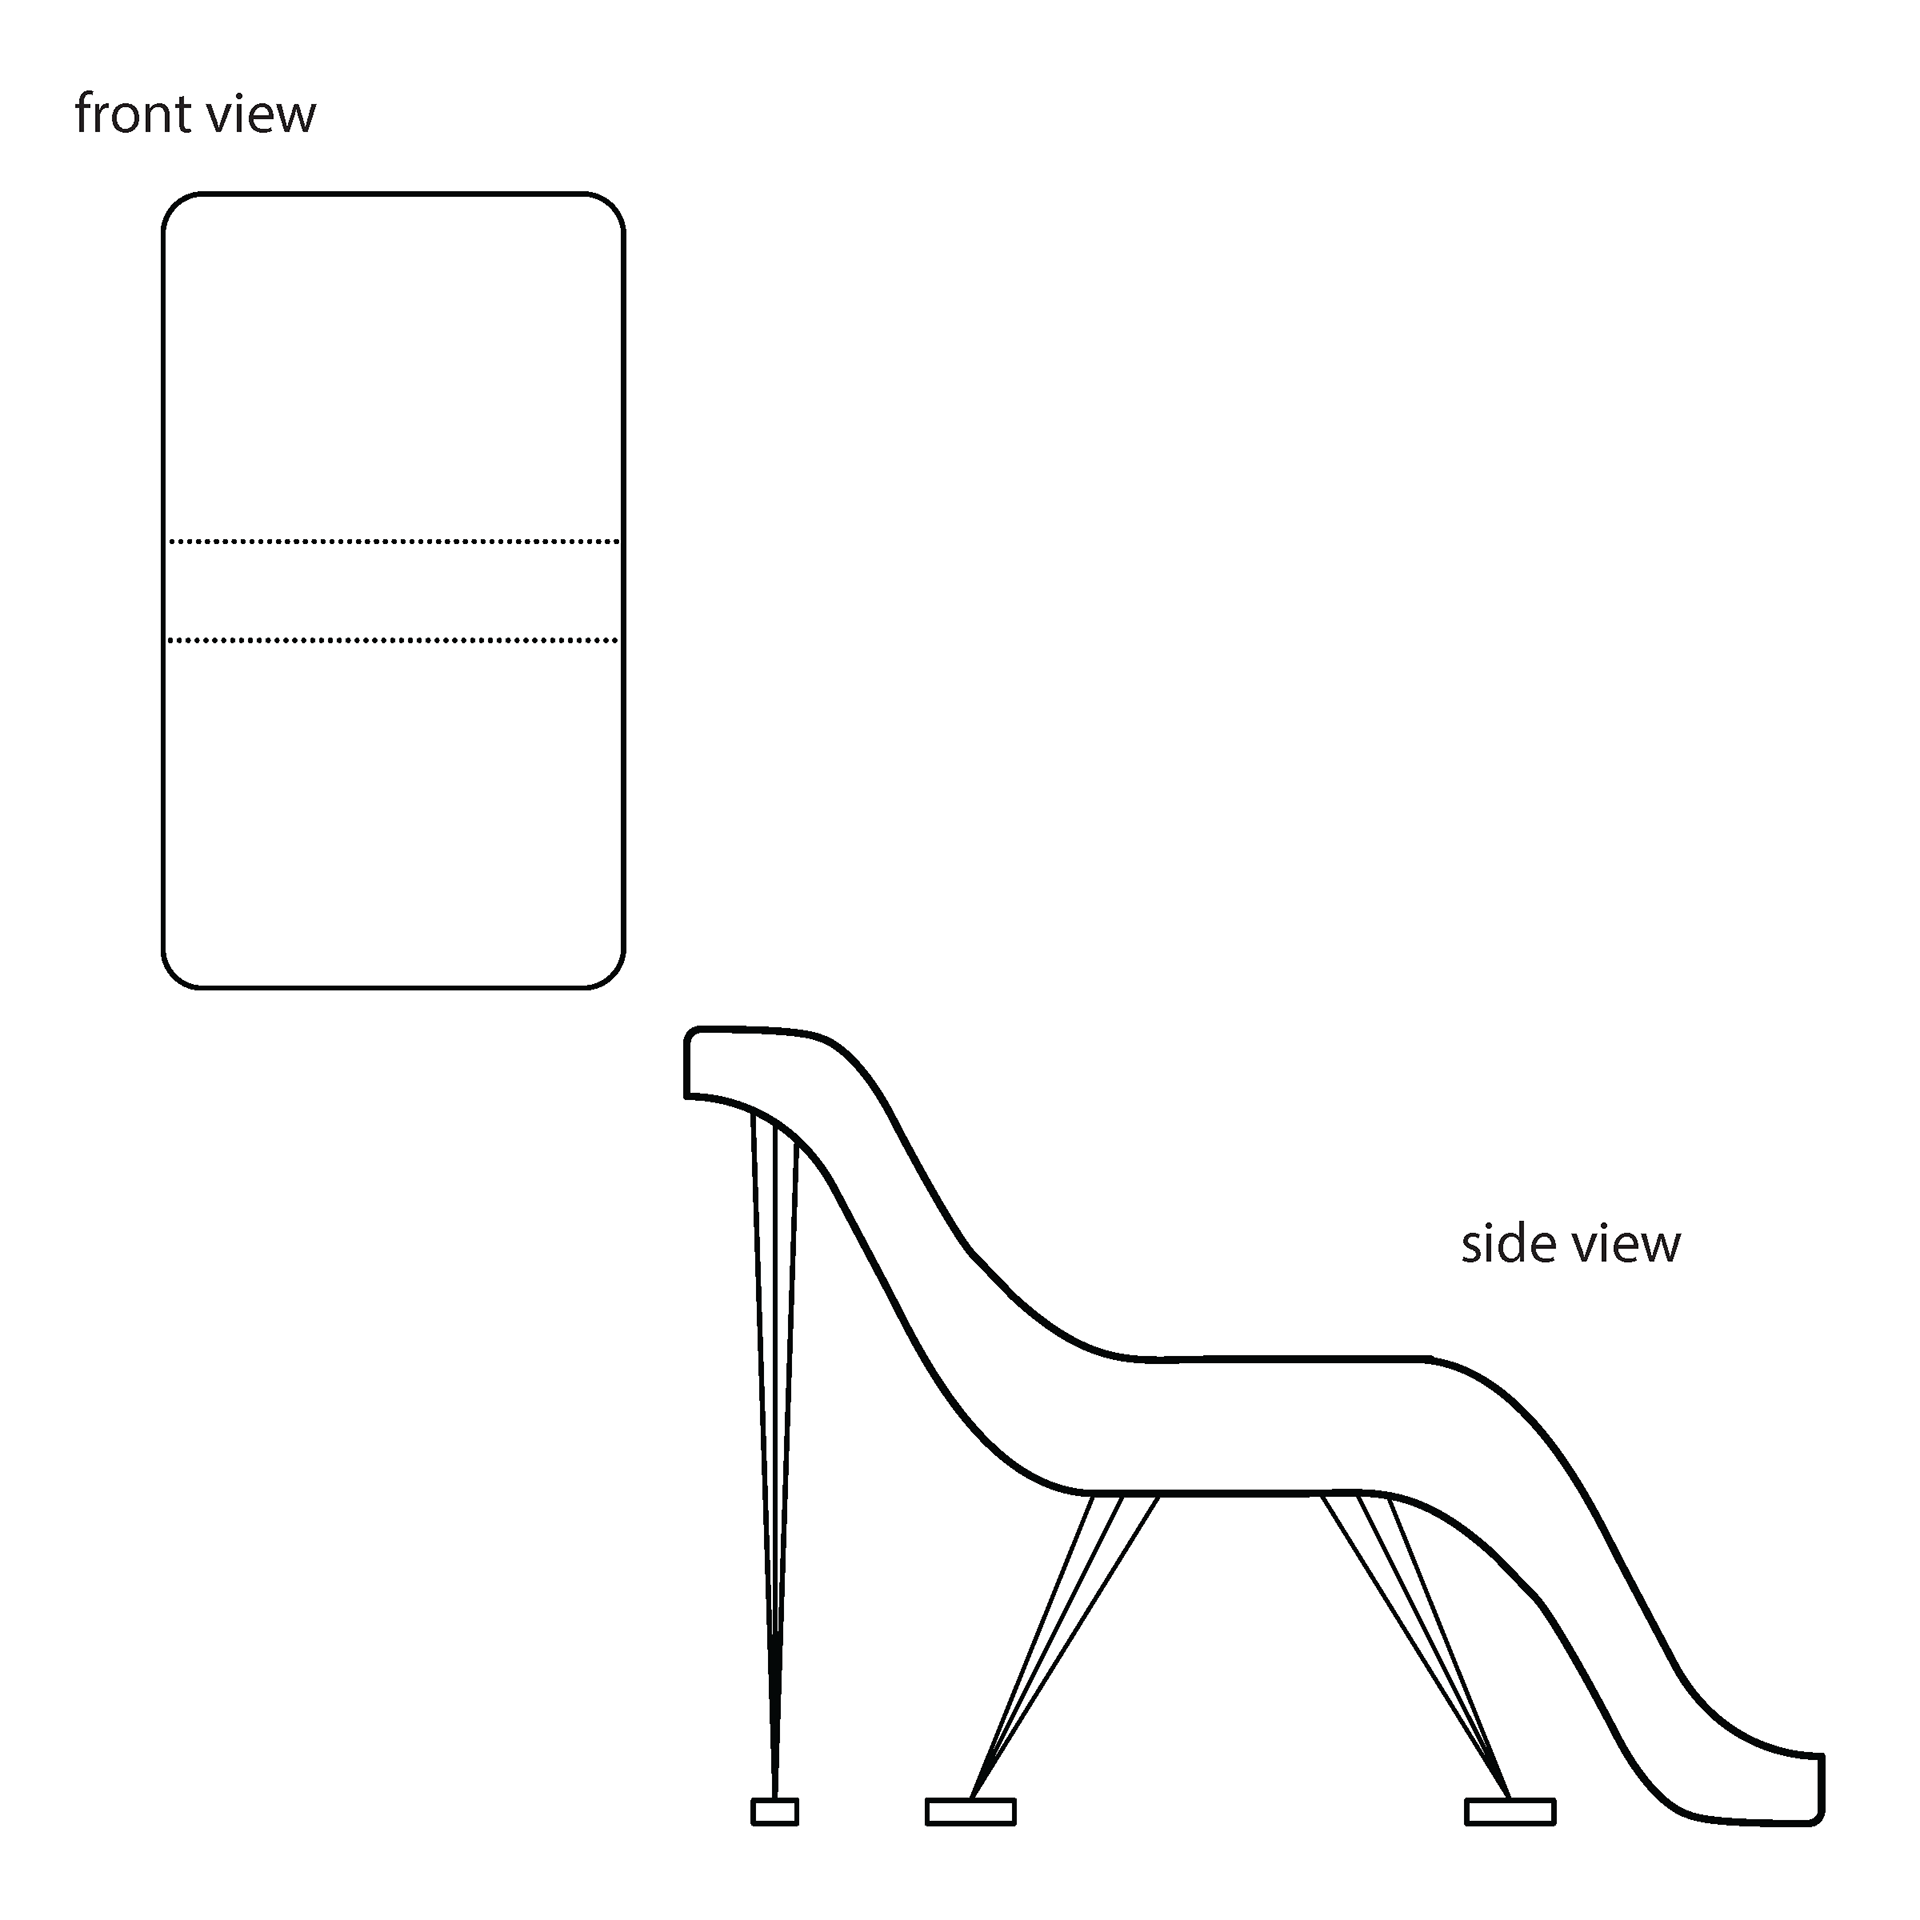
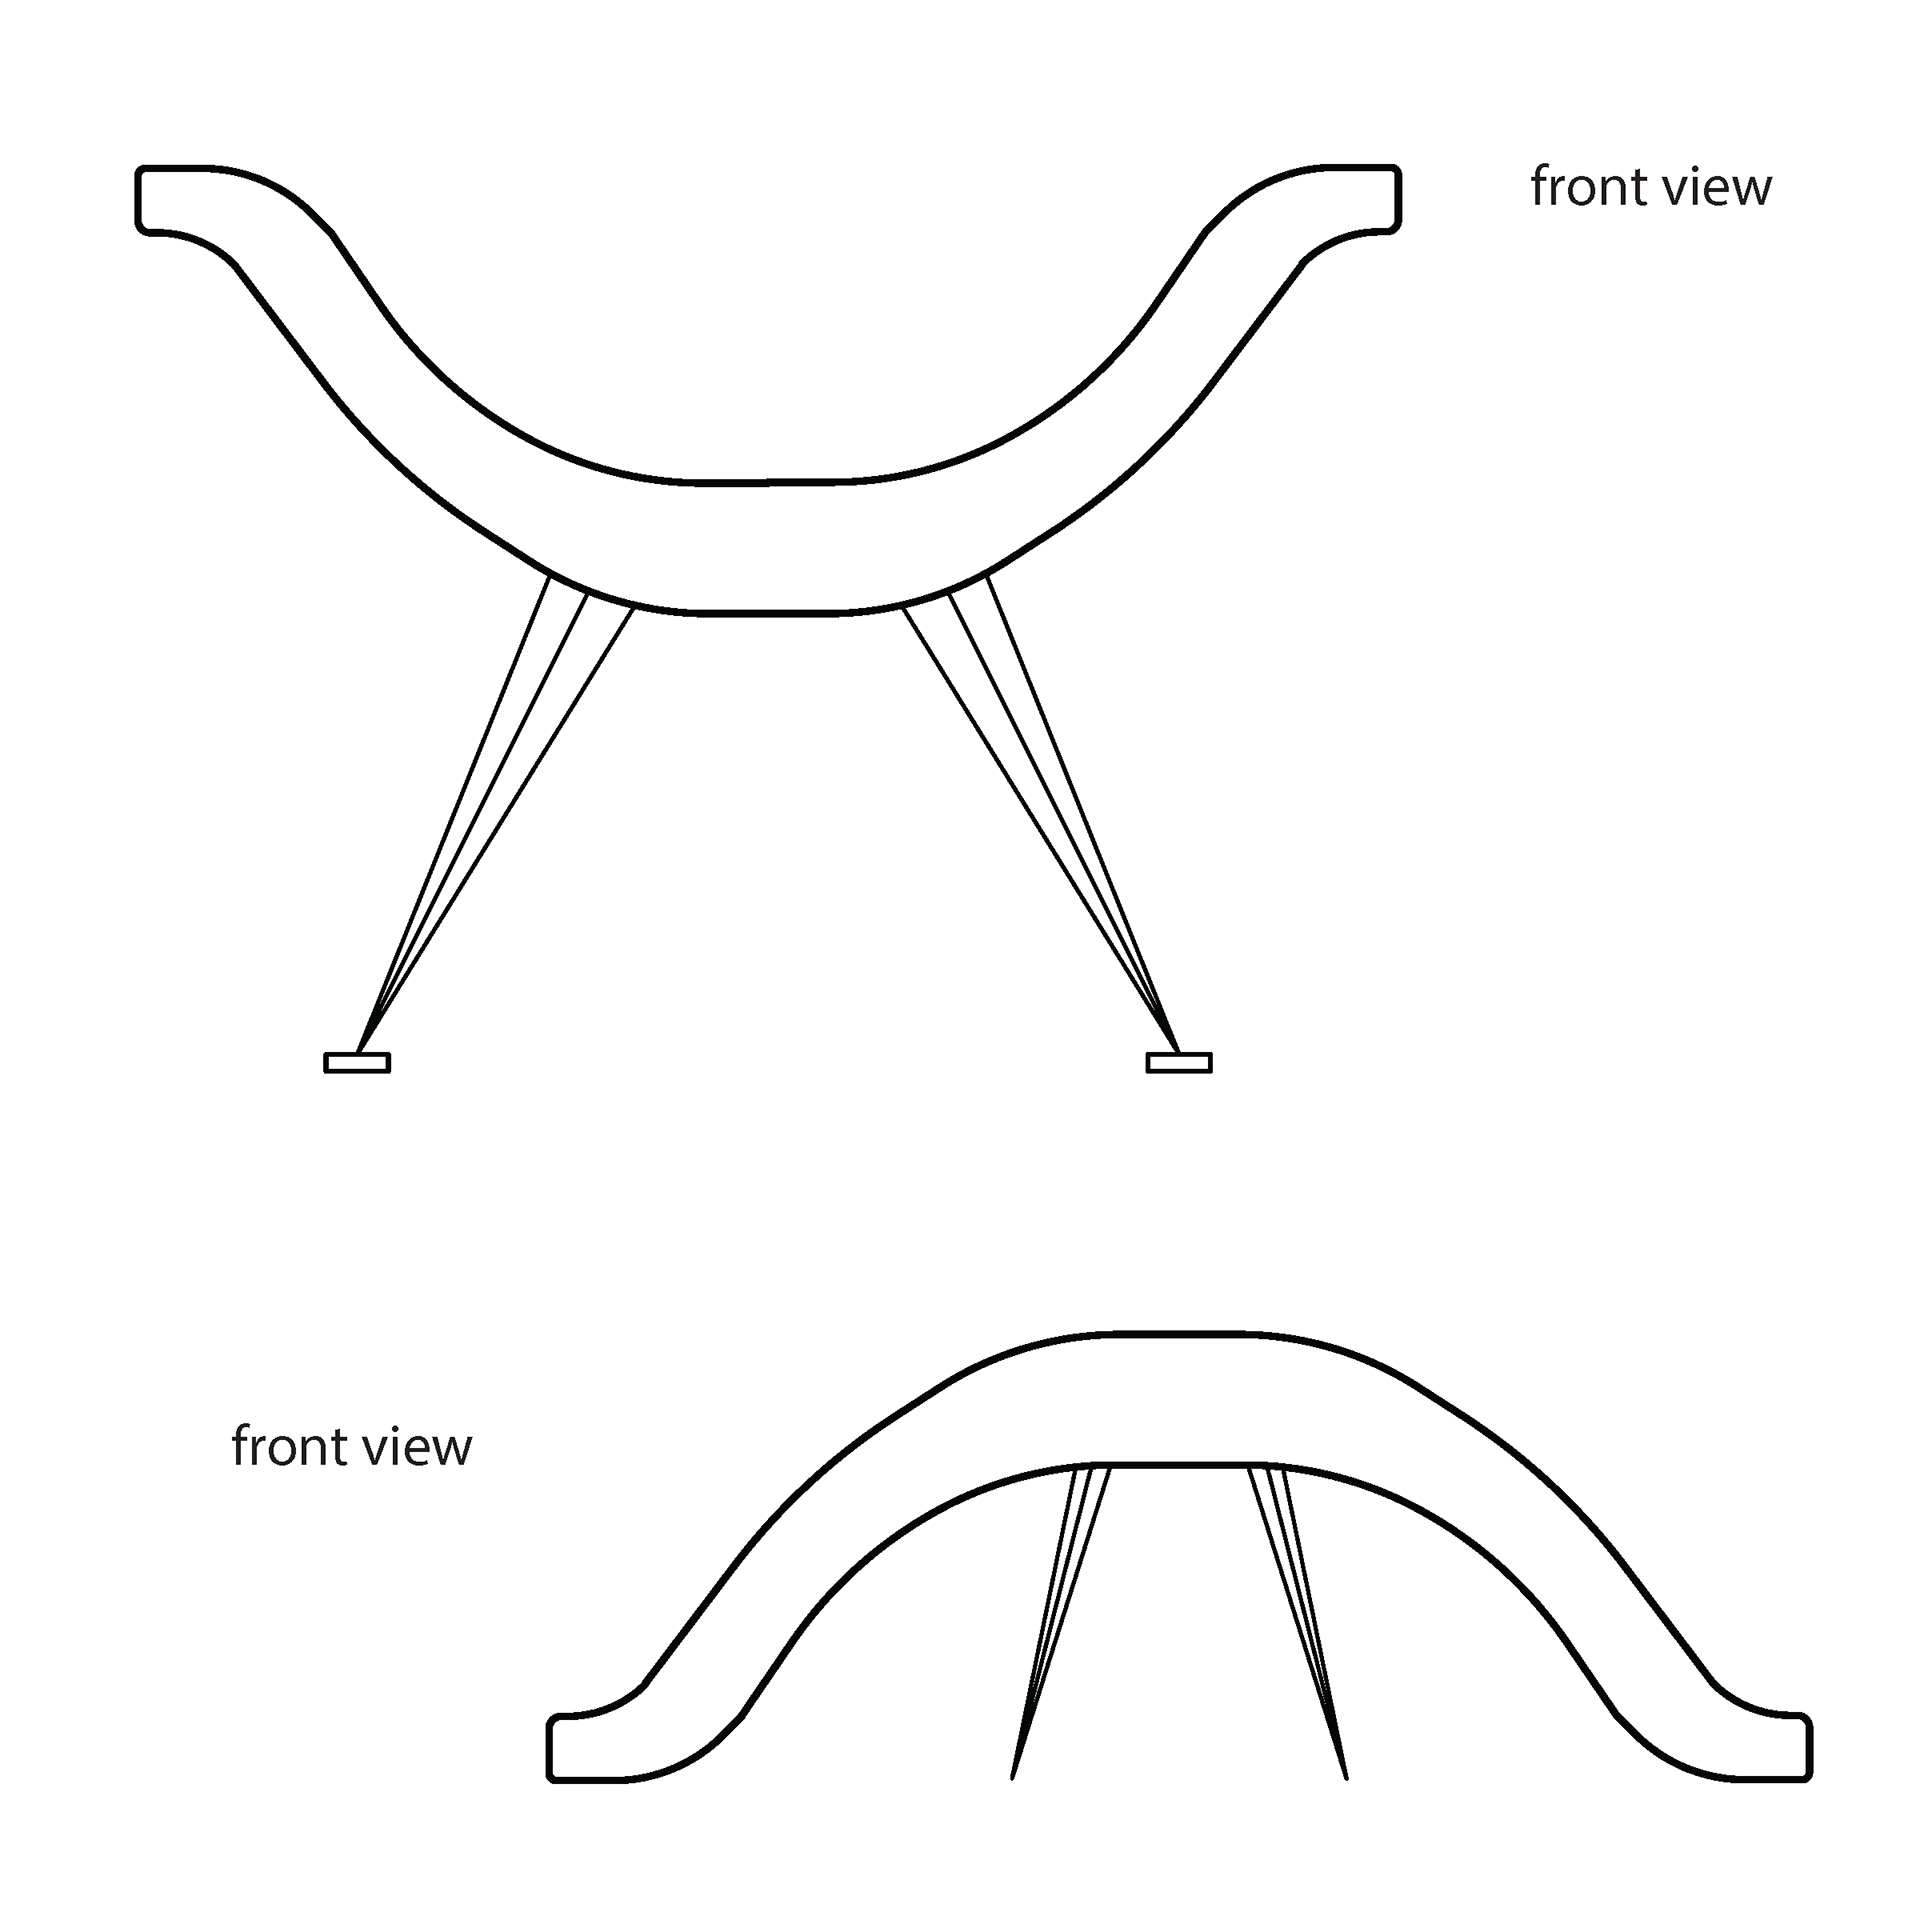
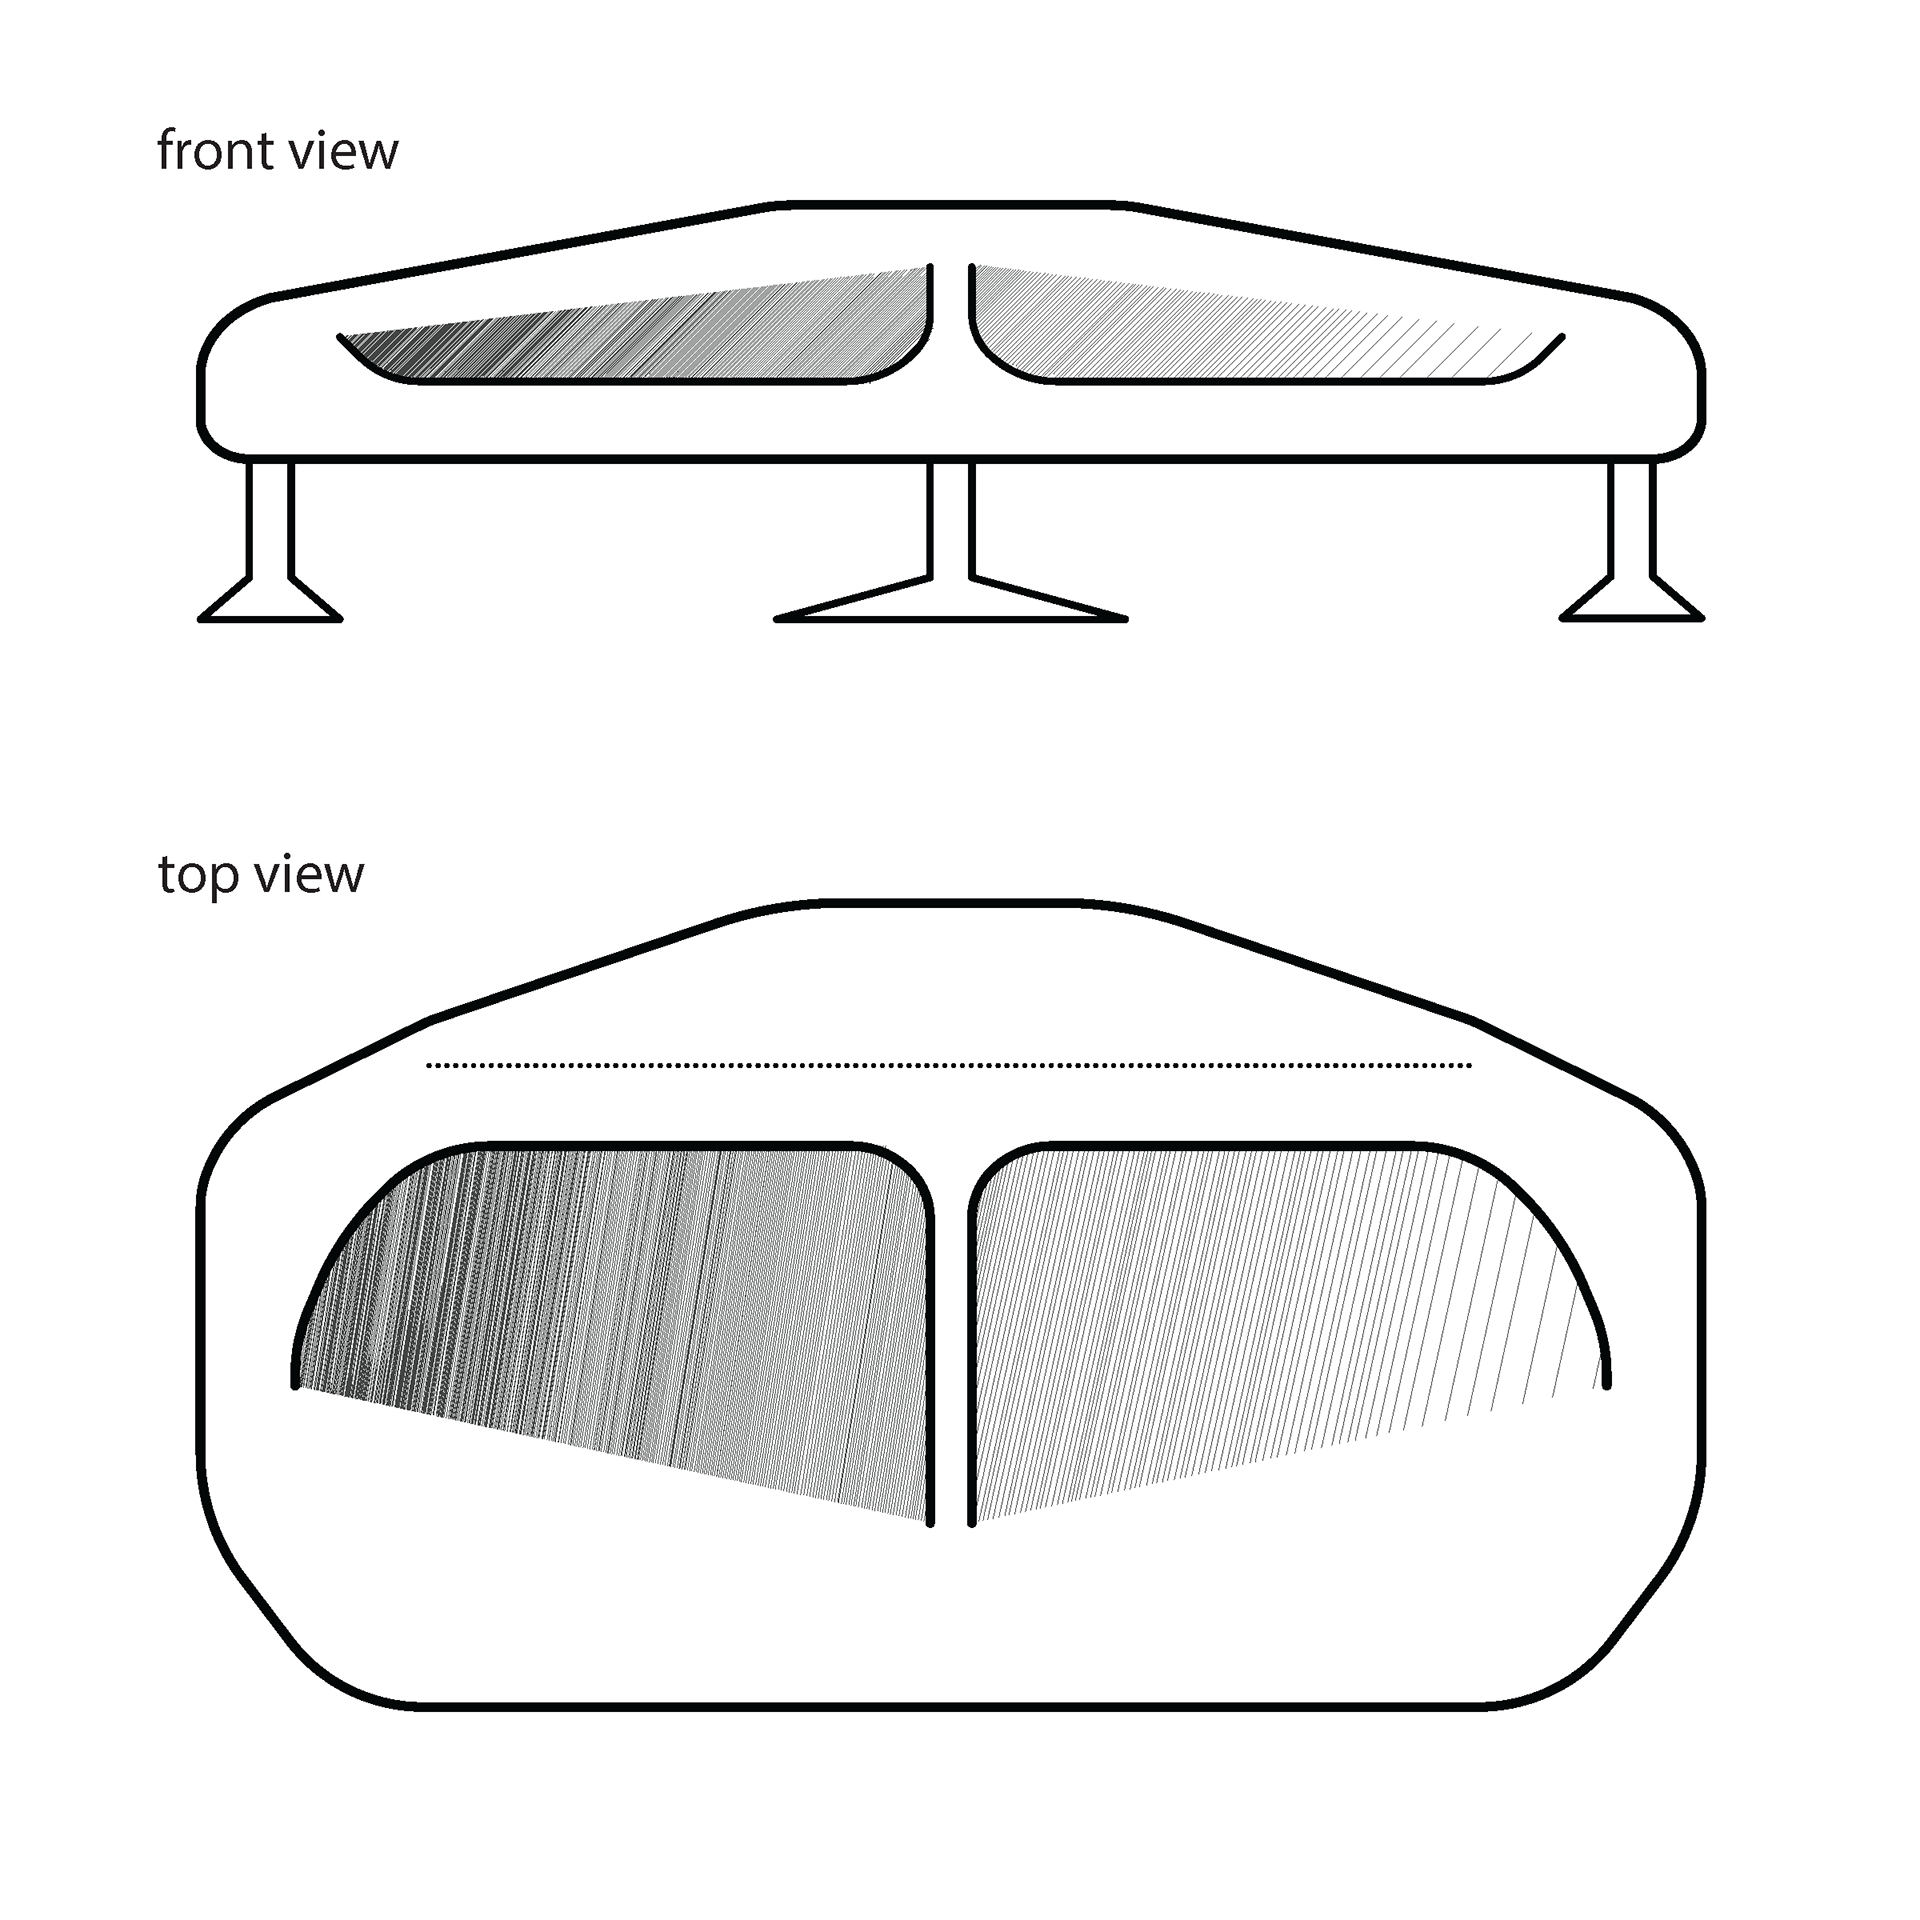
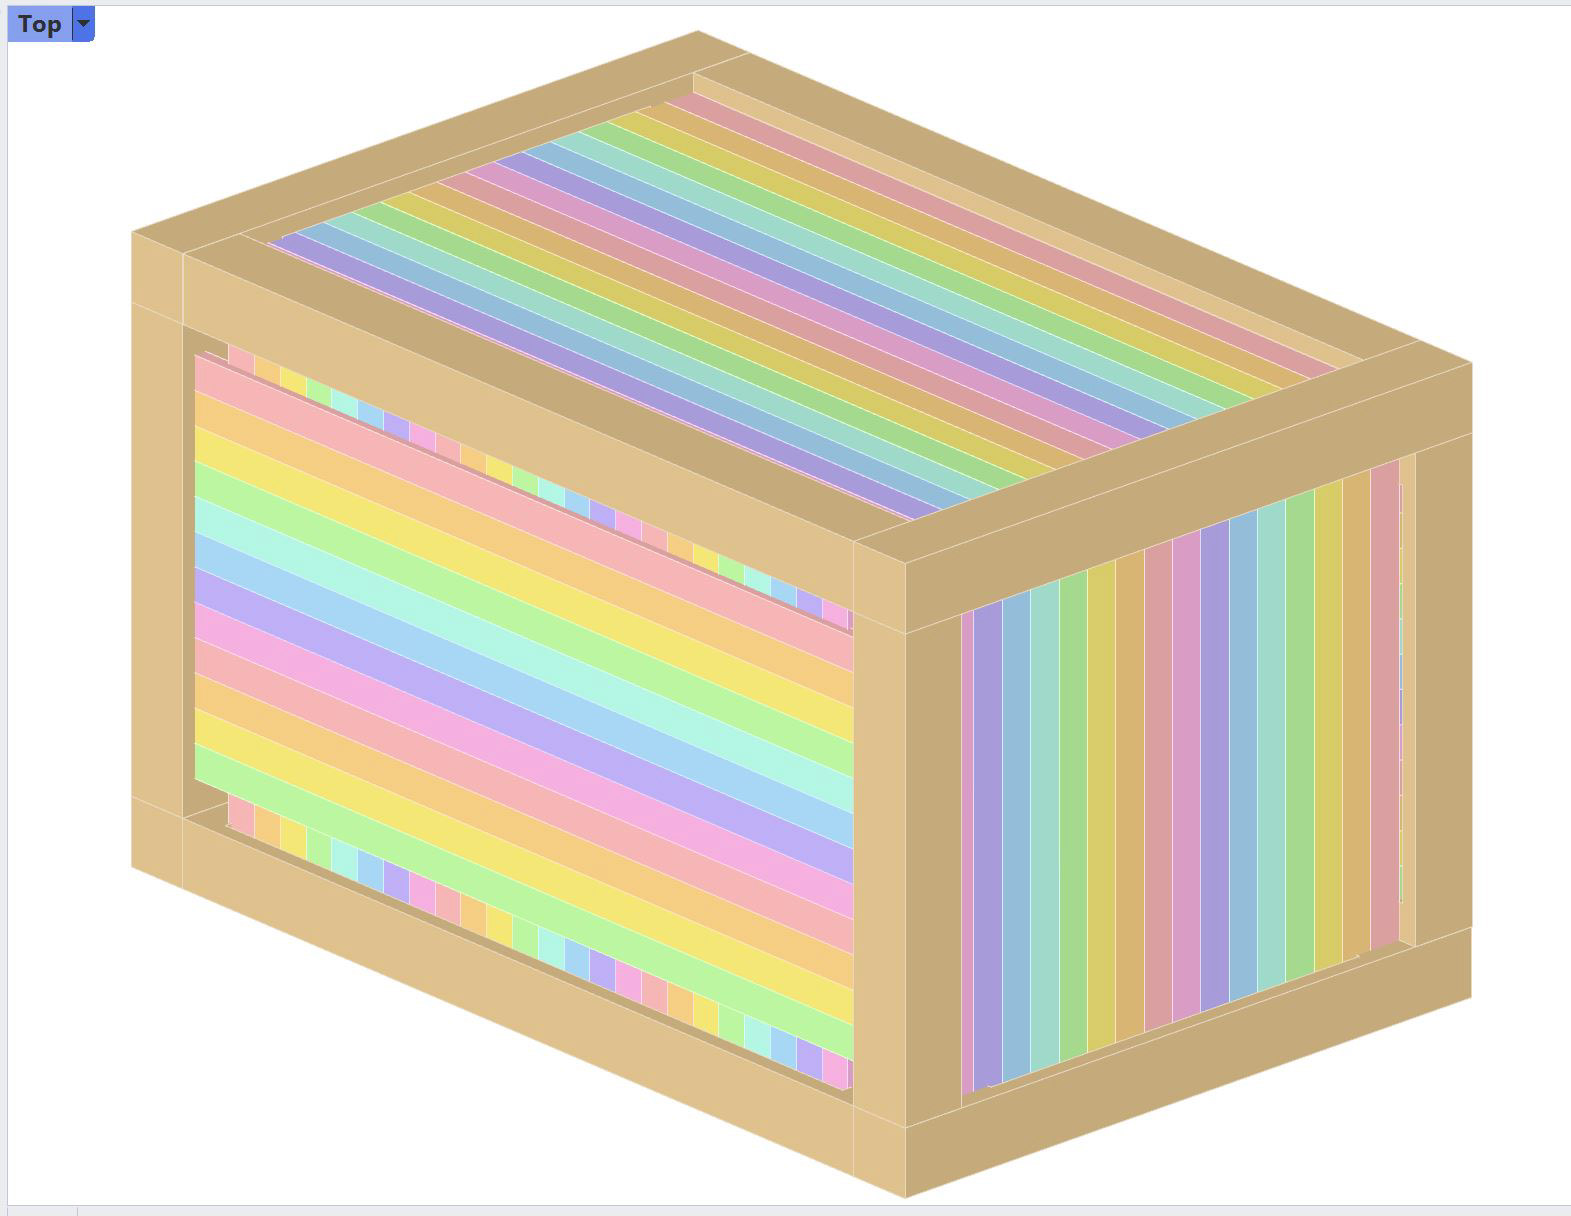
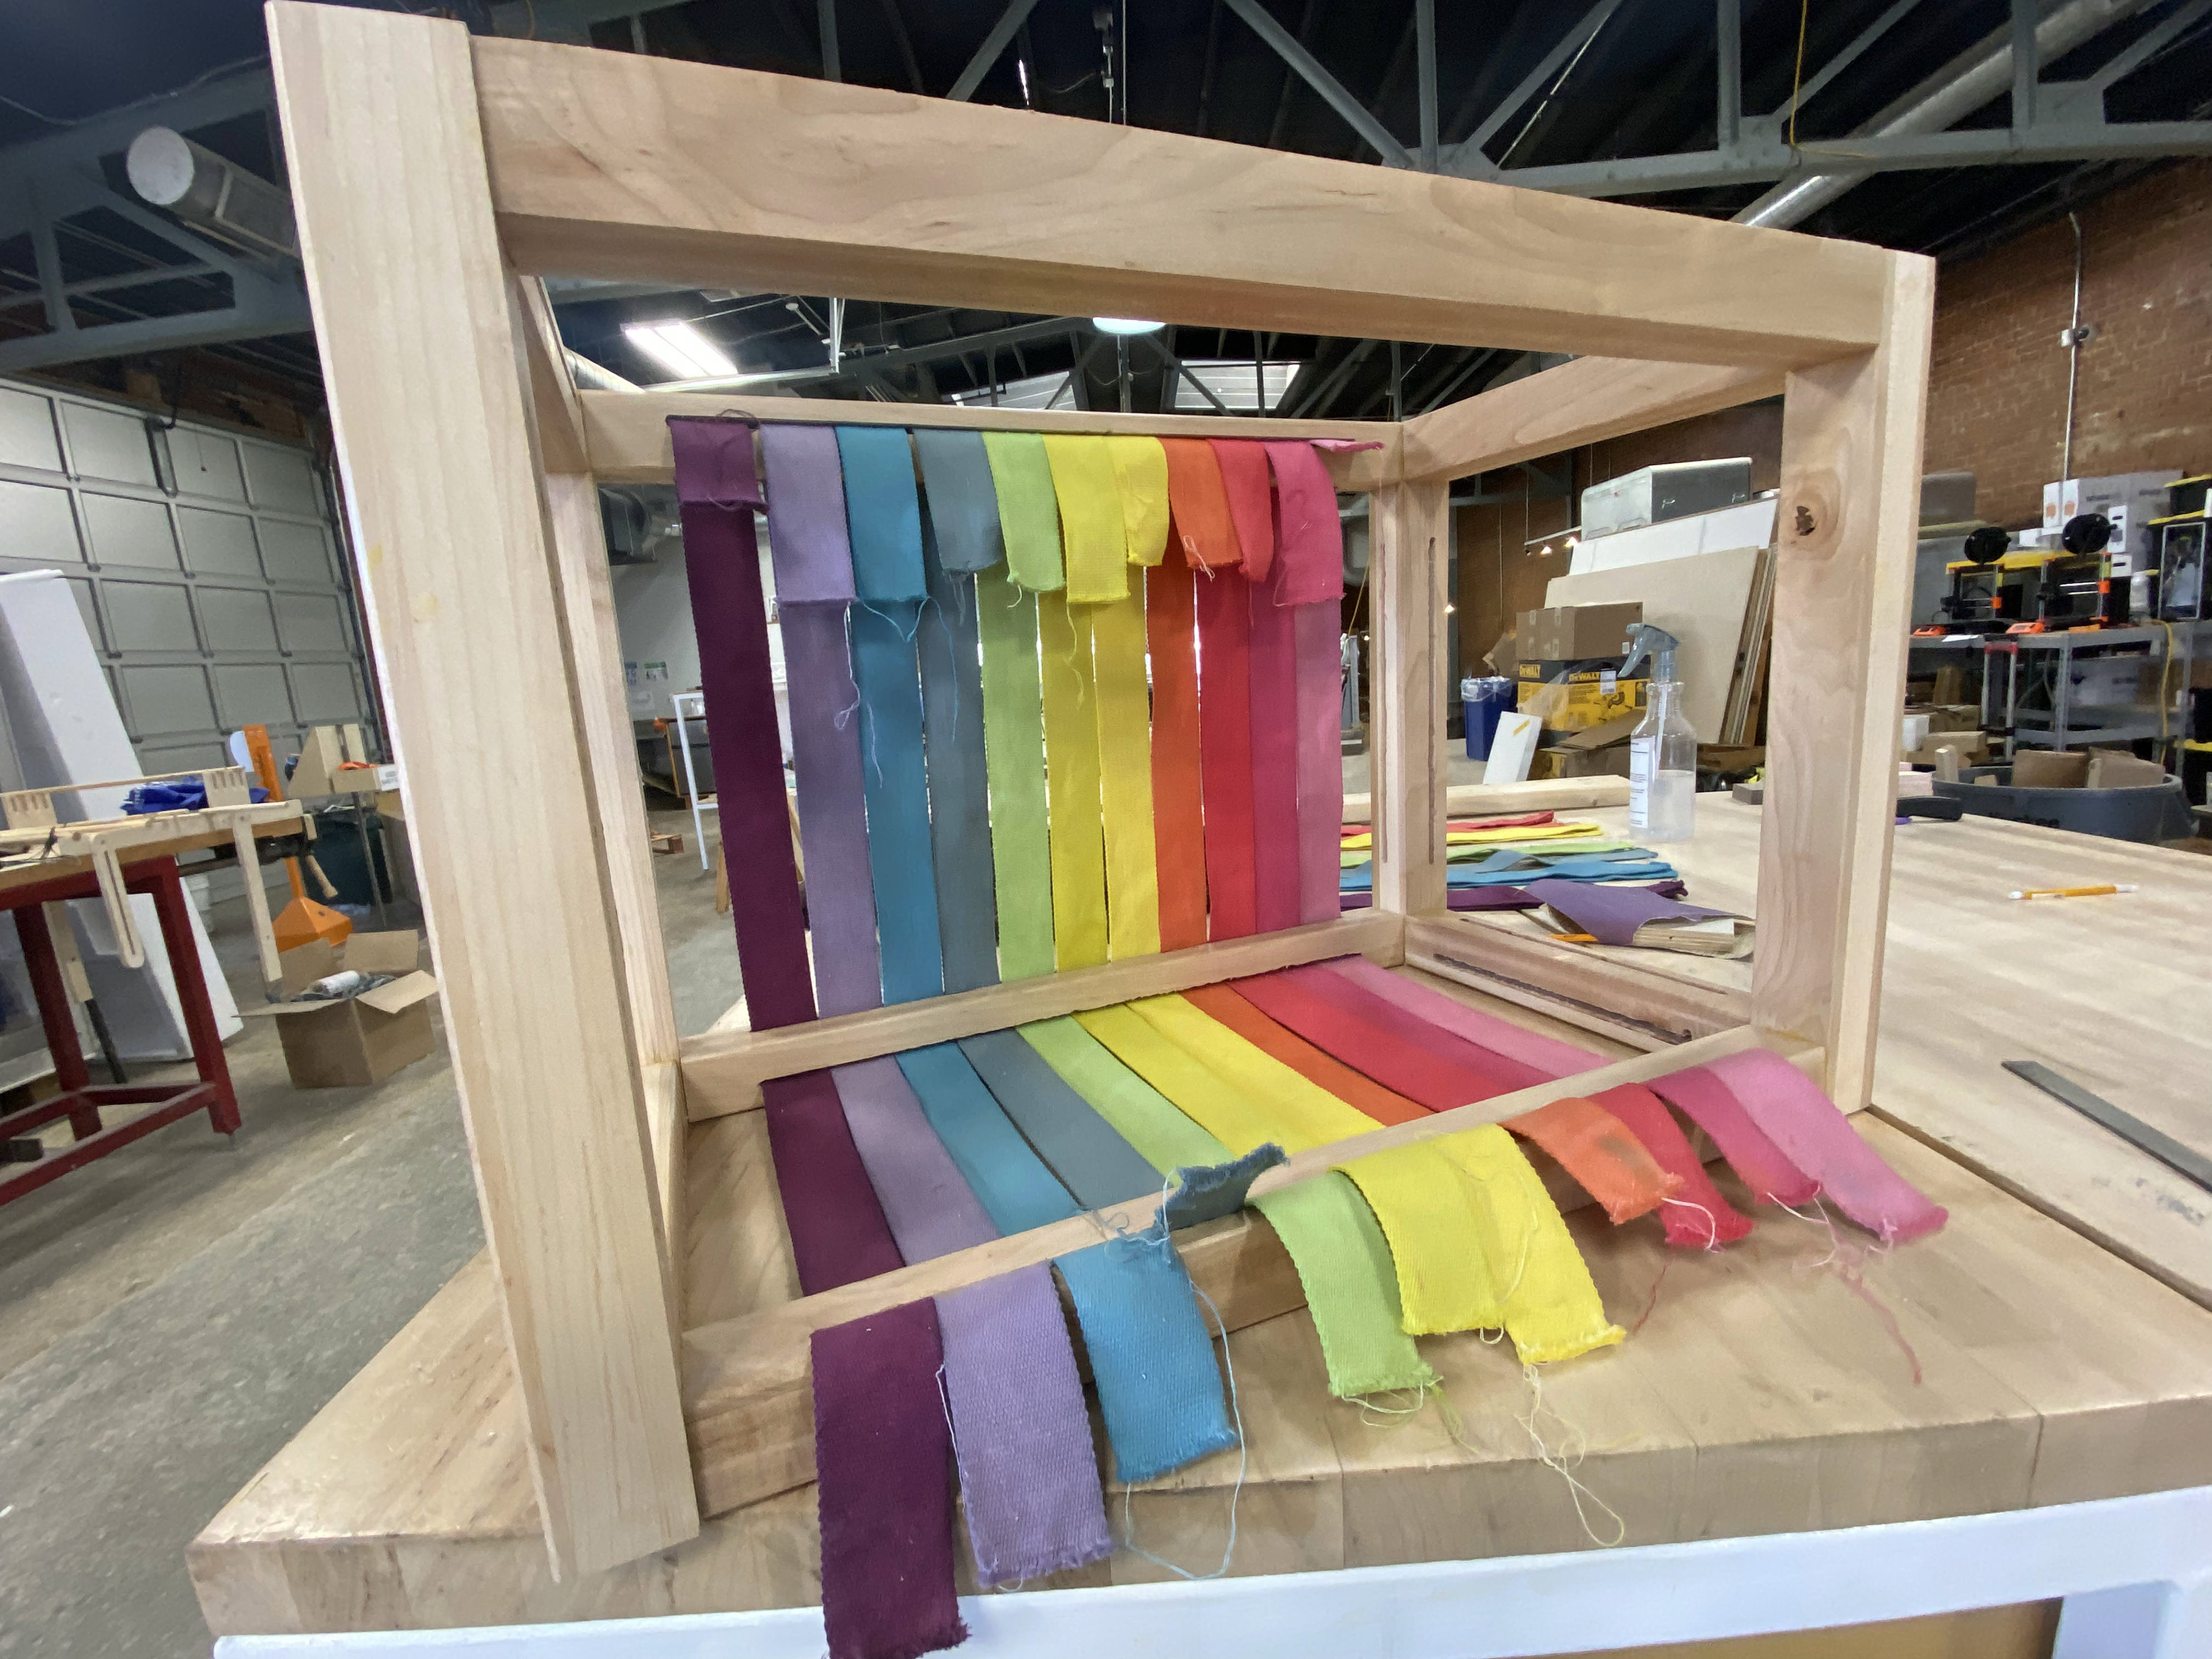
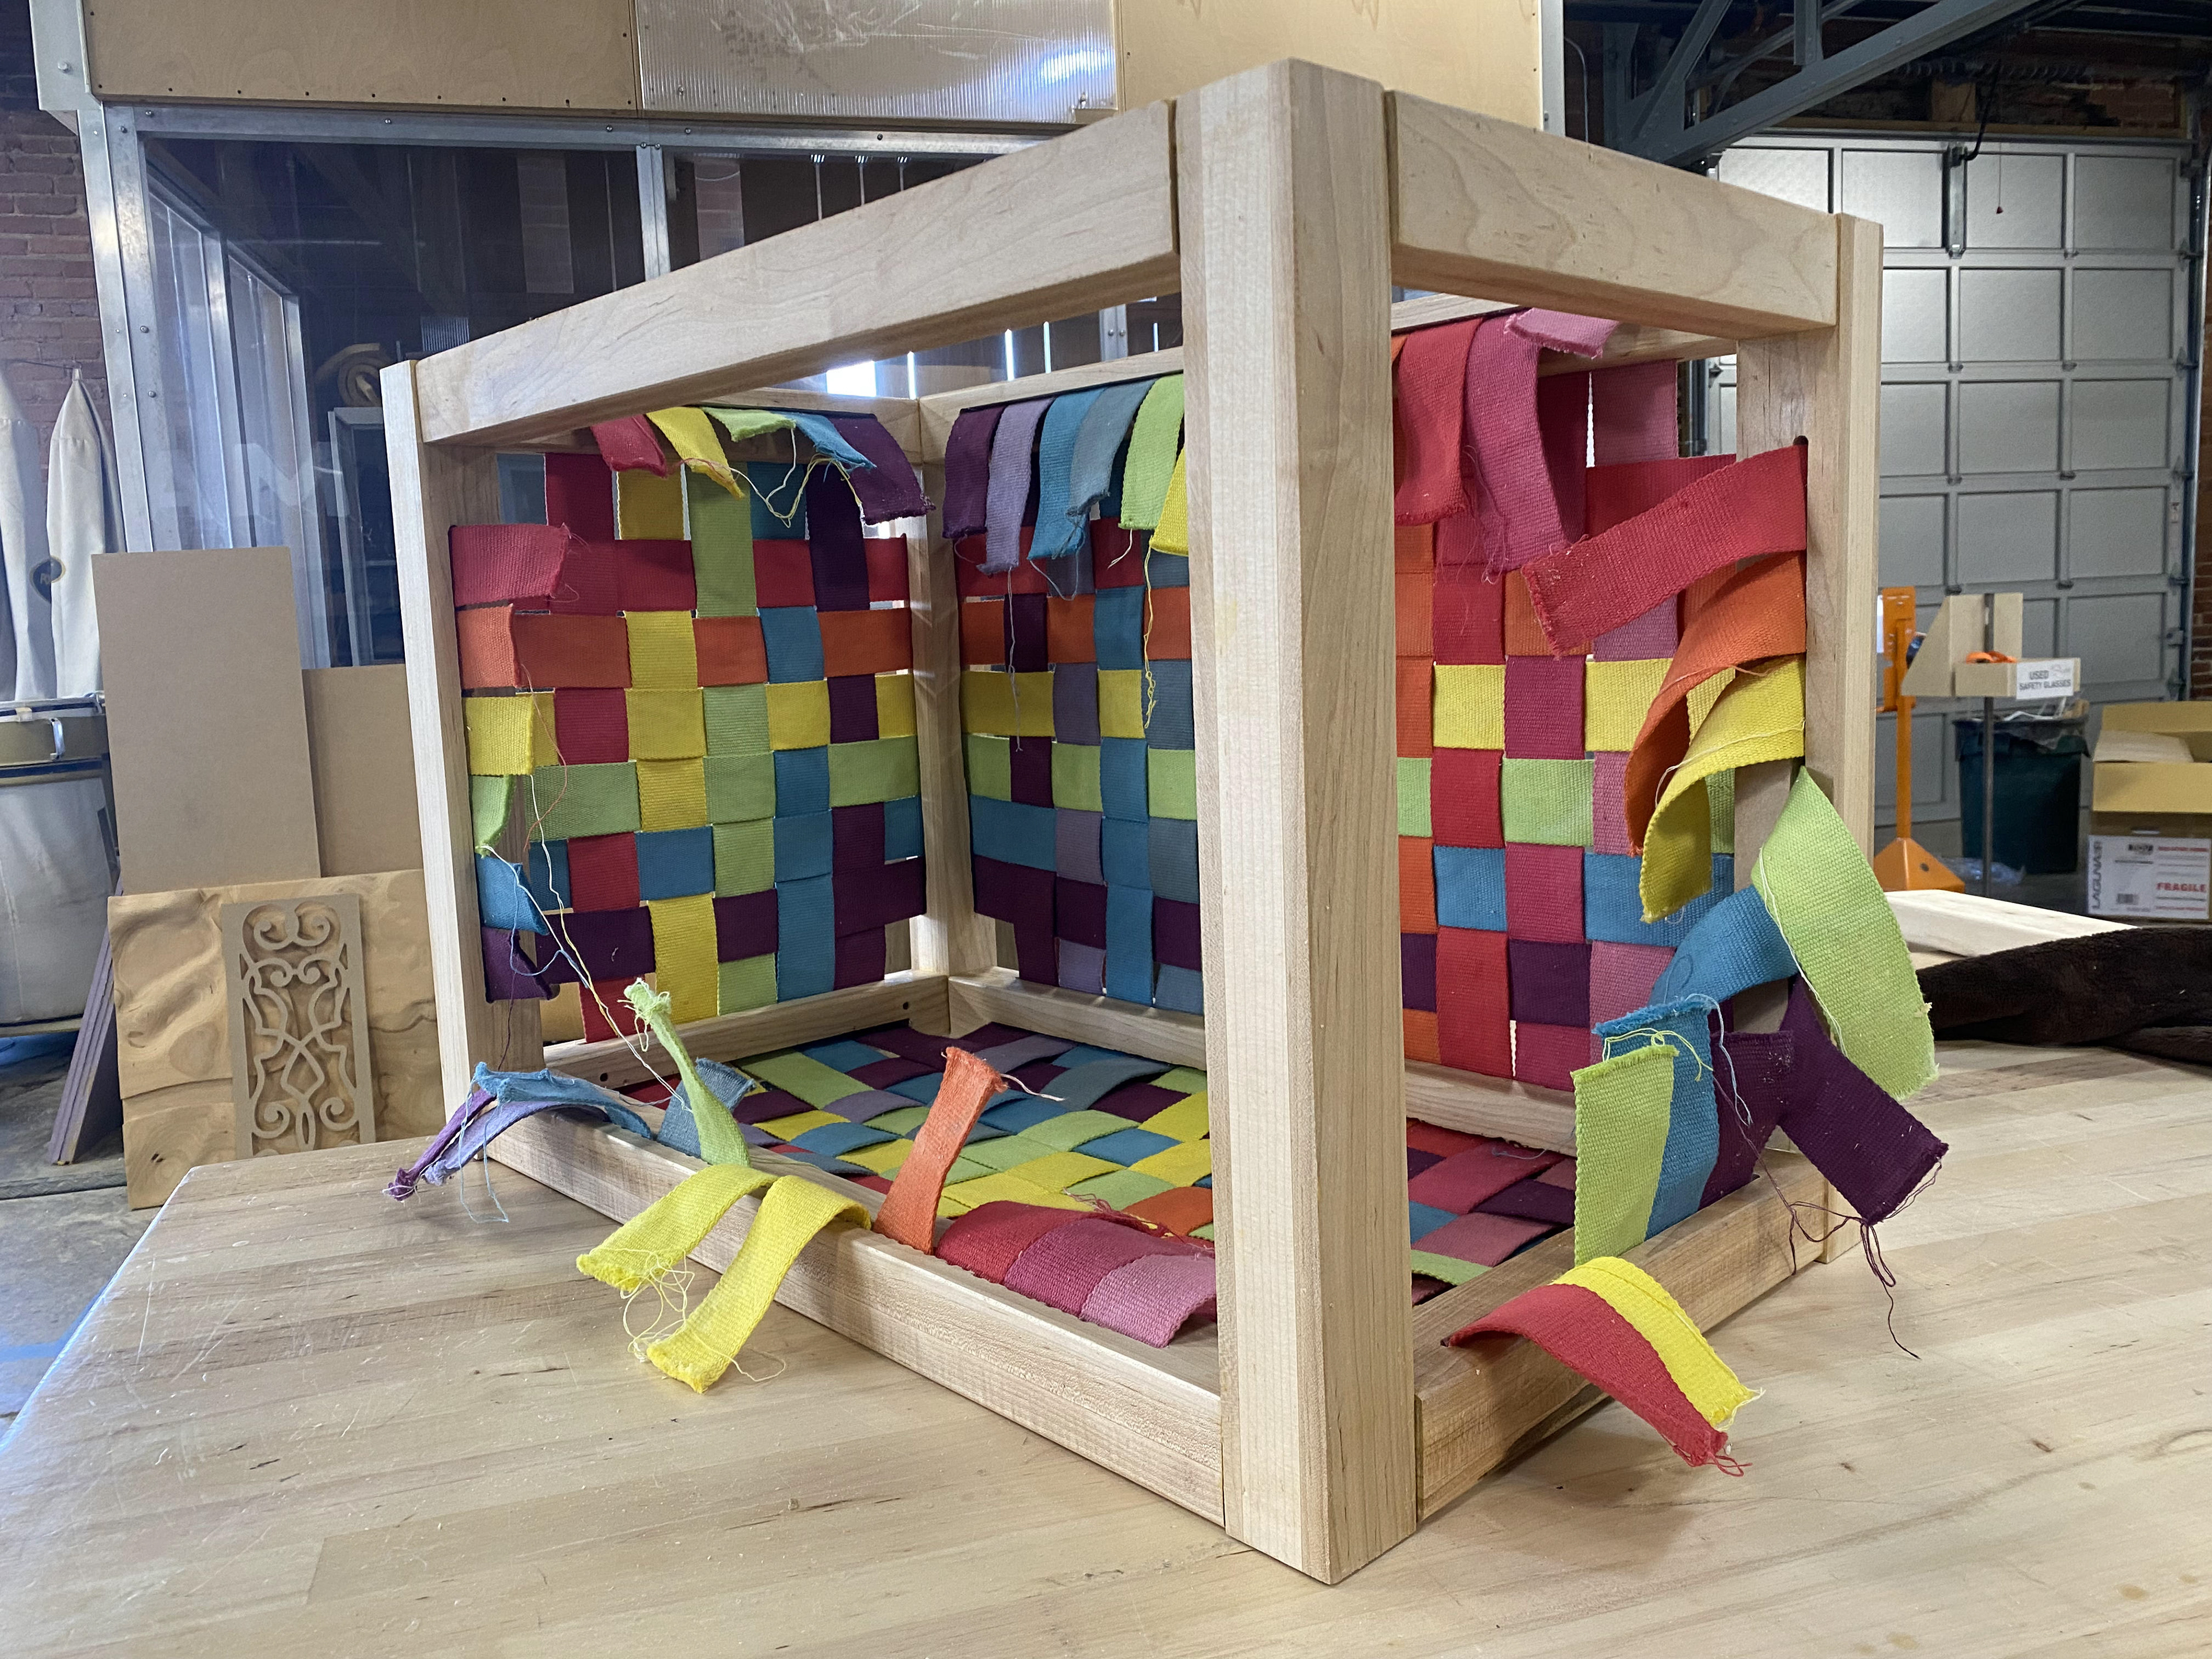
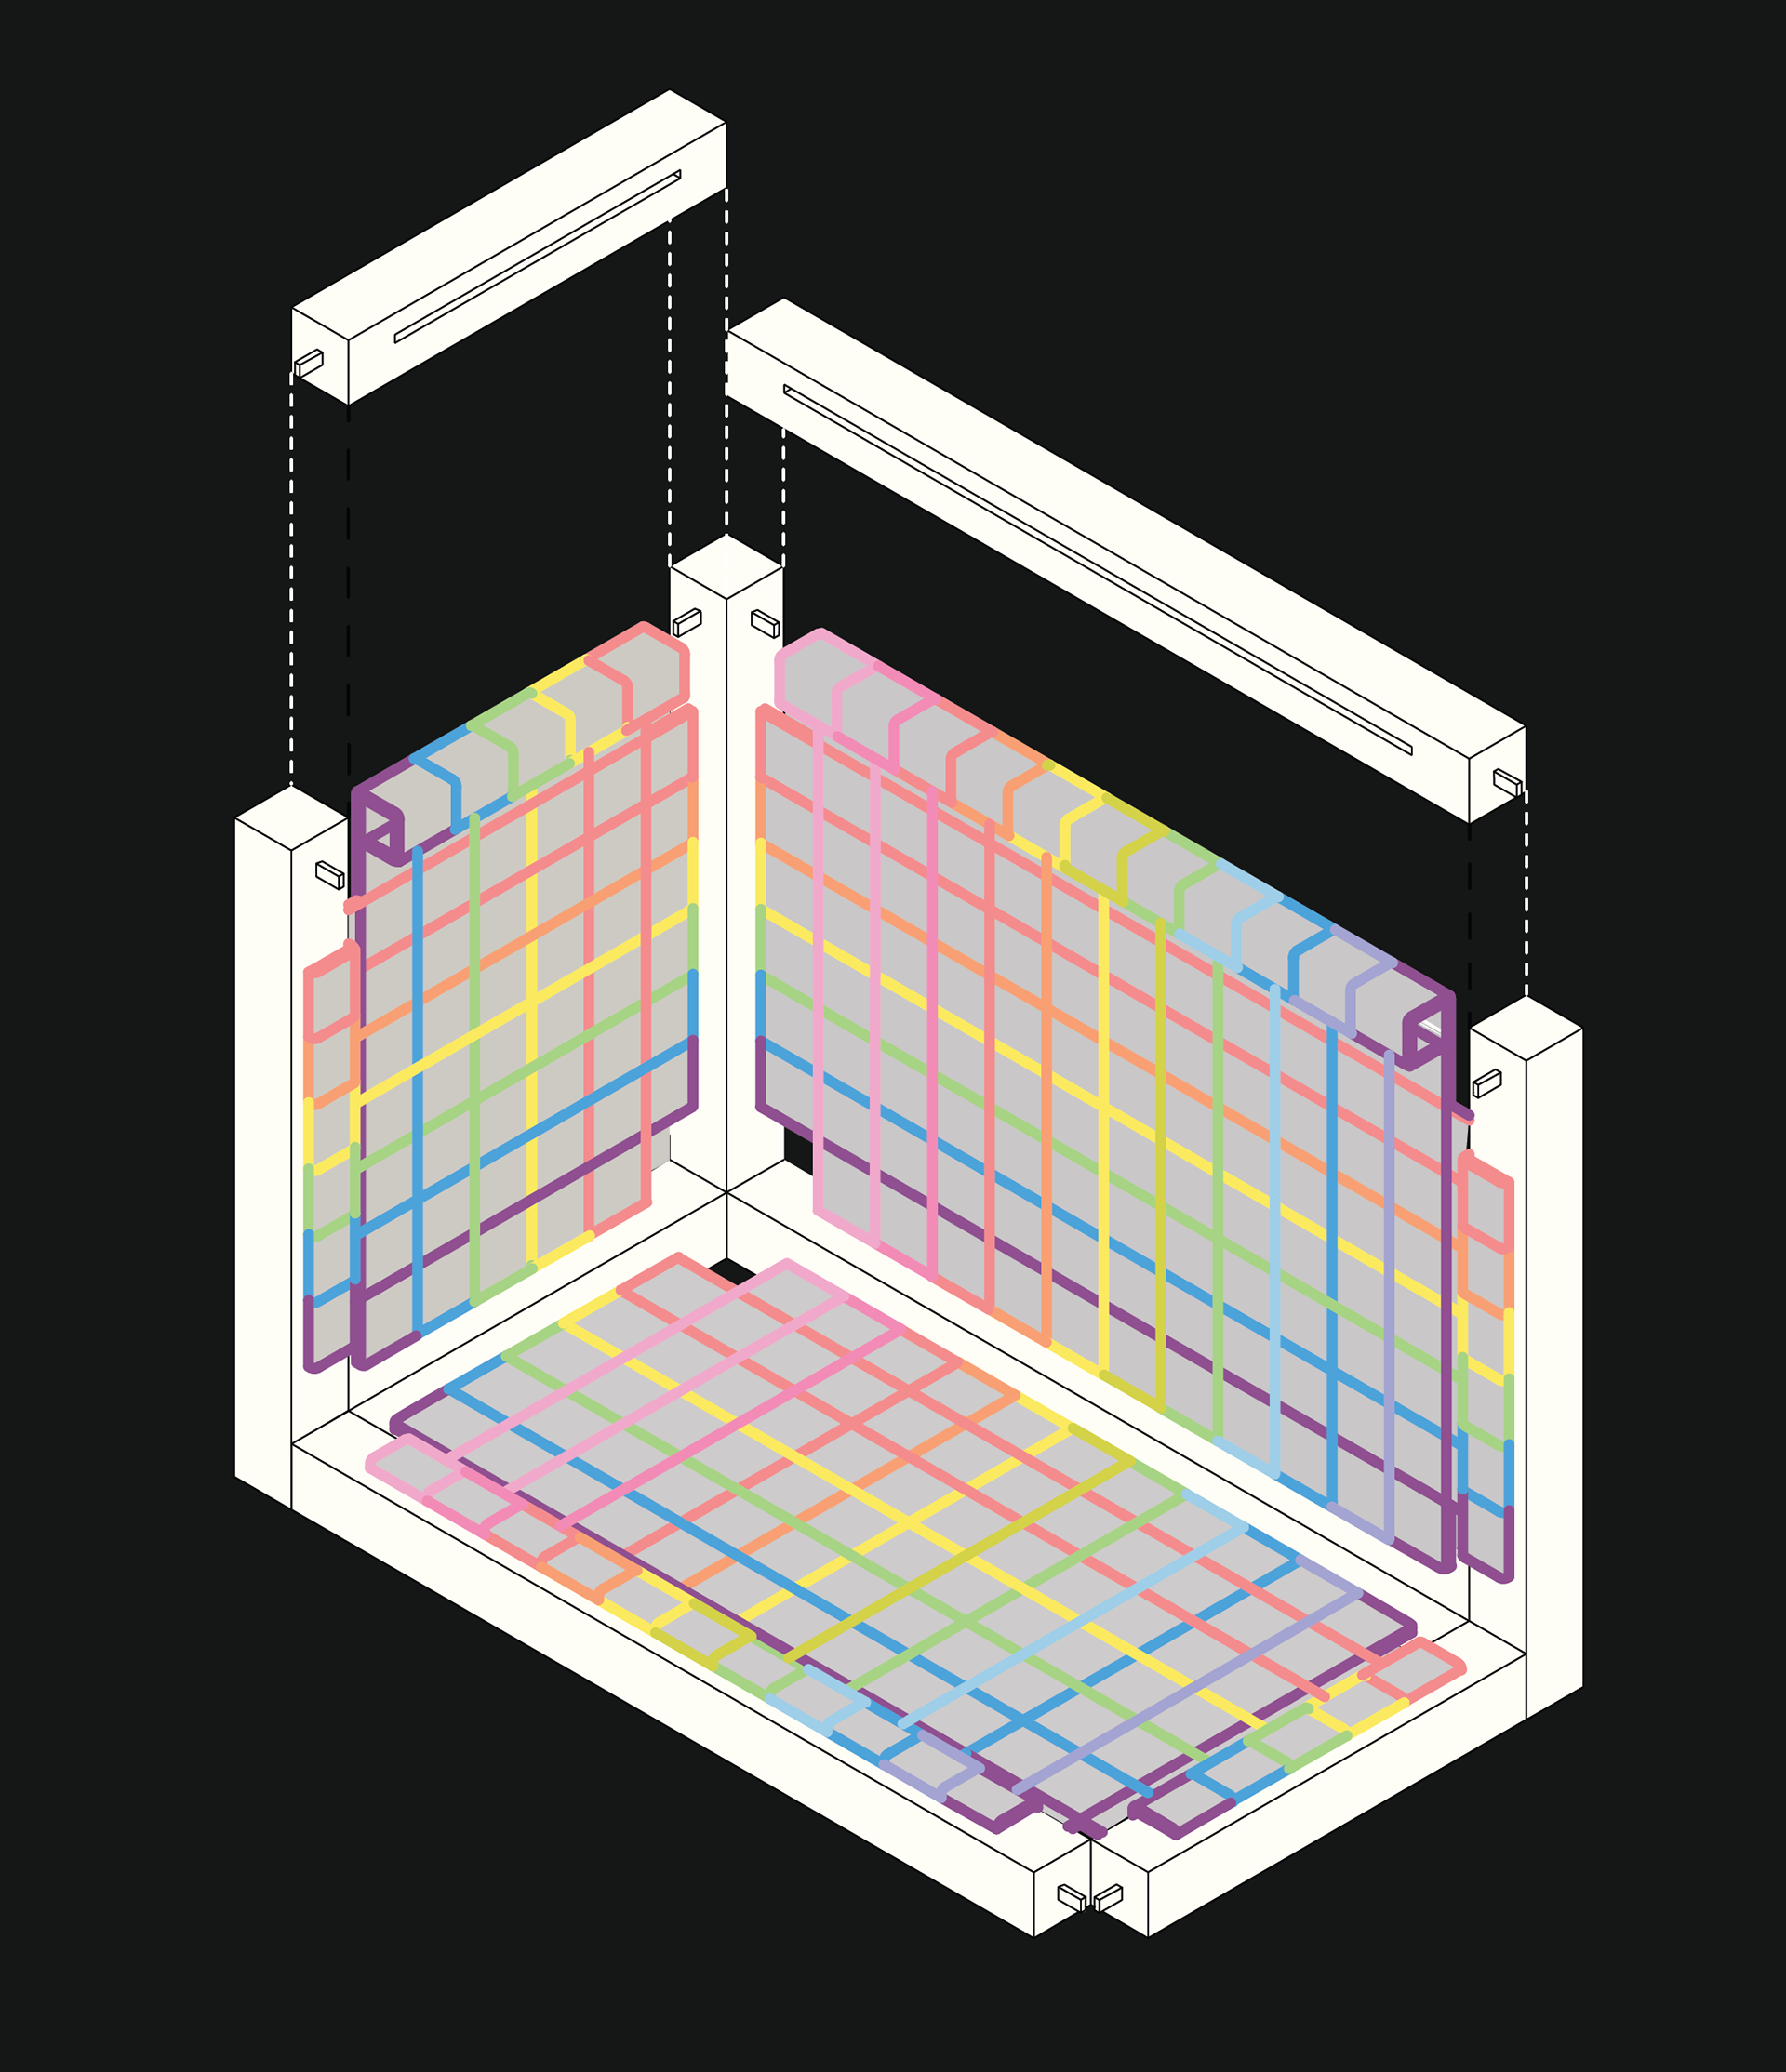
I chose to combine multiple ideas with a rectilinear form to create a multi-orientation stool, allowing the user to customize their experience. Supported by a rectangular prism, woven straps provide support for the seat. These straps occupy three of the stool's six faces. The open faces provide space for one to rest their legs or space to grasp and reorient the stool.

Iteration A, no woven straps
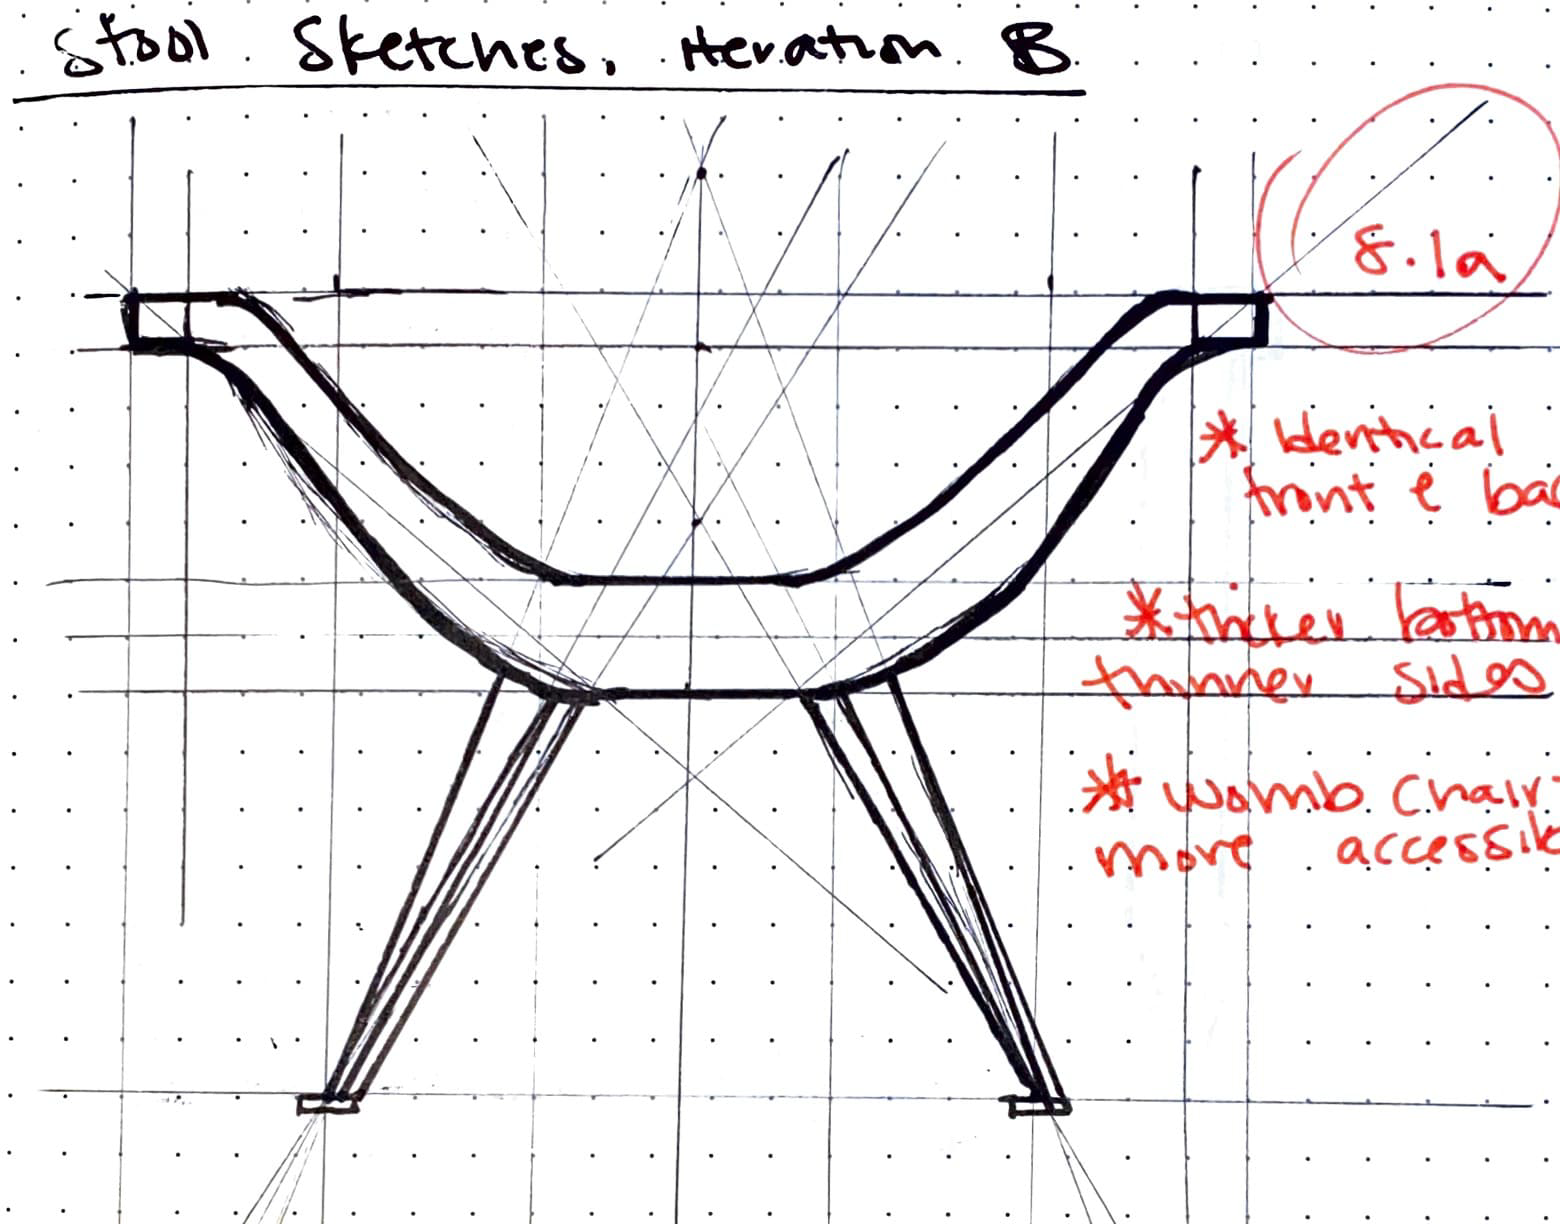
Iteration B, many staps

Iteration C, 22 straps
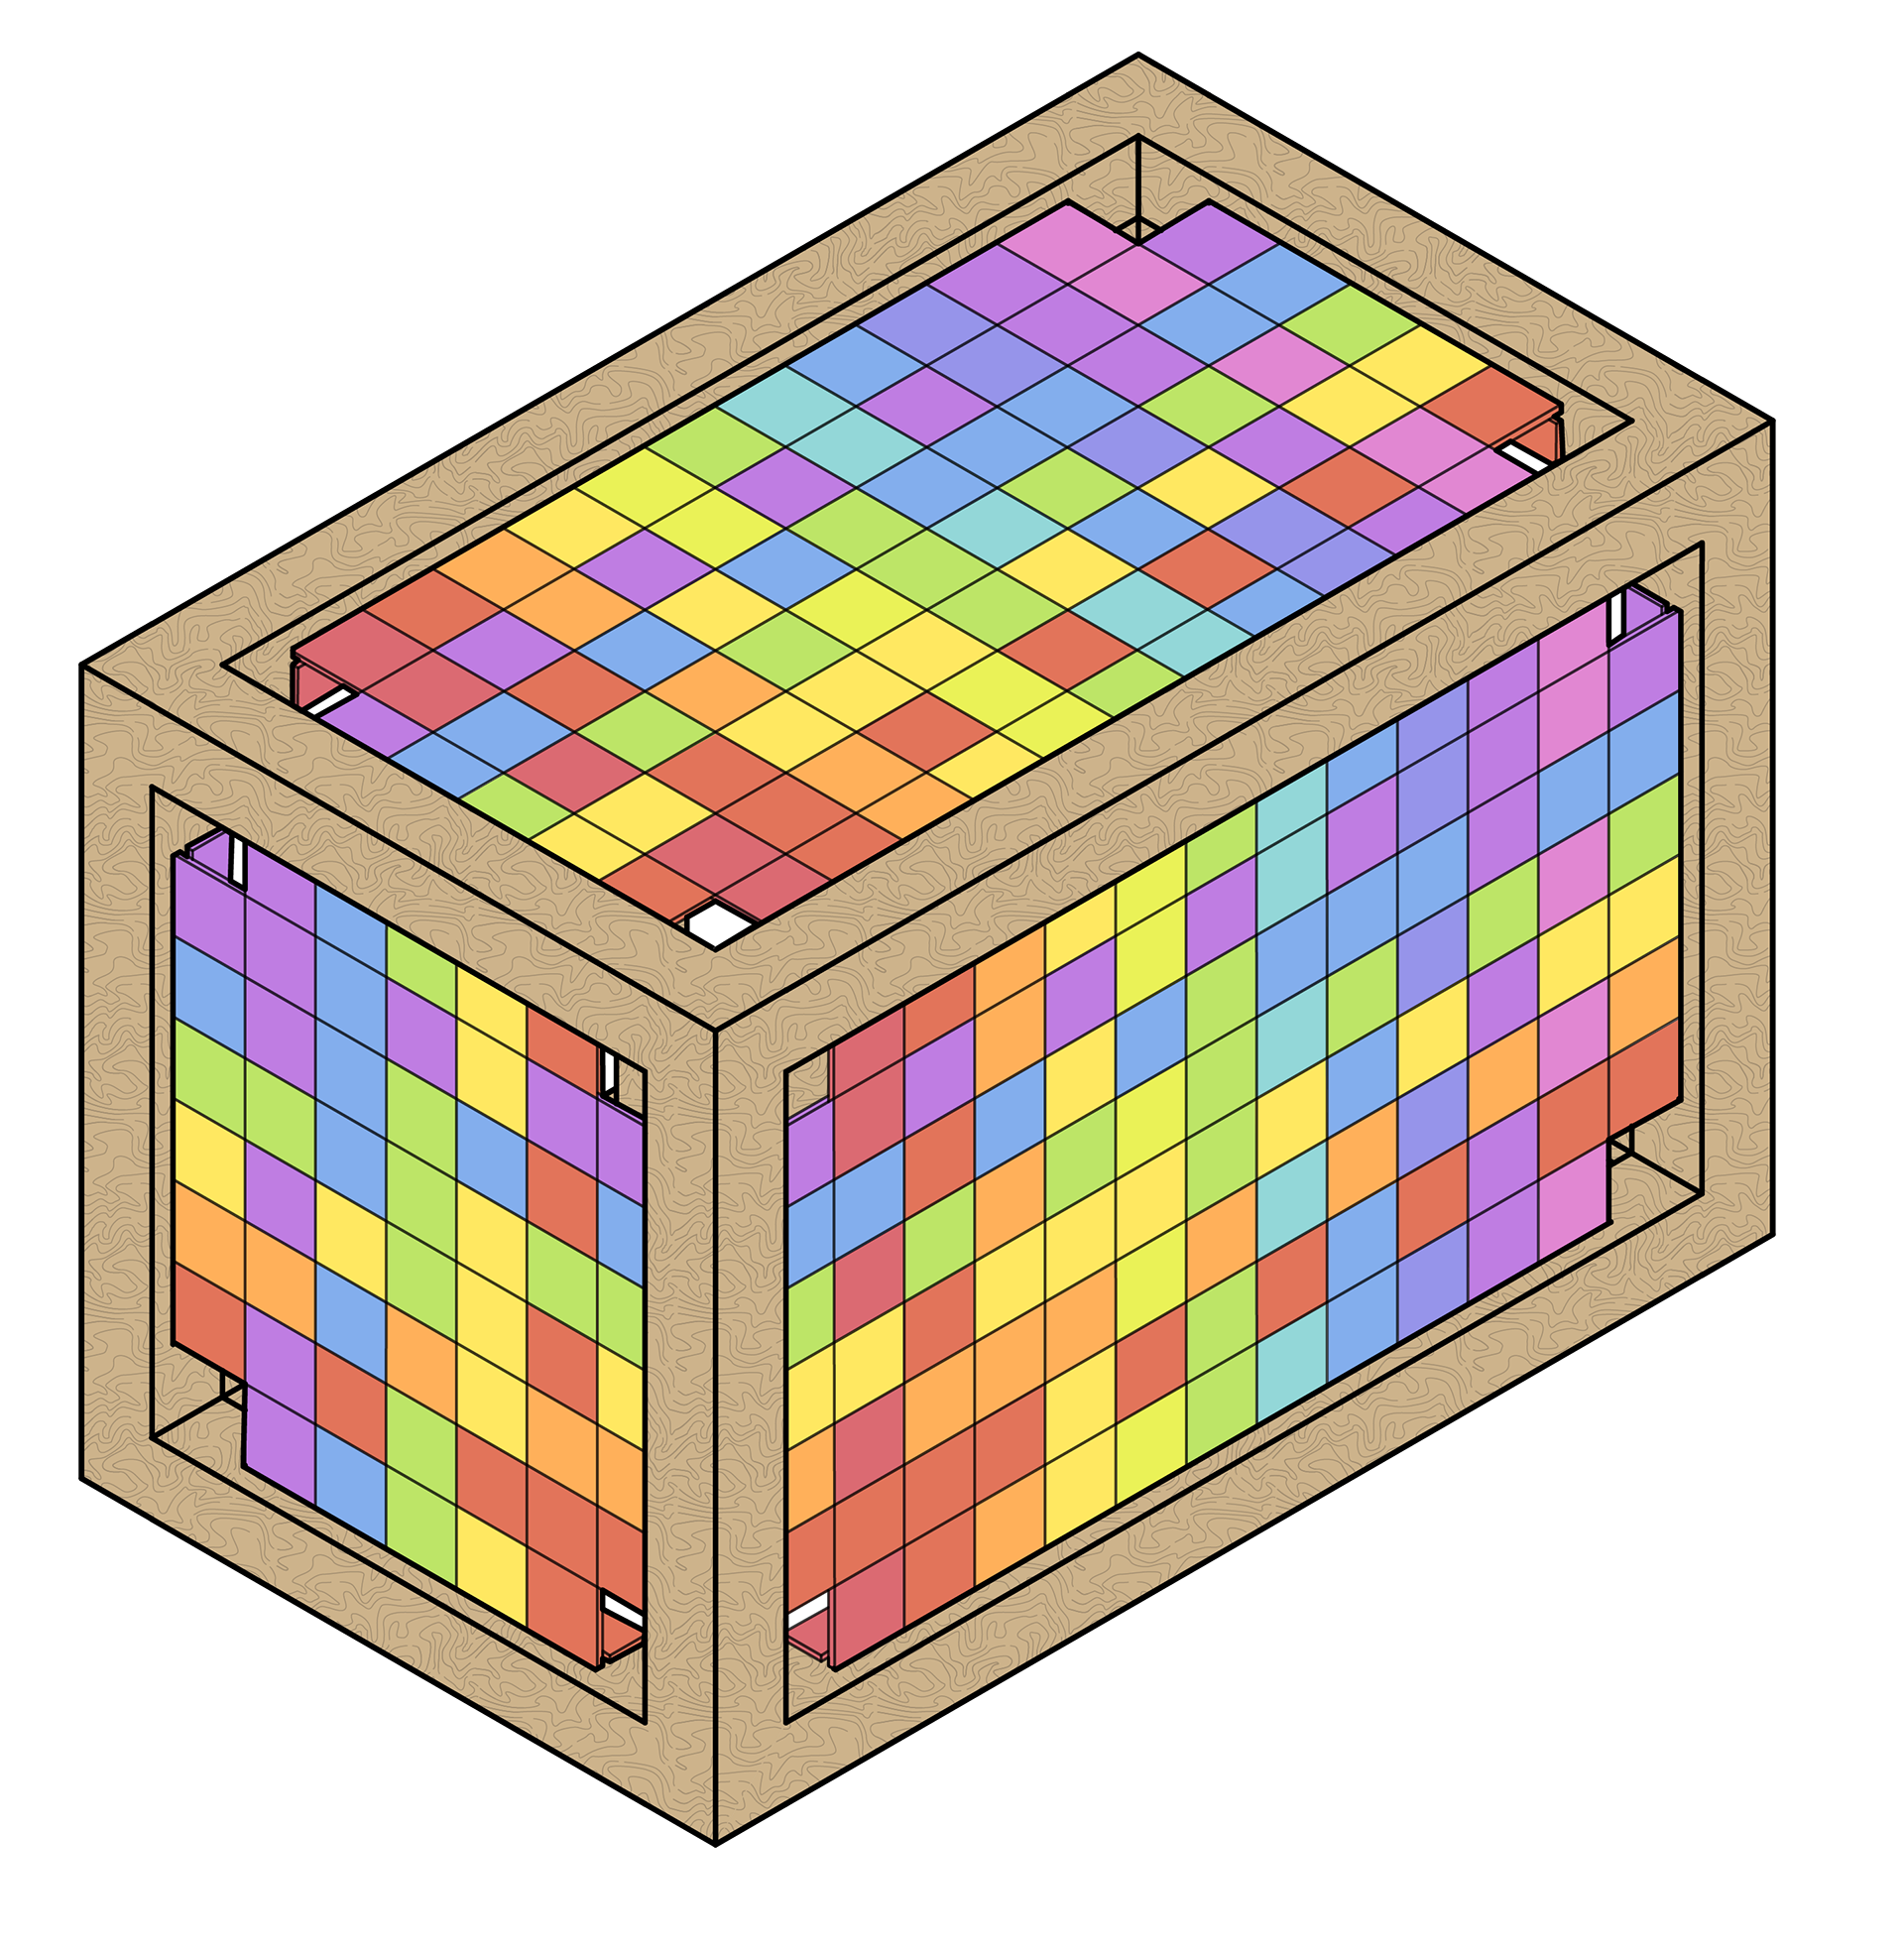
Iteration C, 22 straps woven
HAND DYED STRAPS
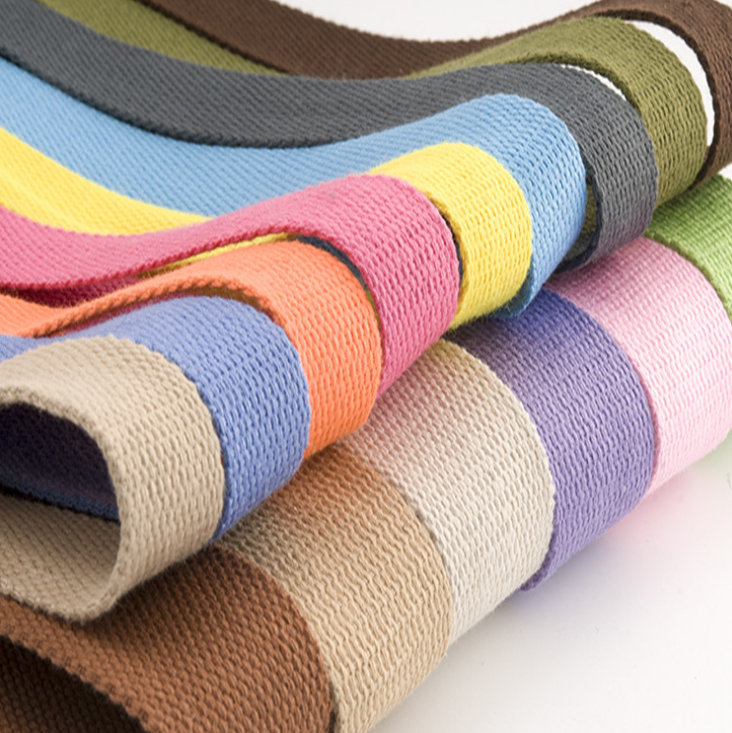
ORIGINAL STRAP INSPIRATION
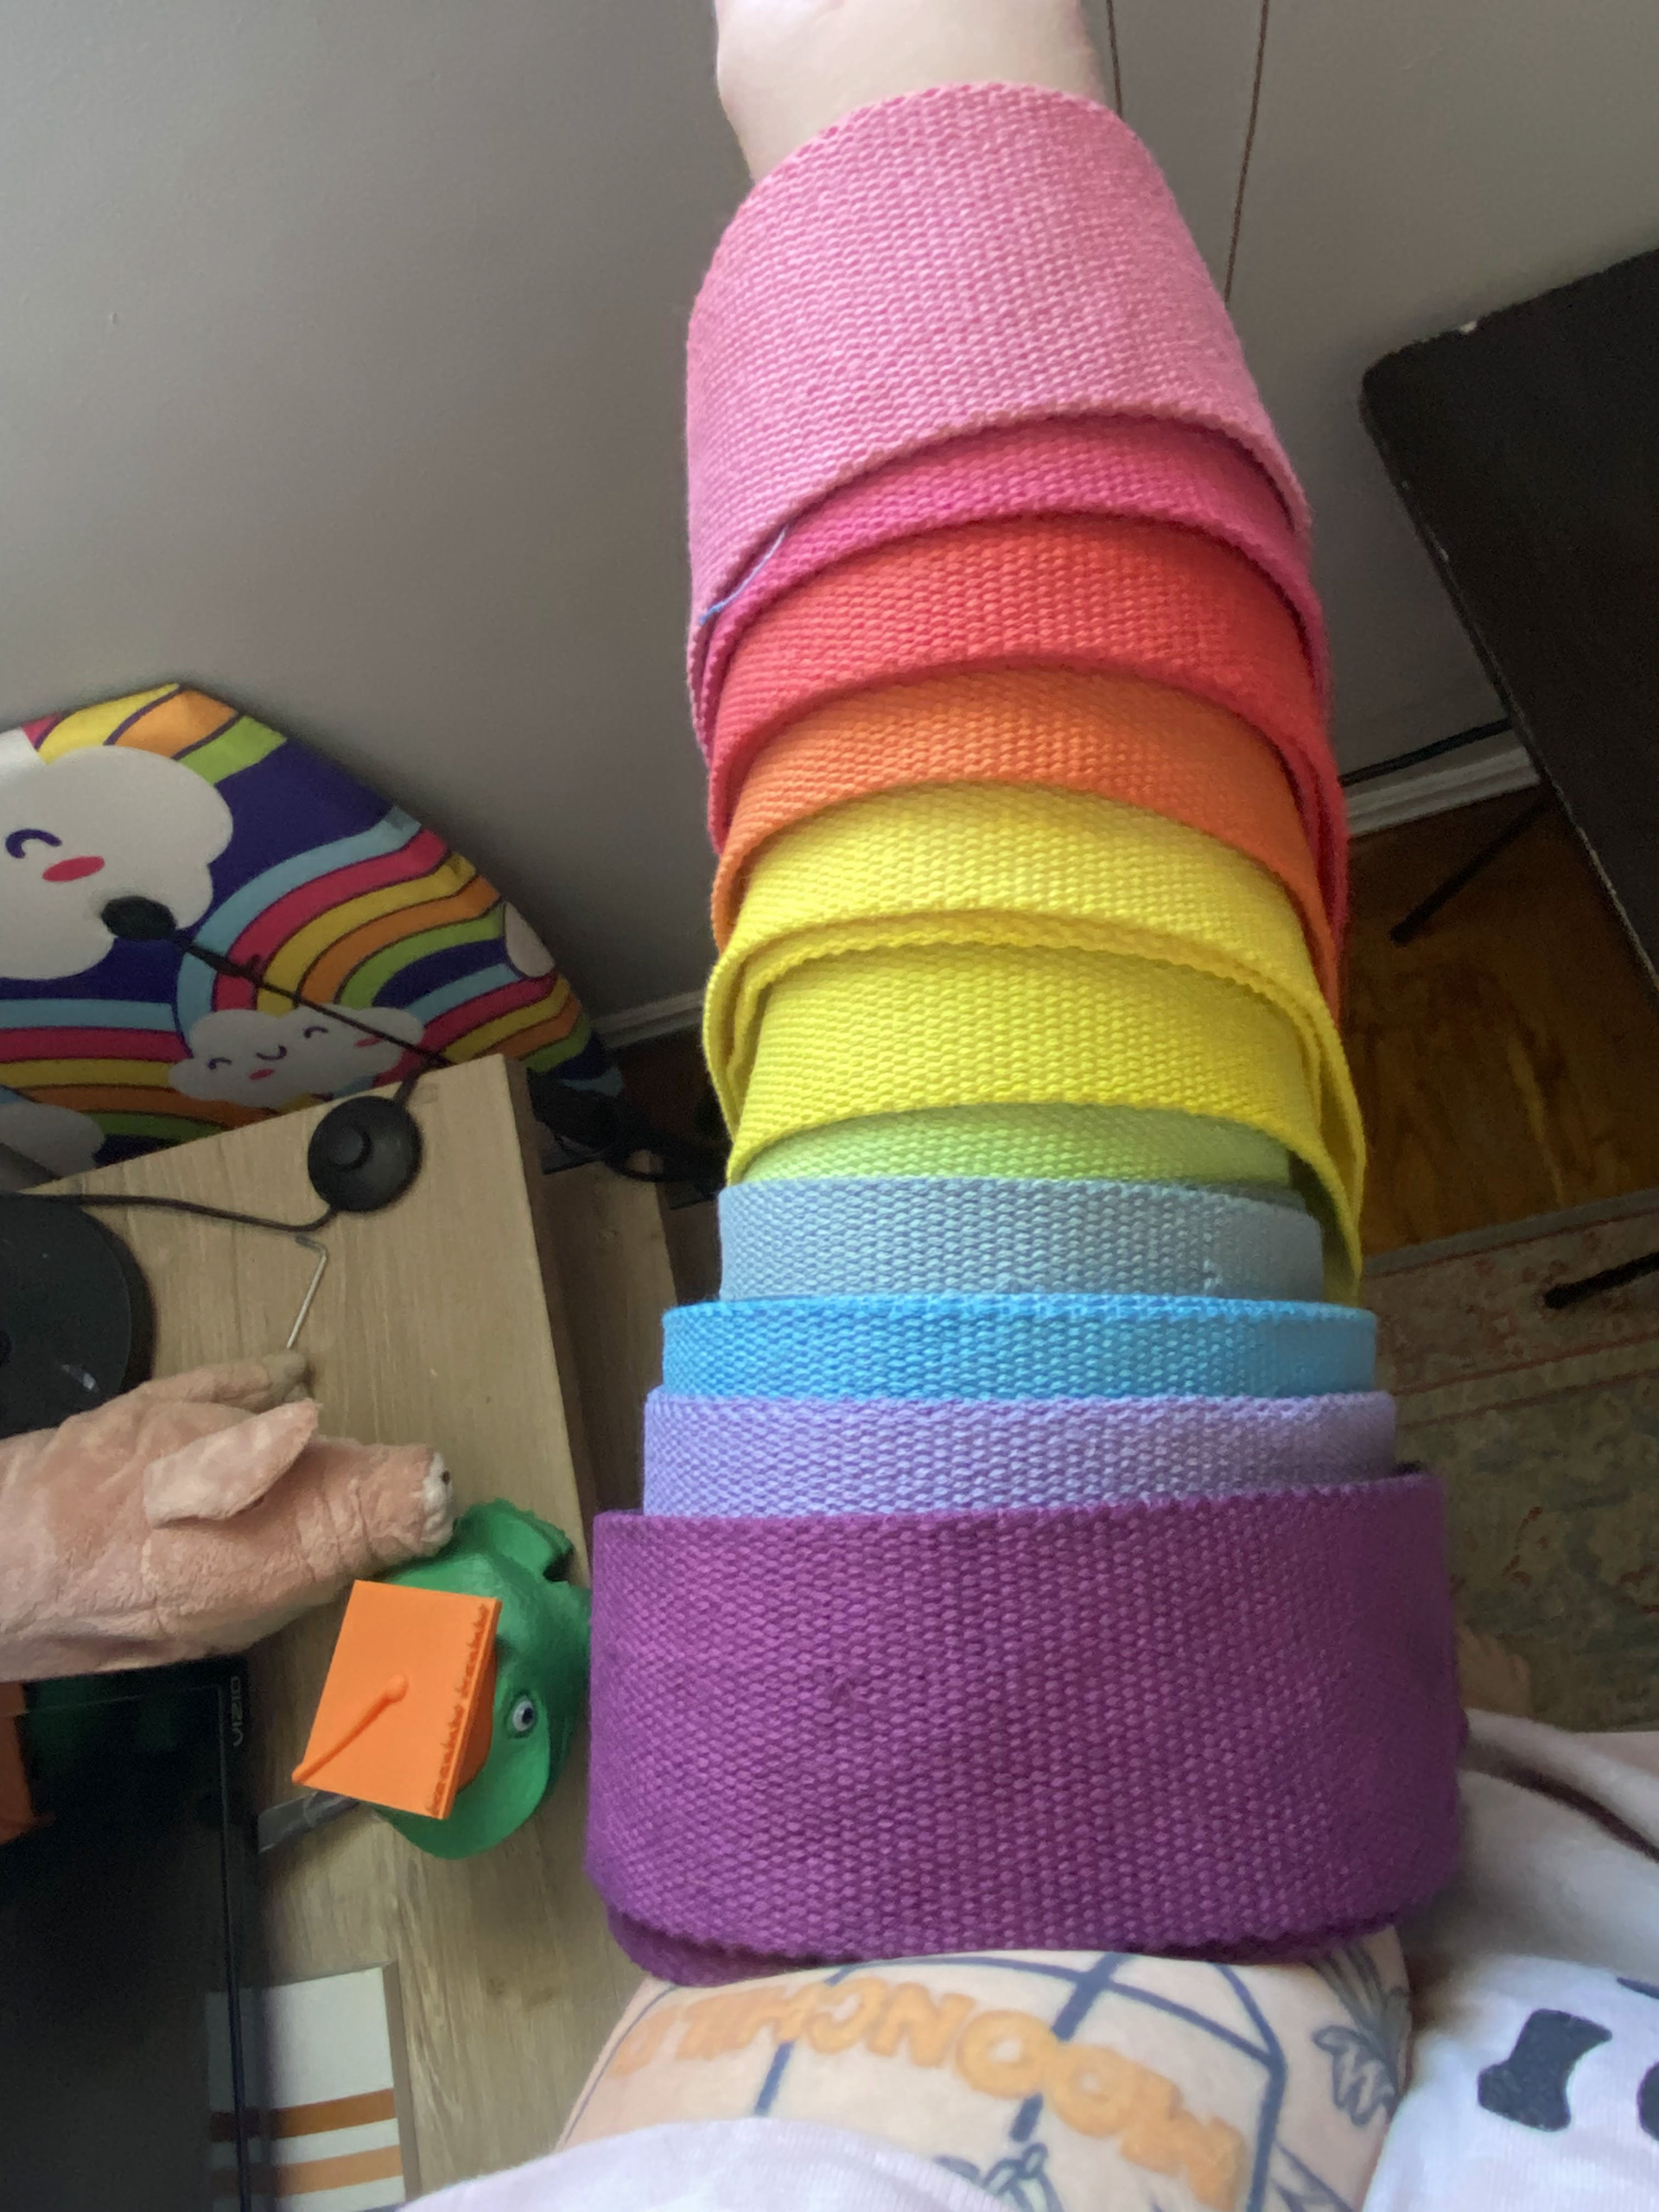
DYED STRAPS -- FINAL PRODUCT
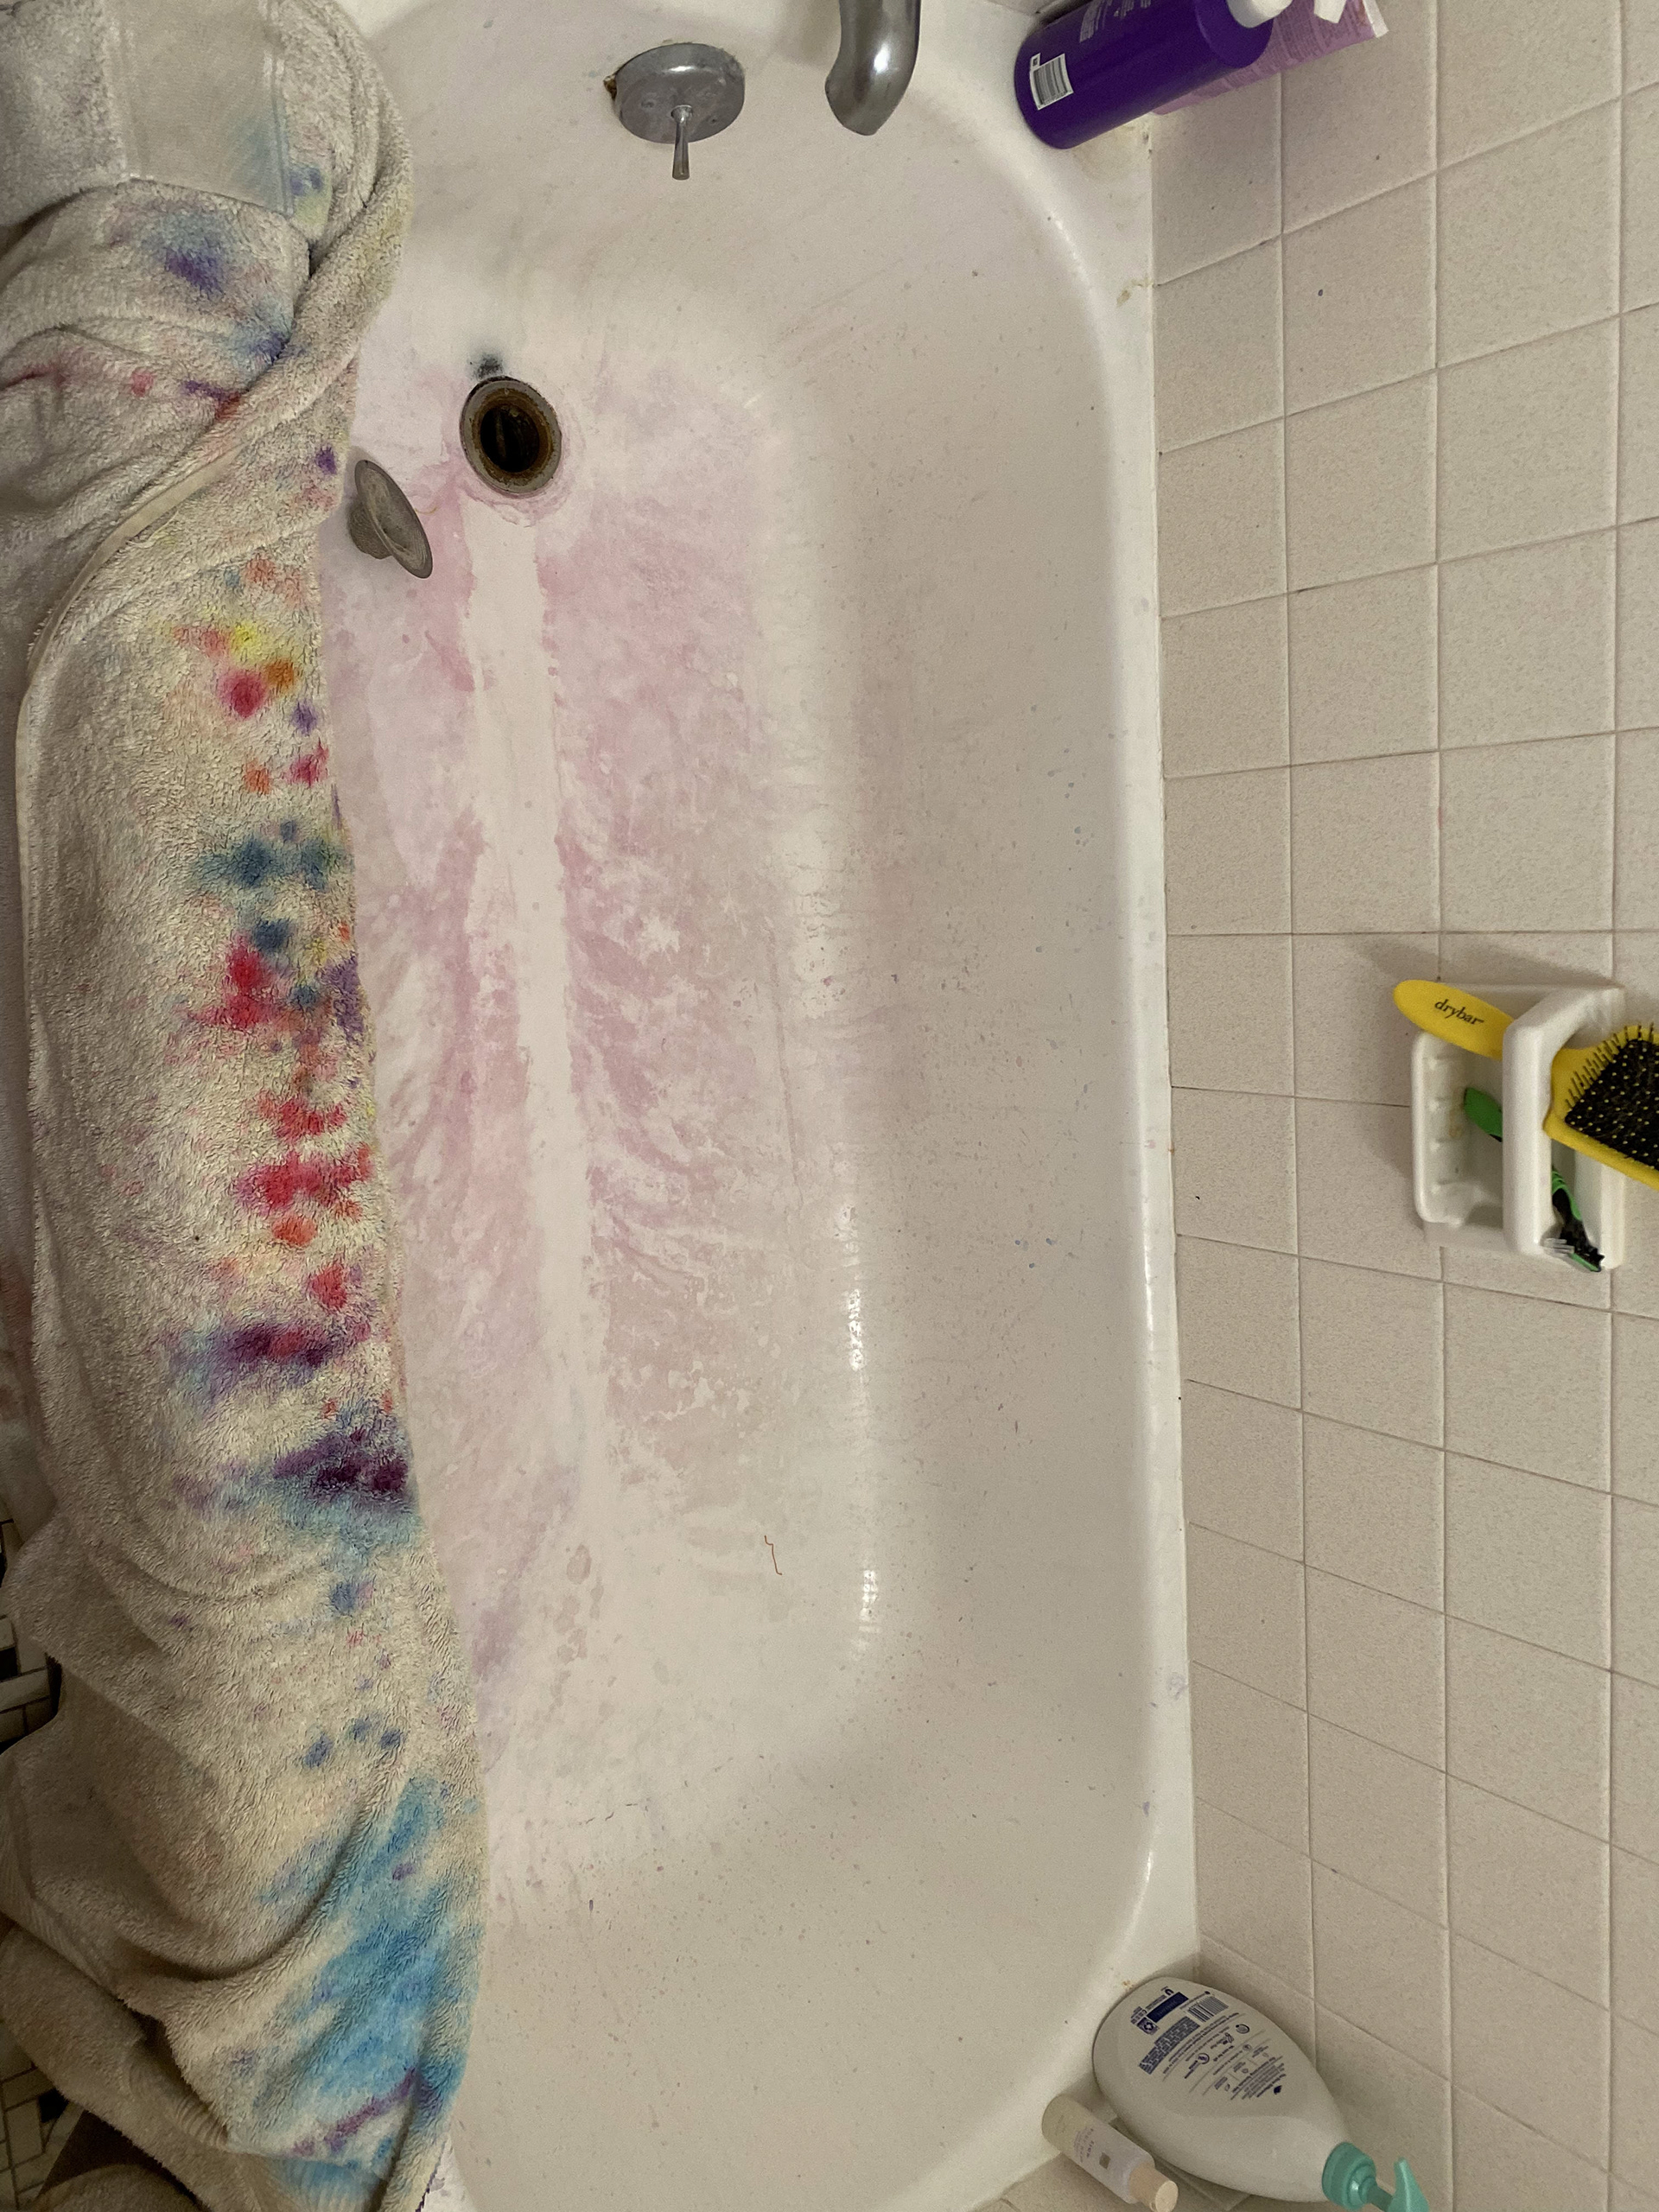
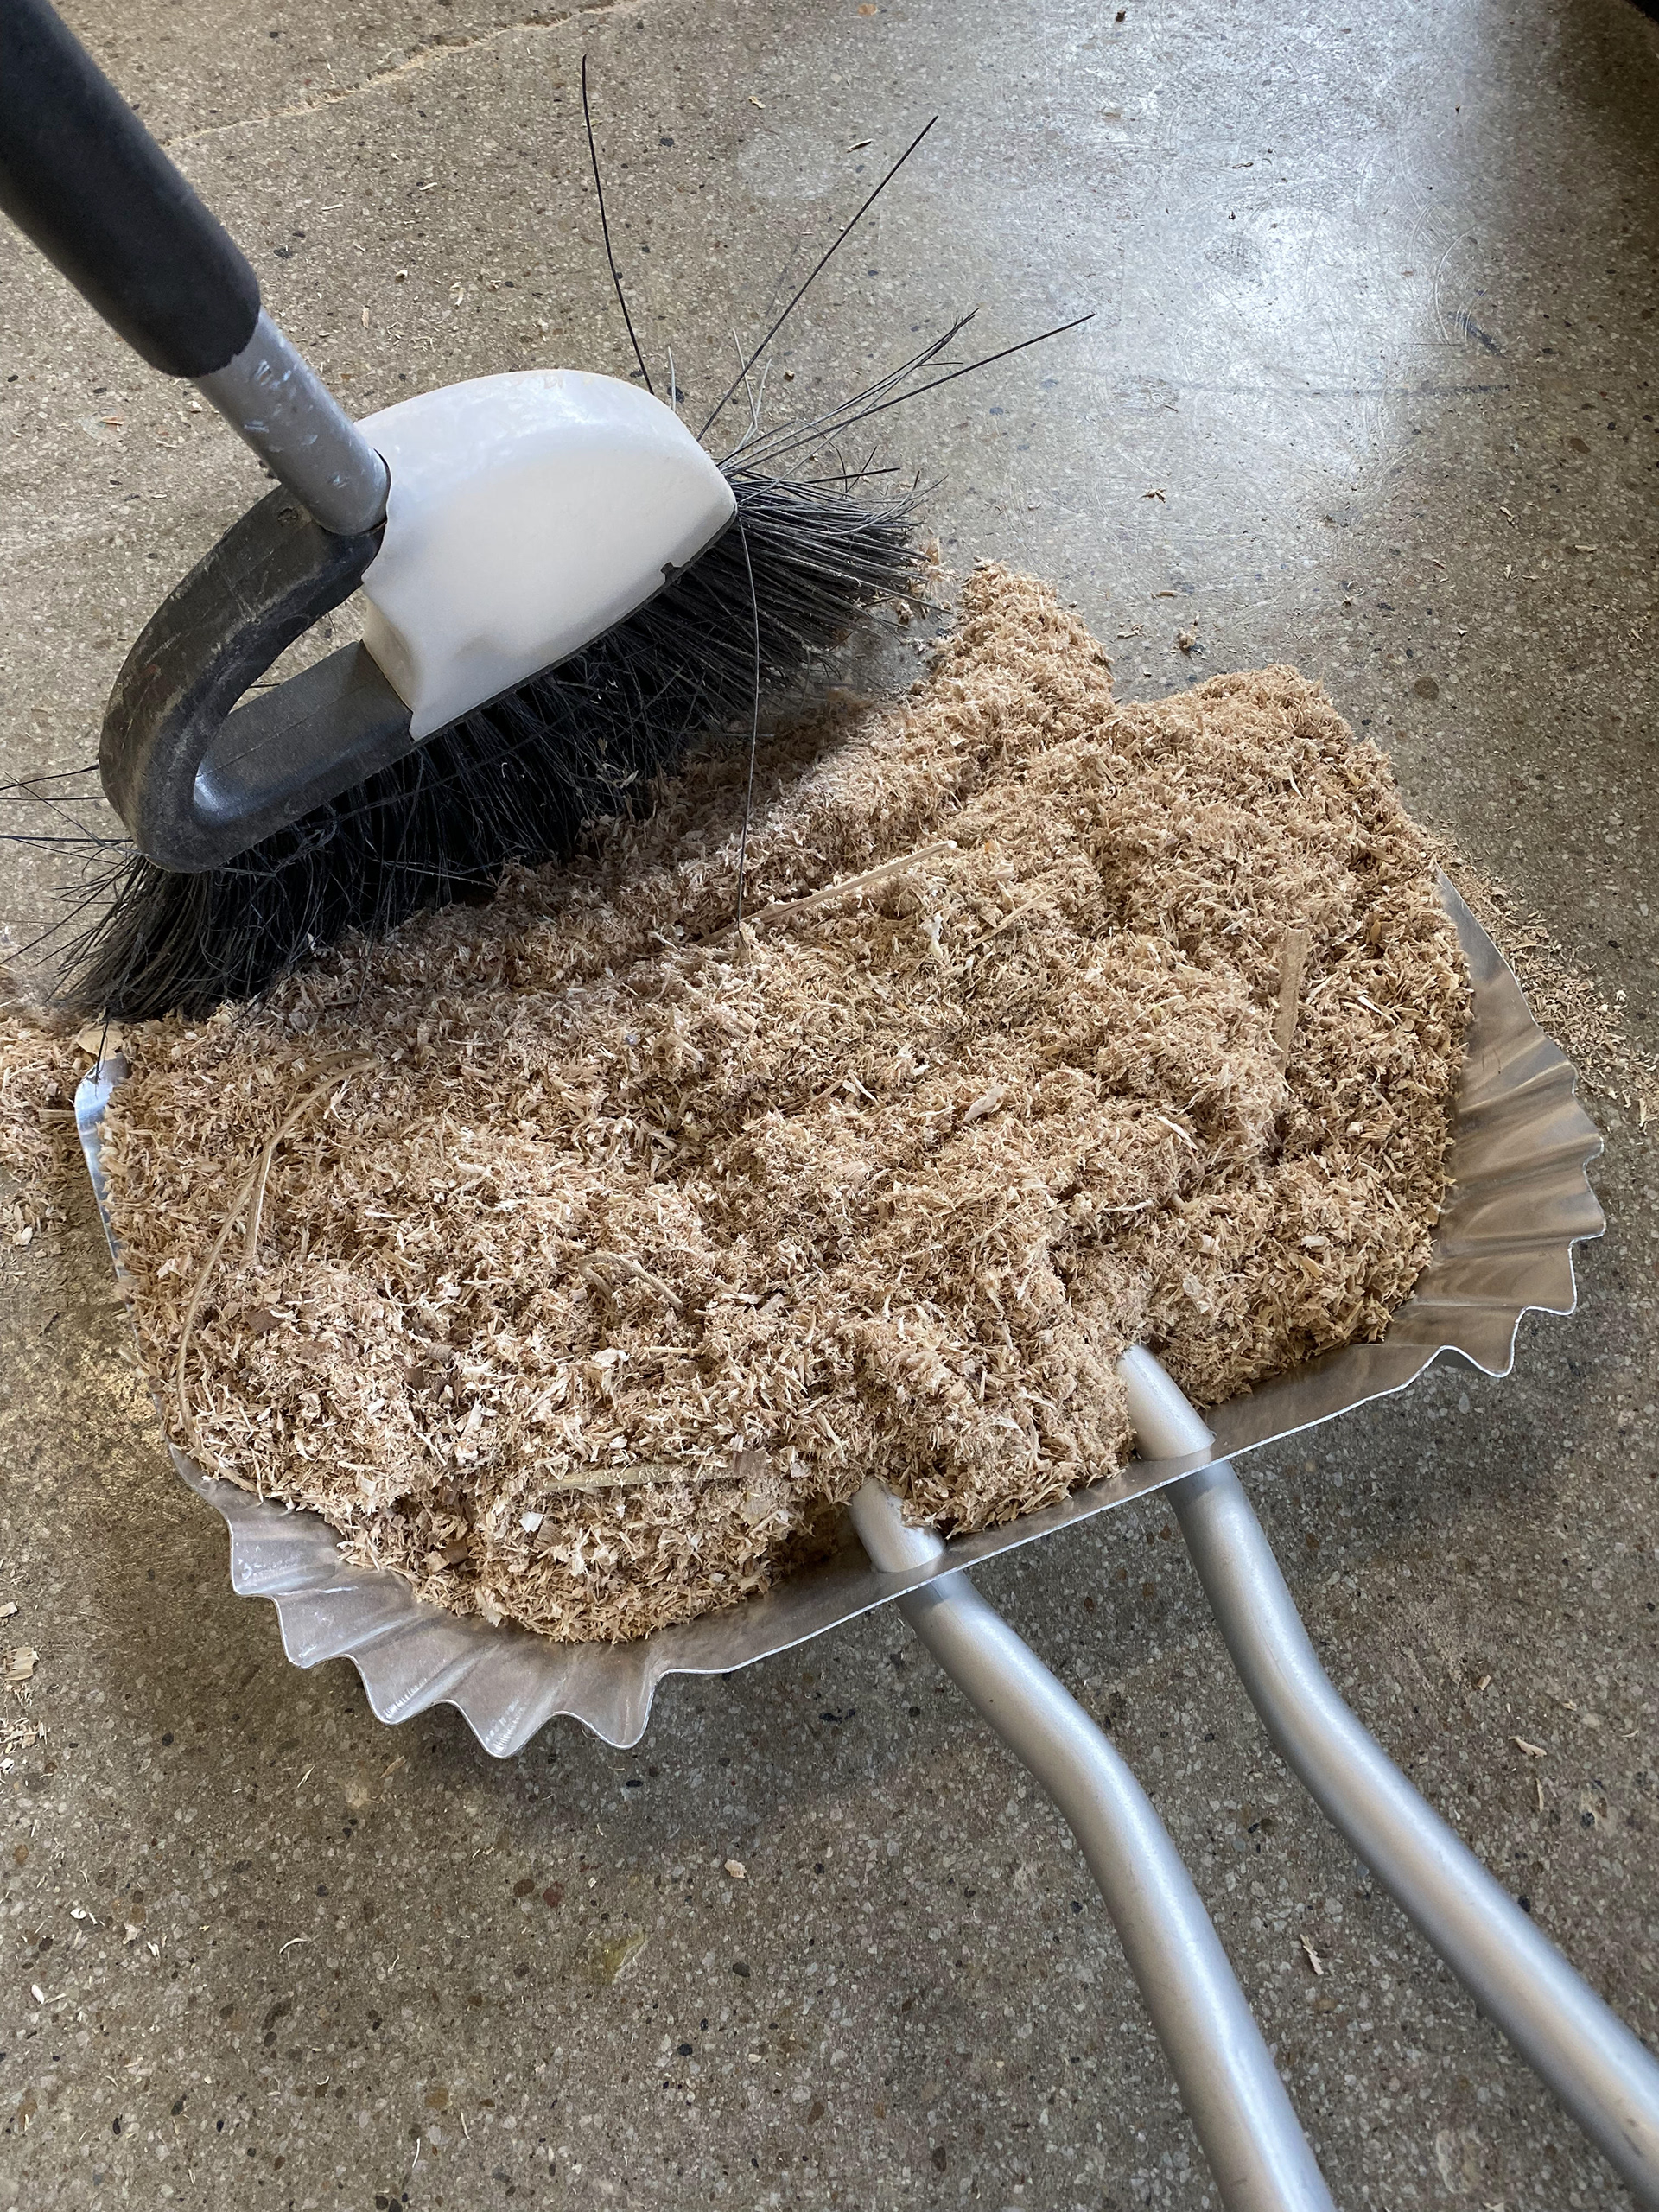
POST-DYE CLEAN UP
Once I defined the number of fabric straps needed, I began researching how I would logistically apply the straps to the stool. Because I wanted to incorporate a rainbow of color to represent a variation in identity, I realized it would be most cost-effective to buy the correct amount of fabric then cut and hand-dye the colors myself. I developed an 11 color scheme, cut the wheel of straps into the appropriate lengths, then prepare dye baths as I went. The entire process took nearly a day, and it stained many of my towels along with my entire tub.
PHYSICAL FABRICATION
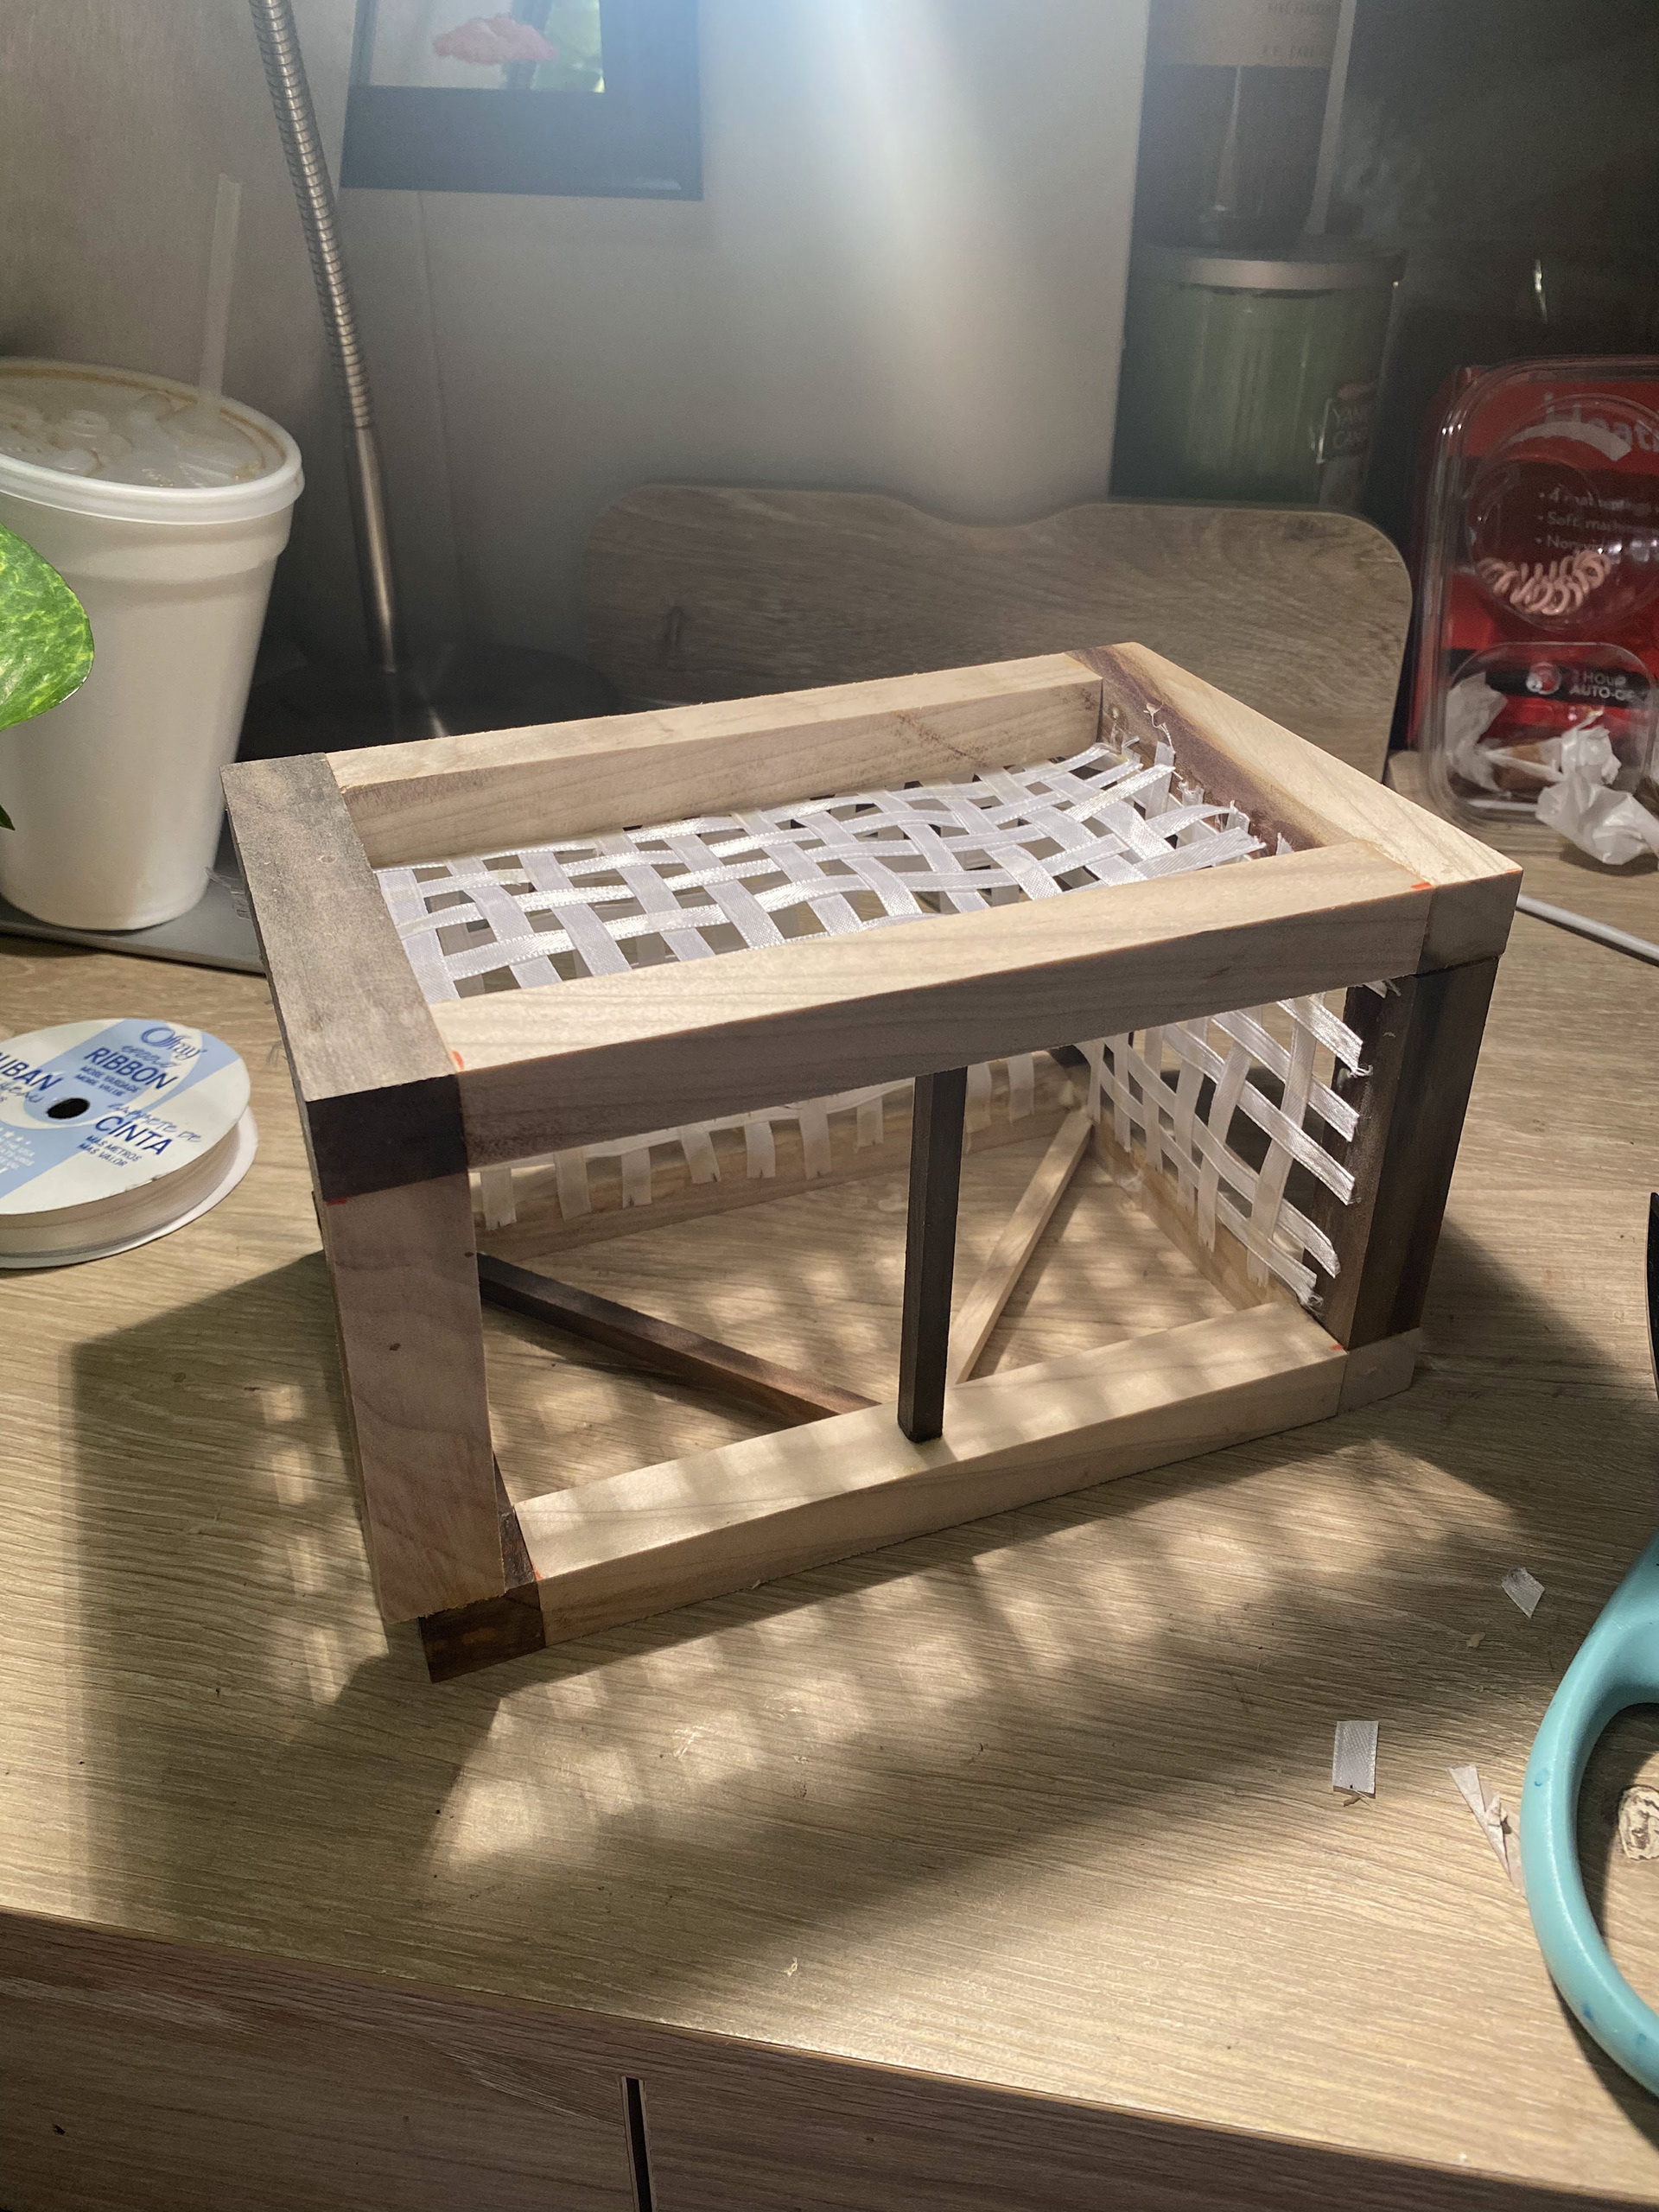
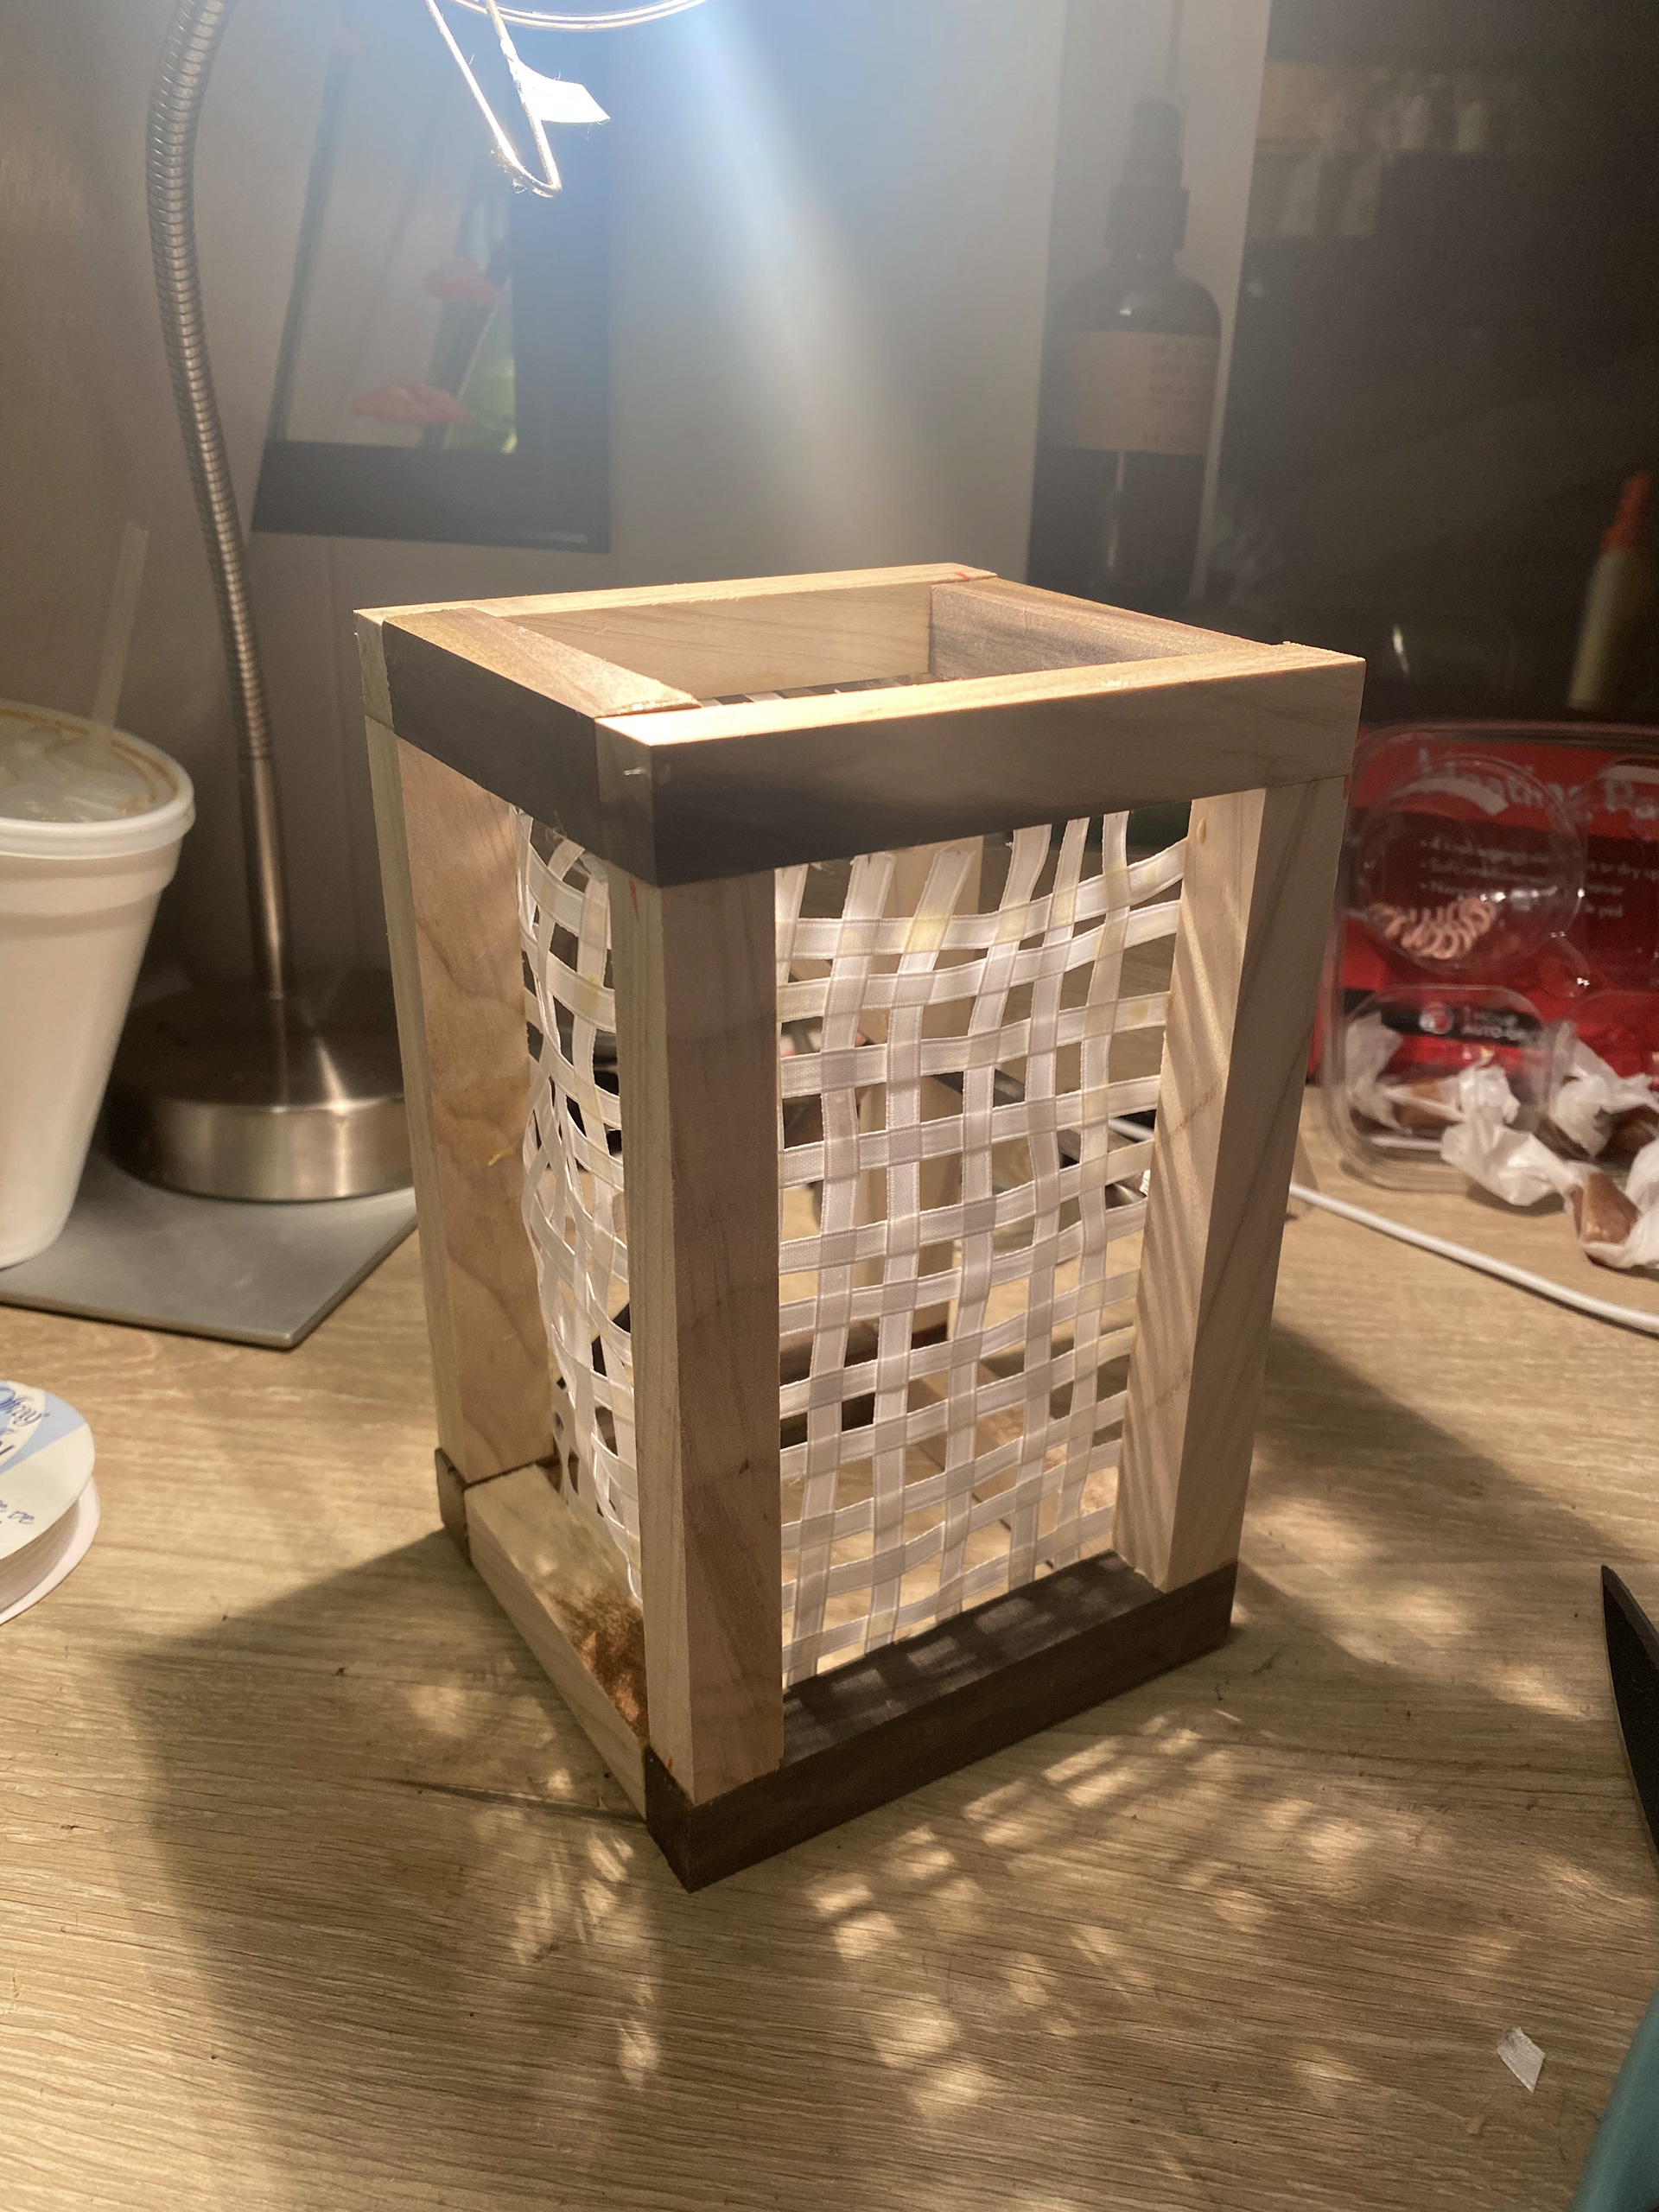
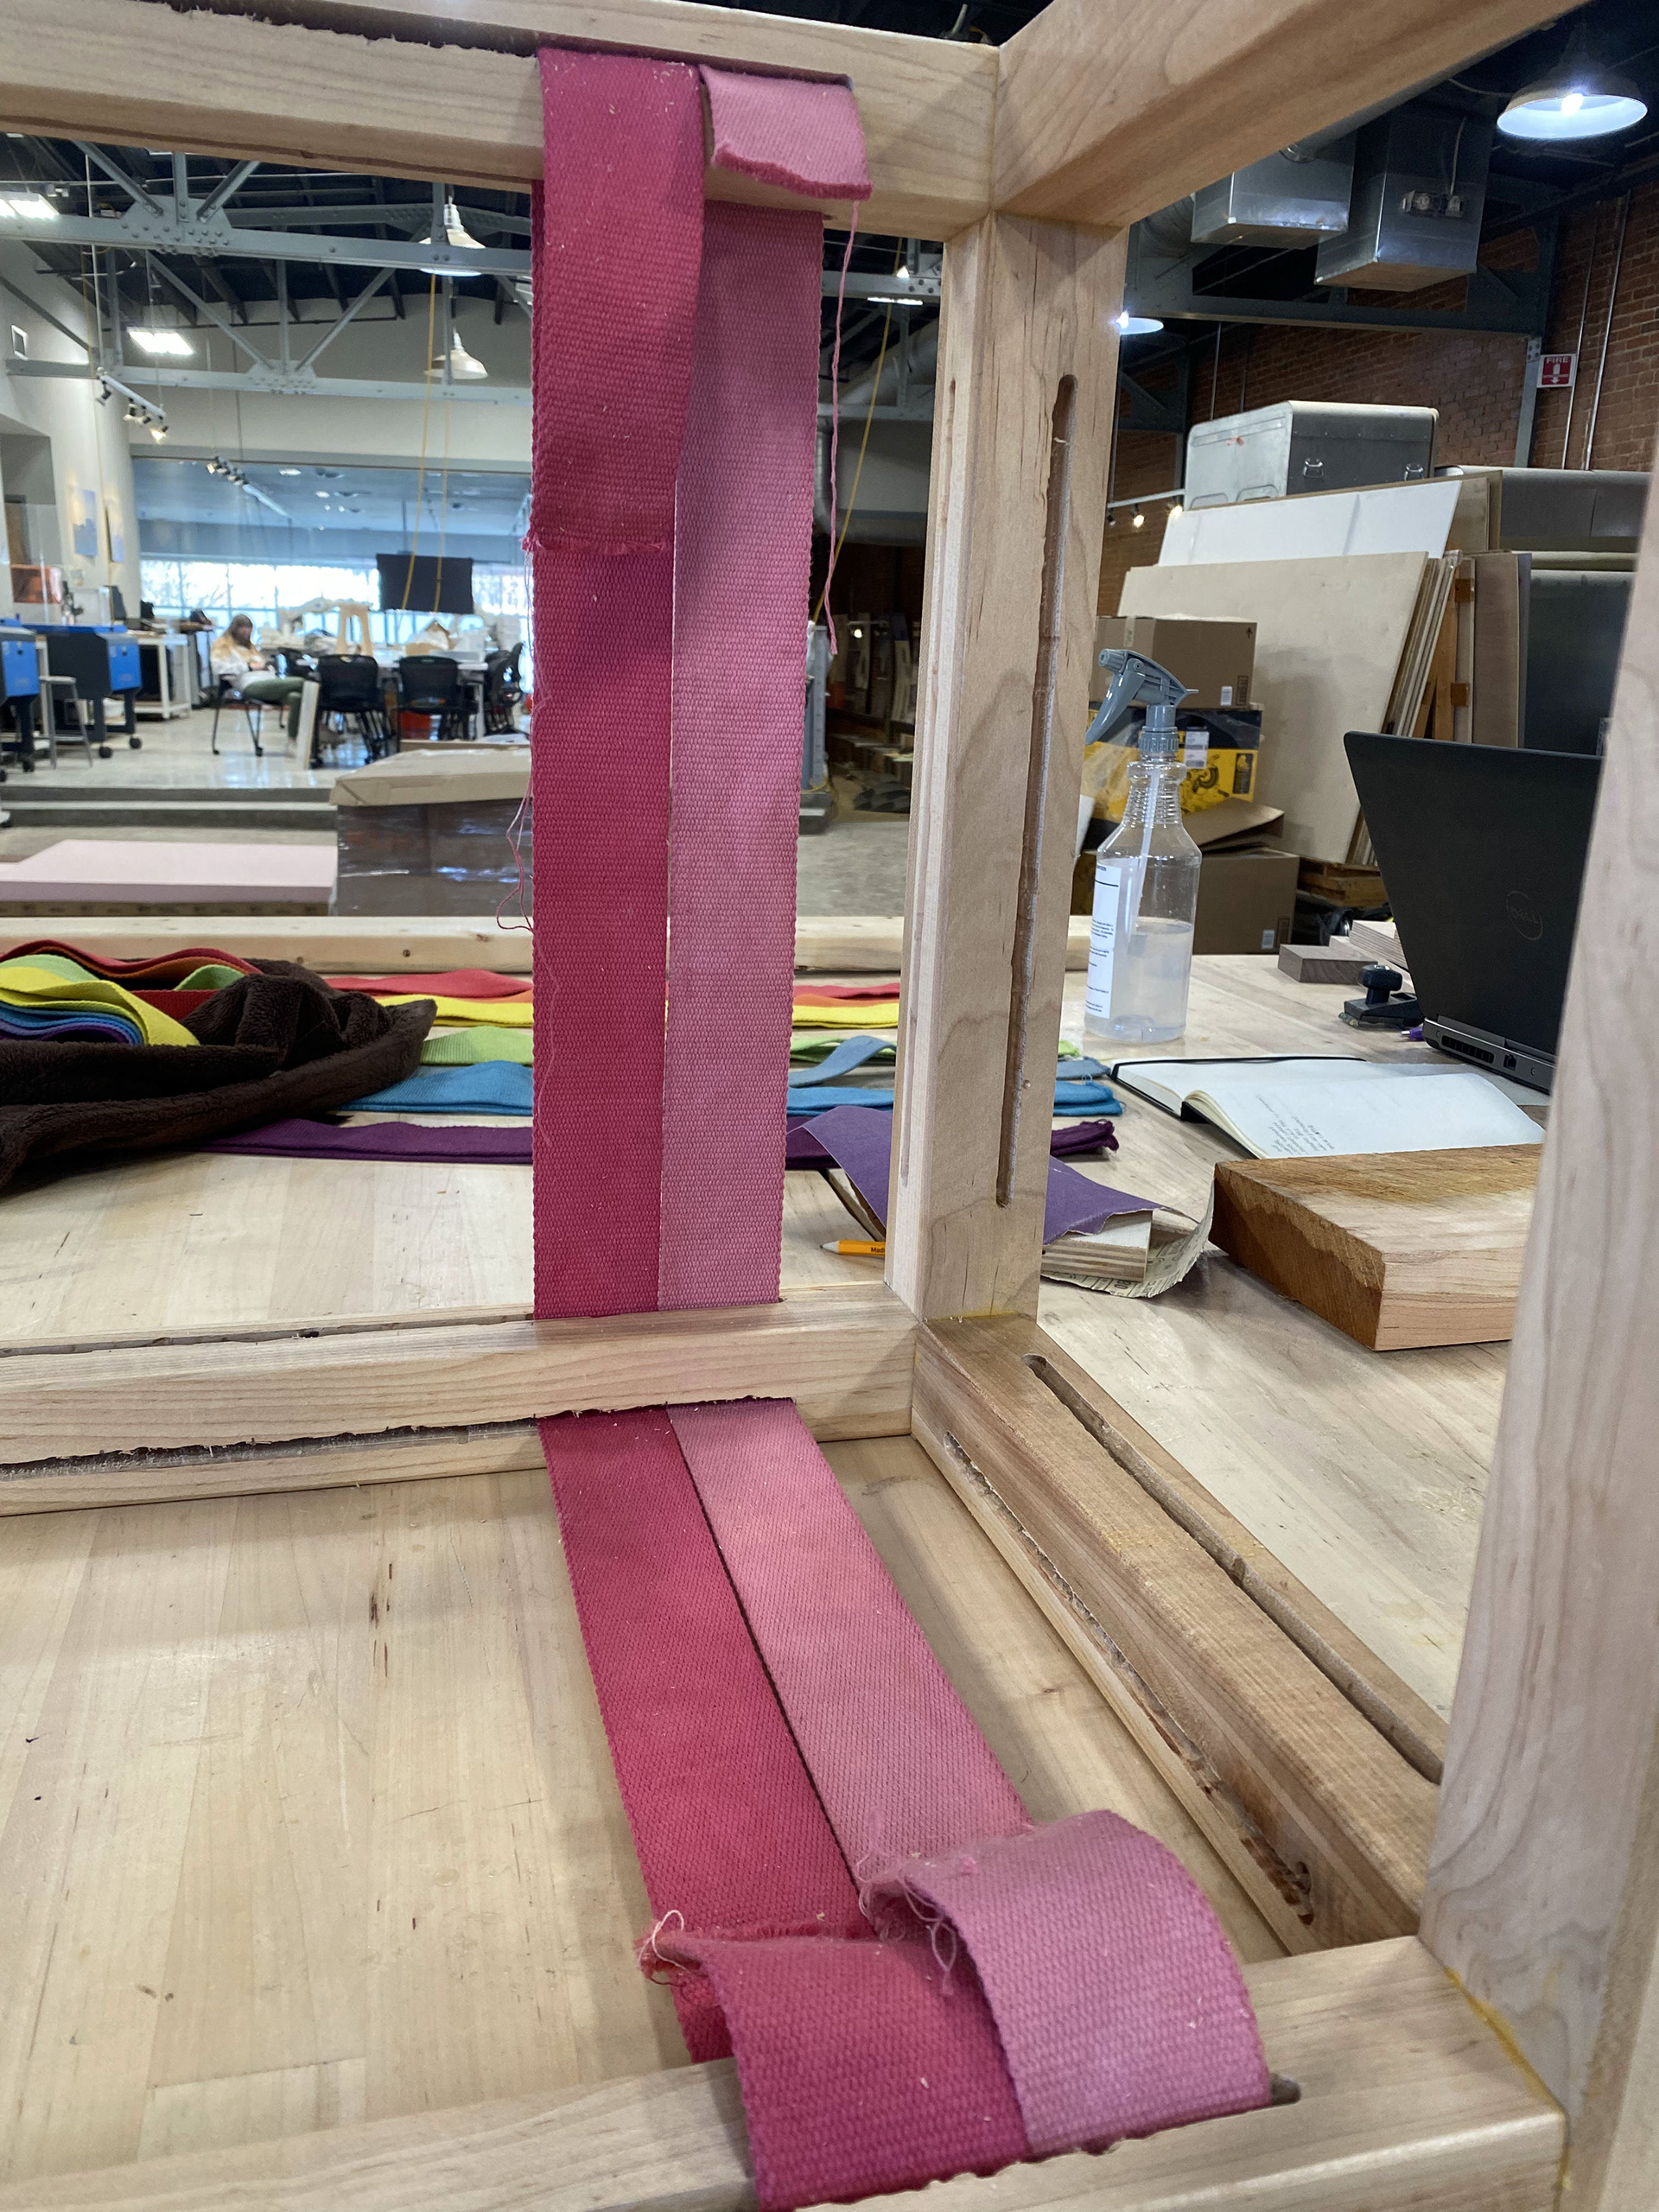
The first step in physical fabrication of the stool was creating a scale model. From this process, I learned that the straps should weave through each leg support, stretching across at least two faces. The model also allowed me to pinpoint the exact width of the straps; I selected straps that are 2" wide and 1/8" thick. The test model also highlighted future issues I would encounter with the original supports across two of the open faces; during the fabrication phase, these supports were eliminated. While the test model was created using whatever scrap wood was available at the university's Fabrication Lab, I selected soft maple wood for the final model. "Soft" is a commercial term that separates it from other maple woods that are considerably harder. The wood was cost effective, so many students in the class selected it. Its light color and easy workability made it an attractive option.
FINAL MODEL
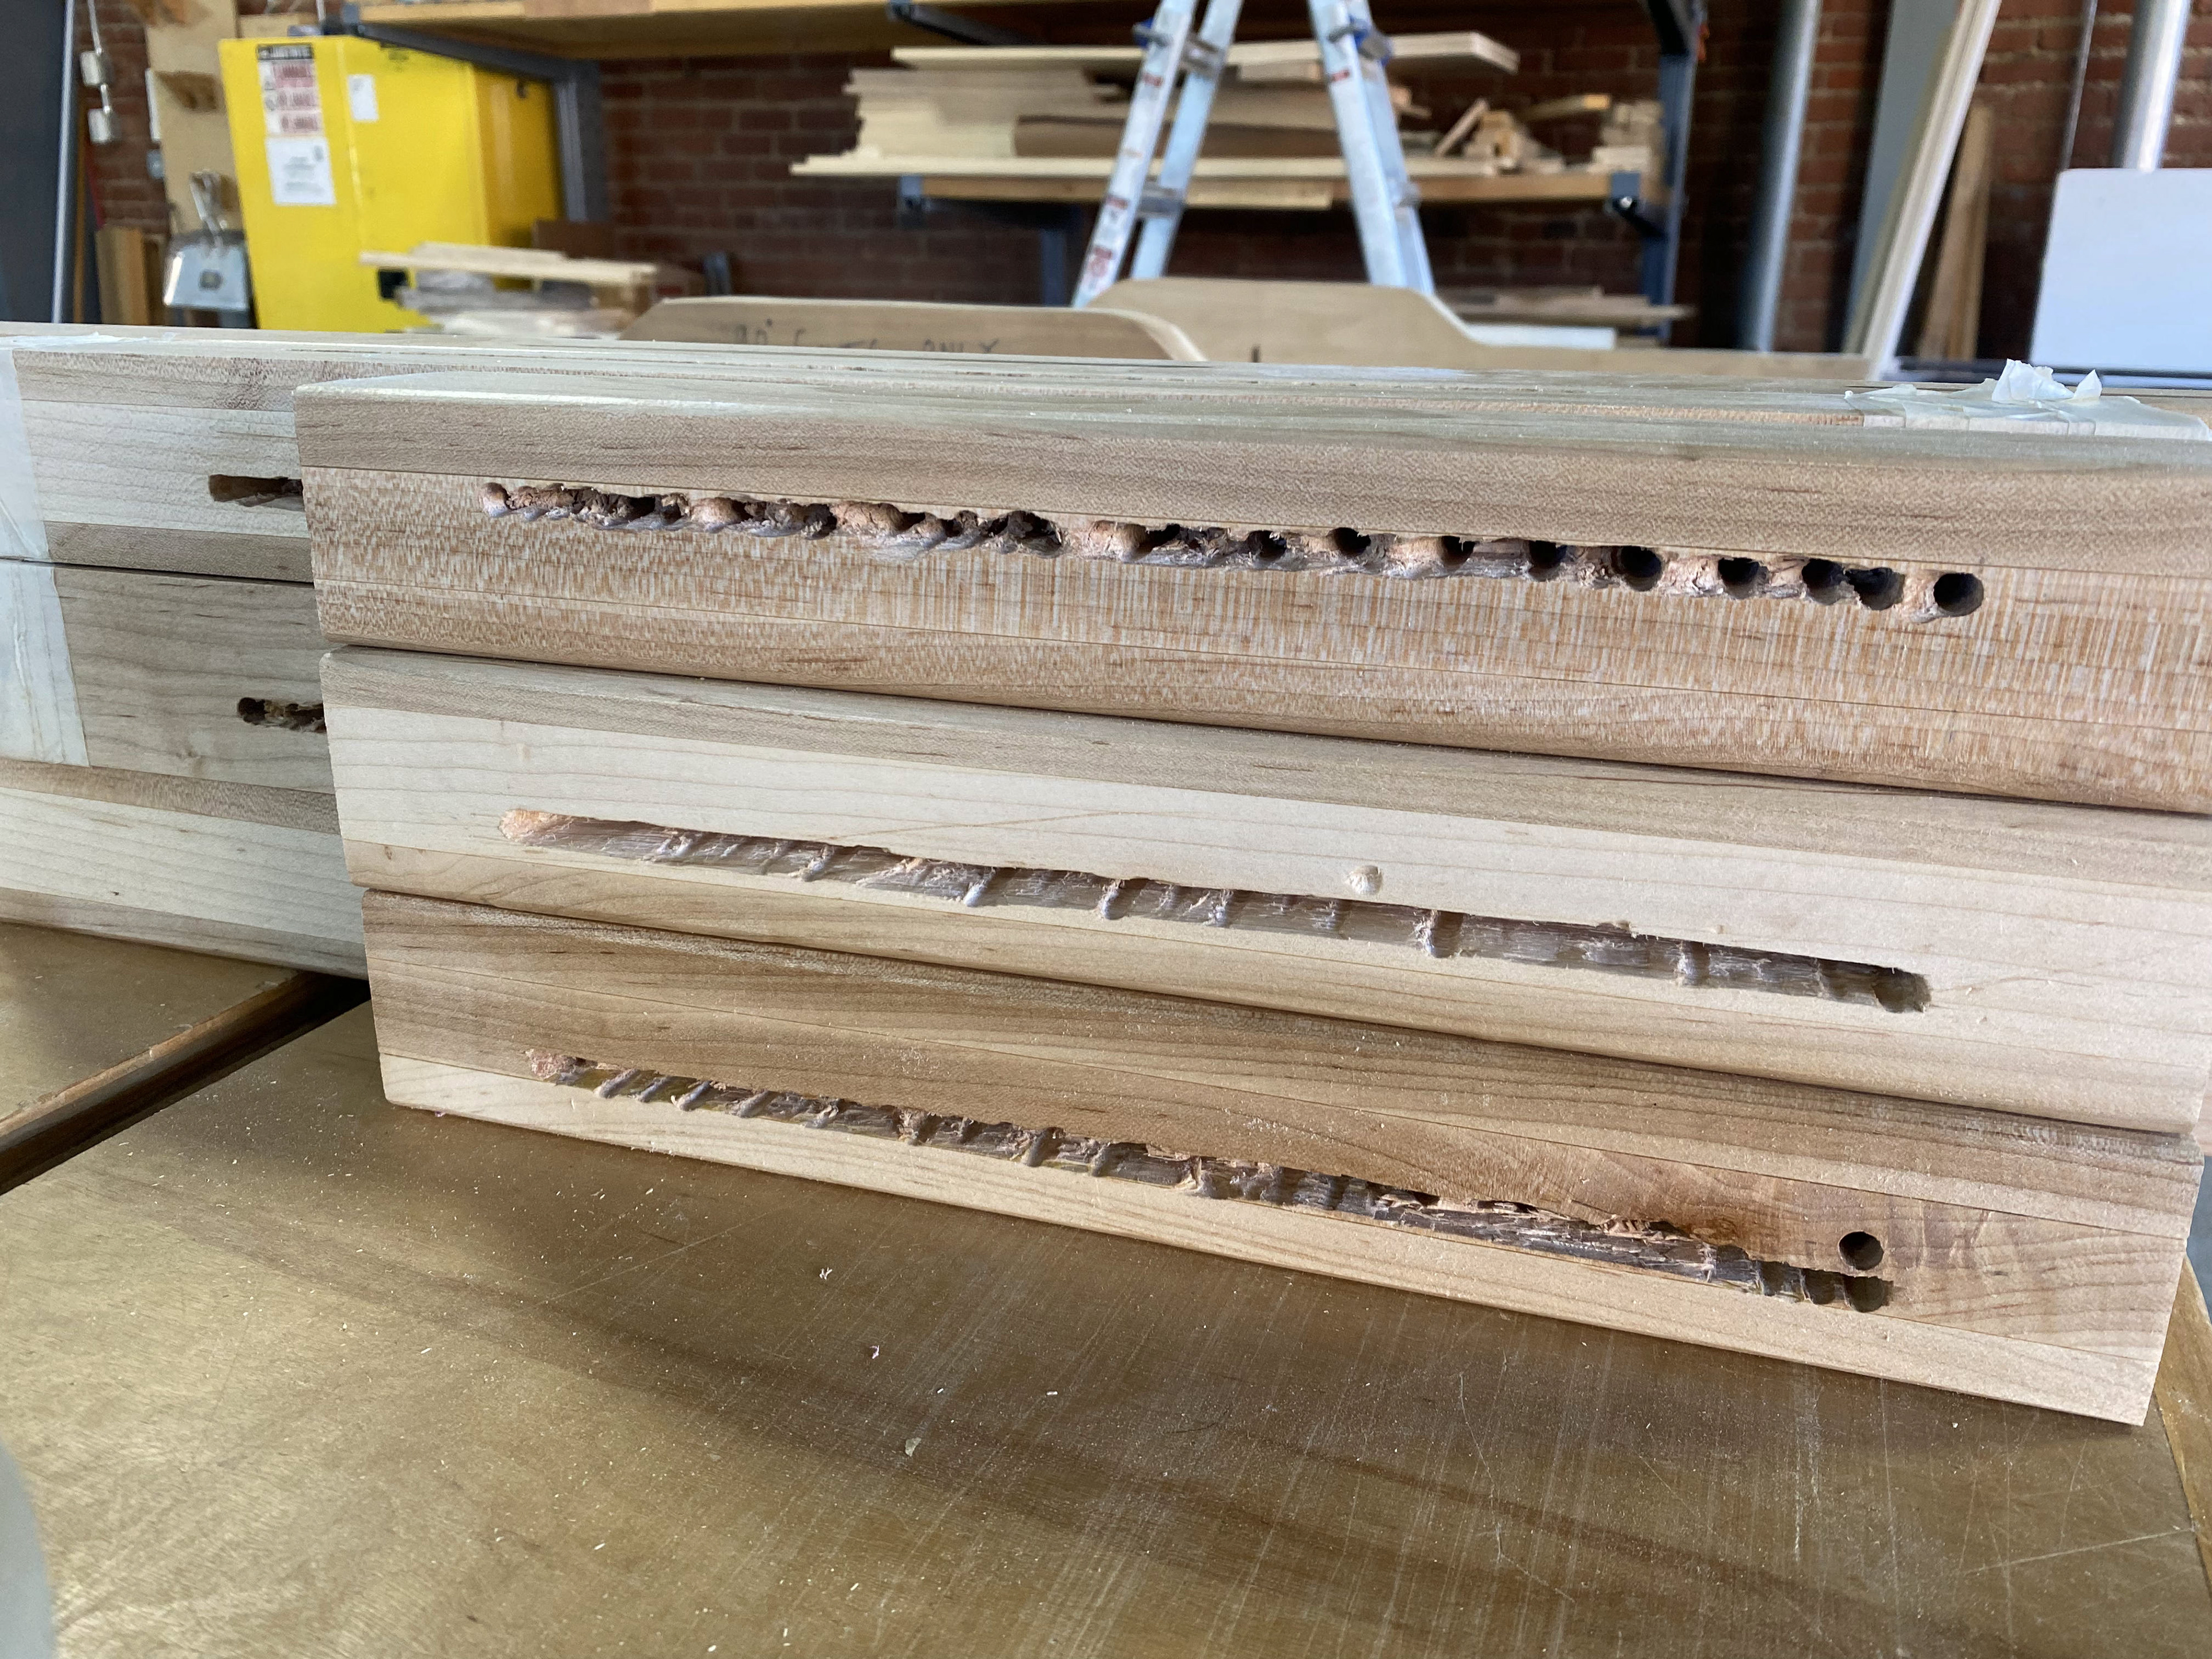
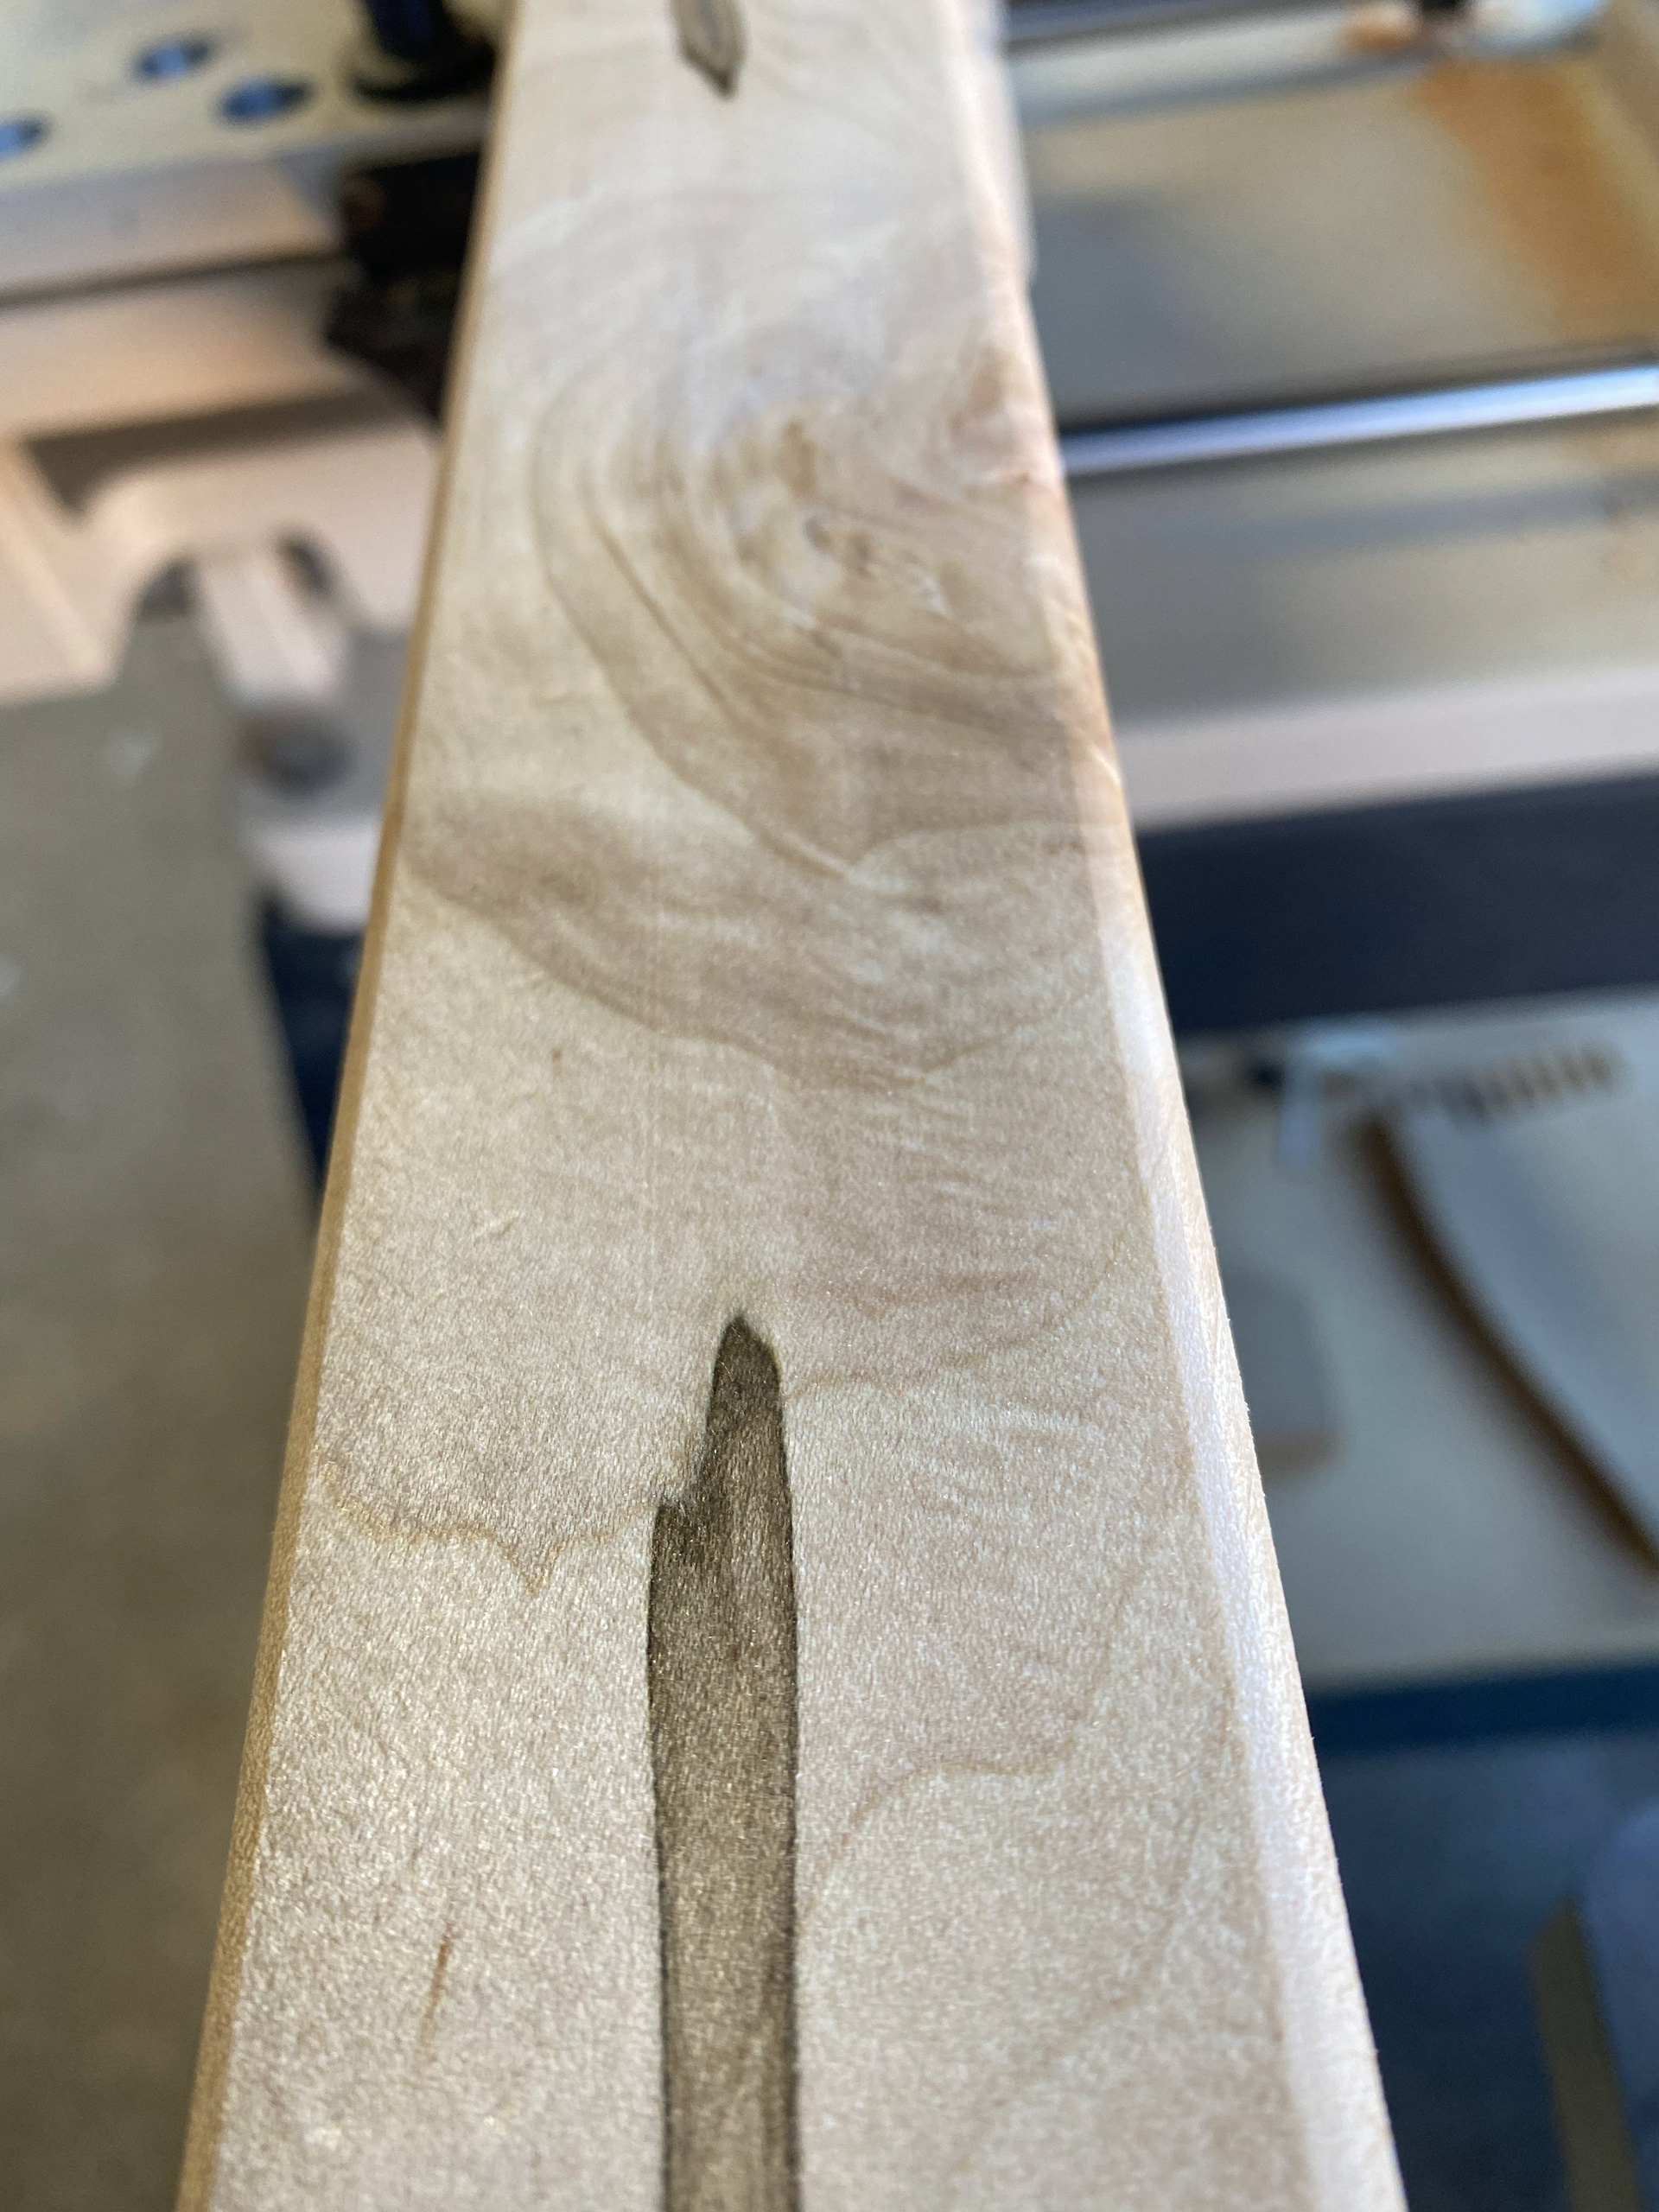
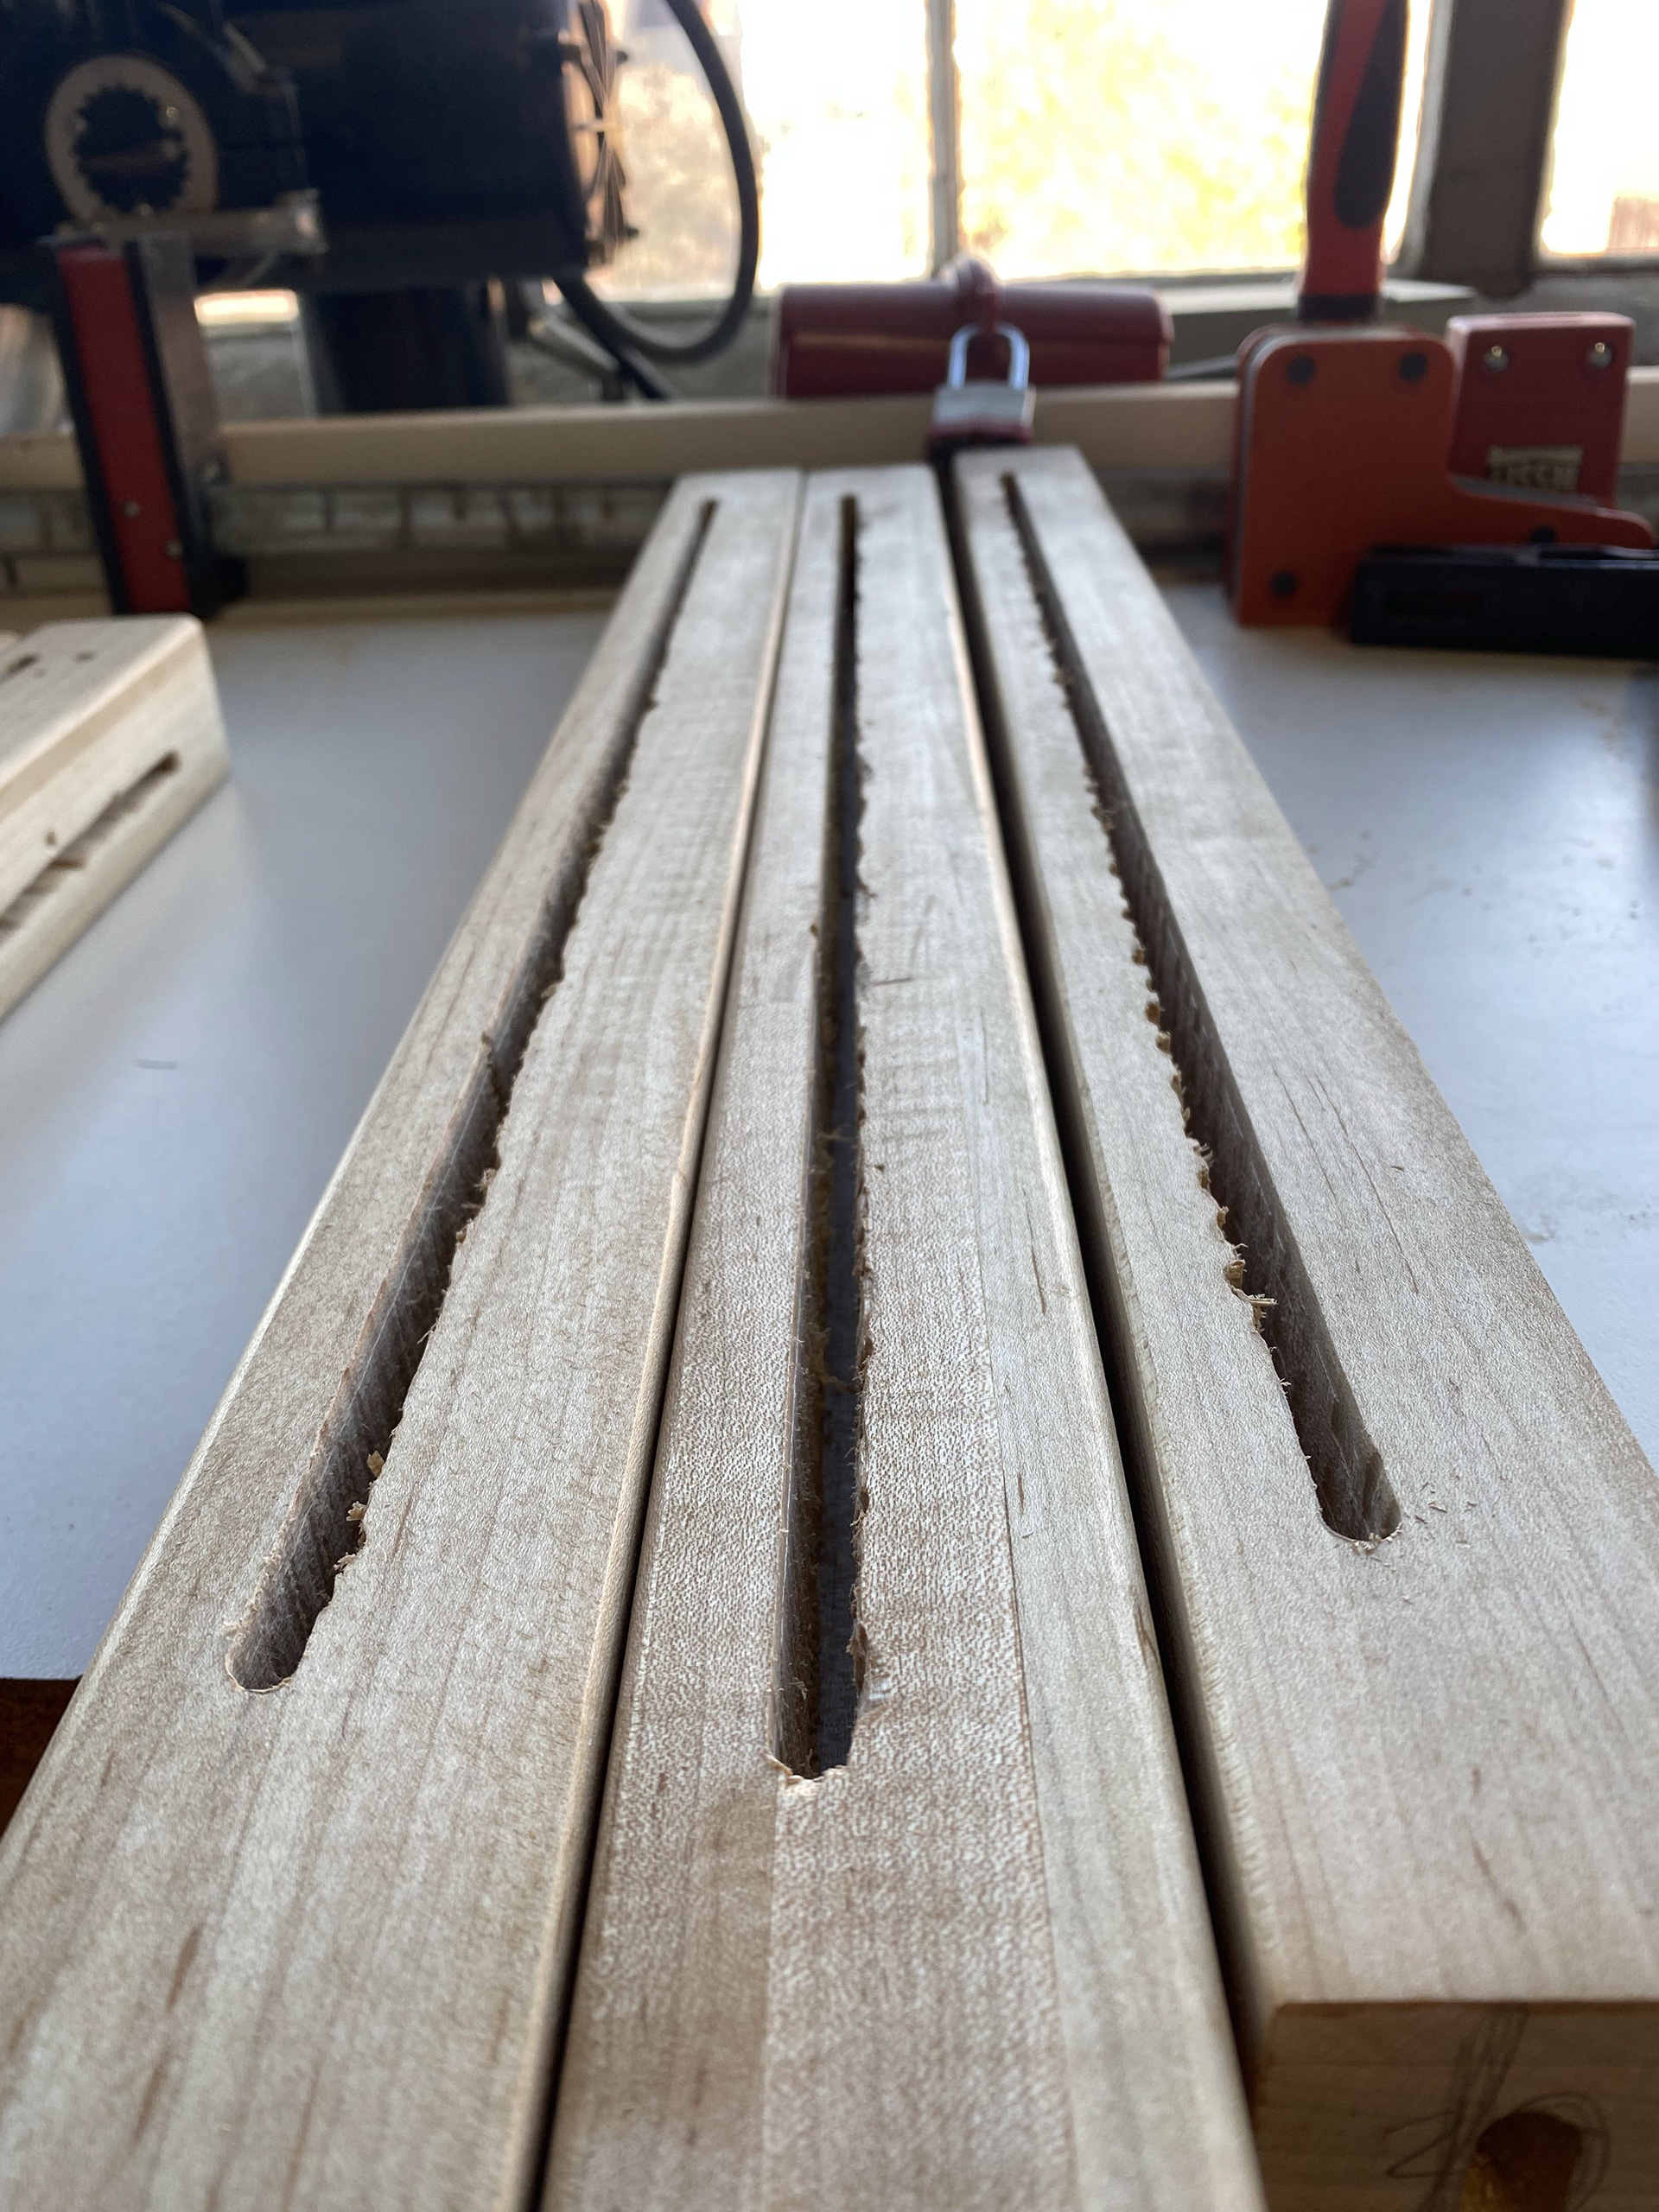
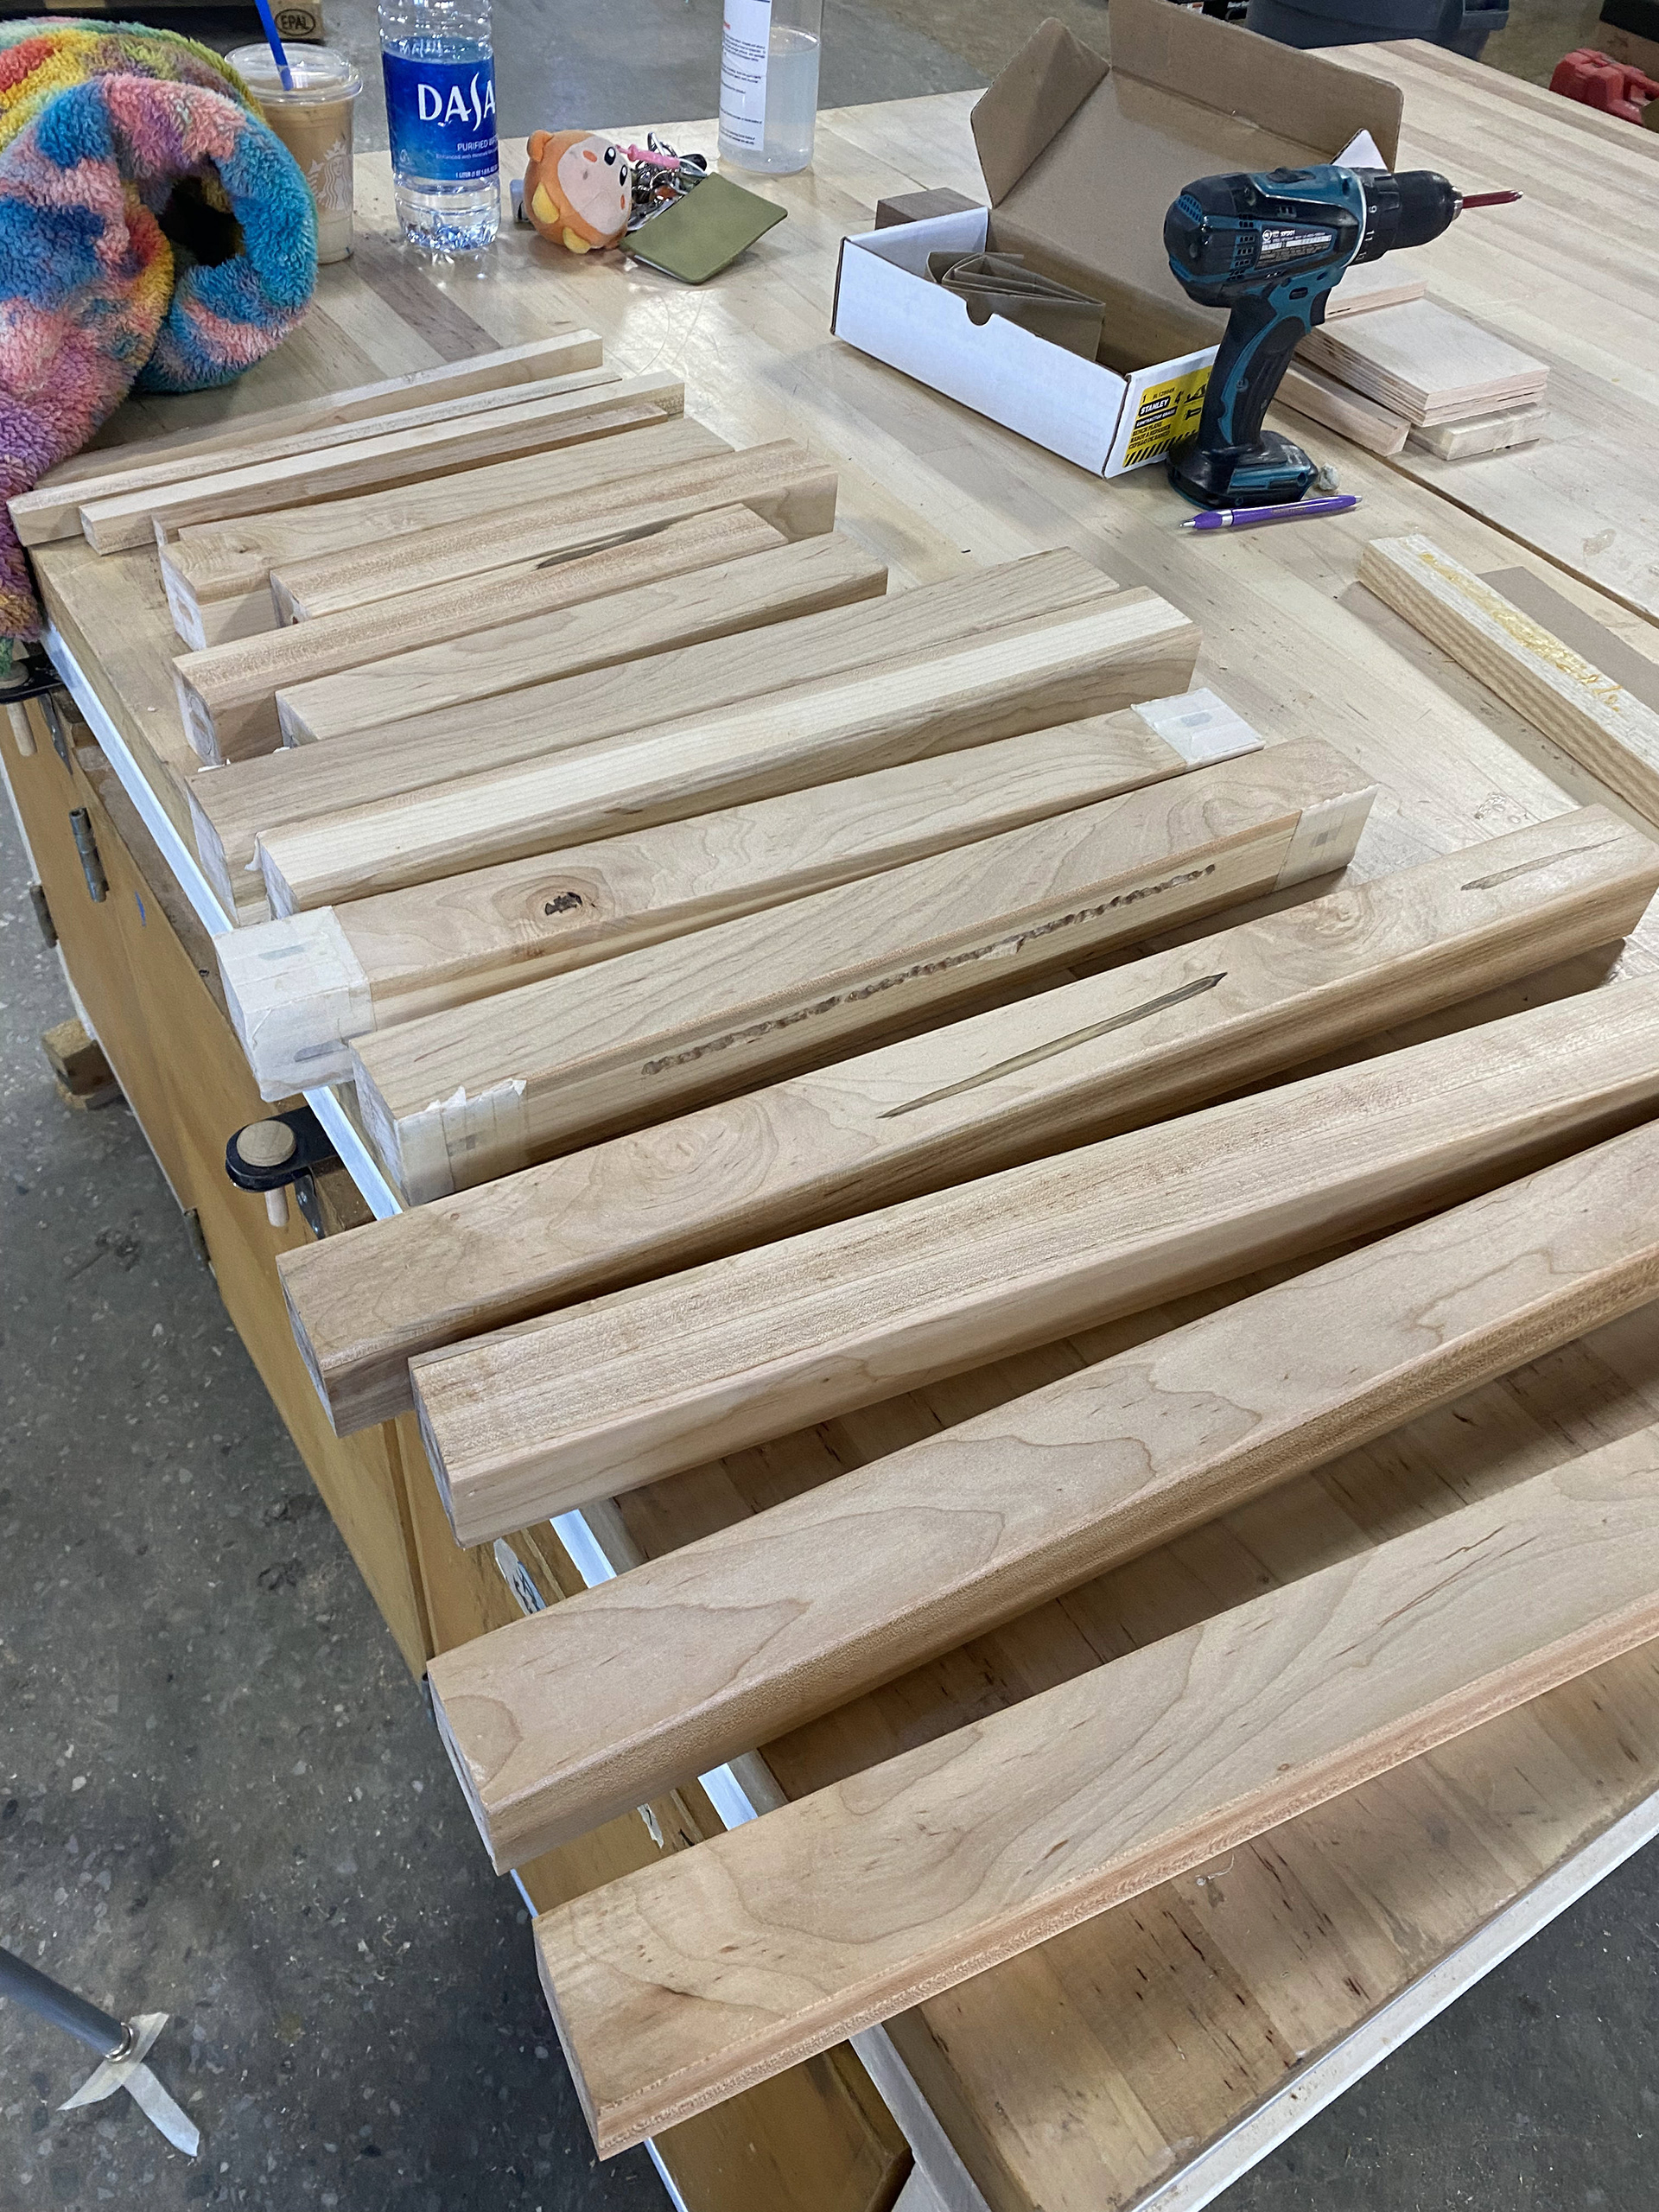
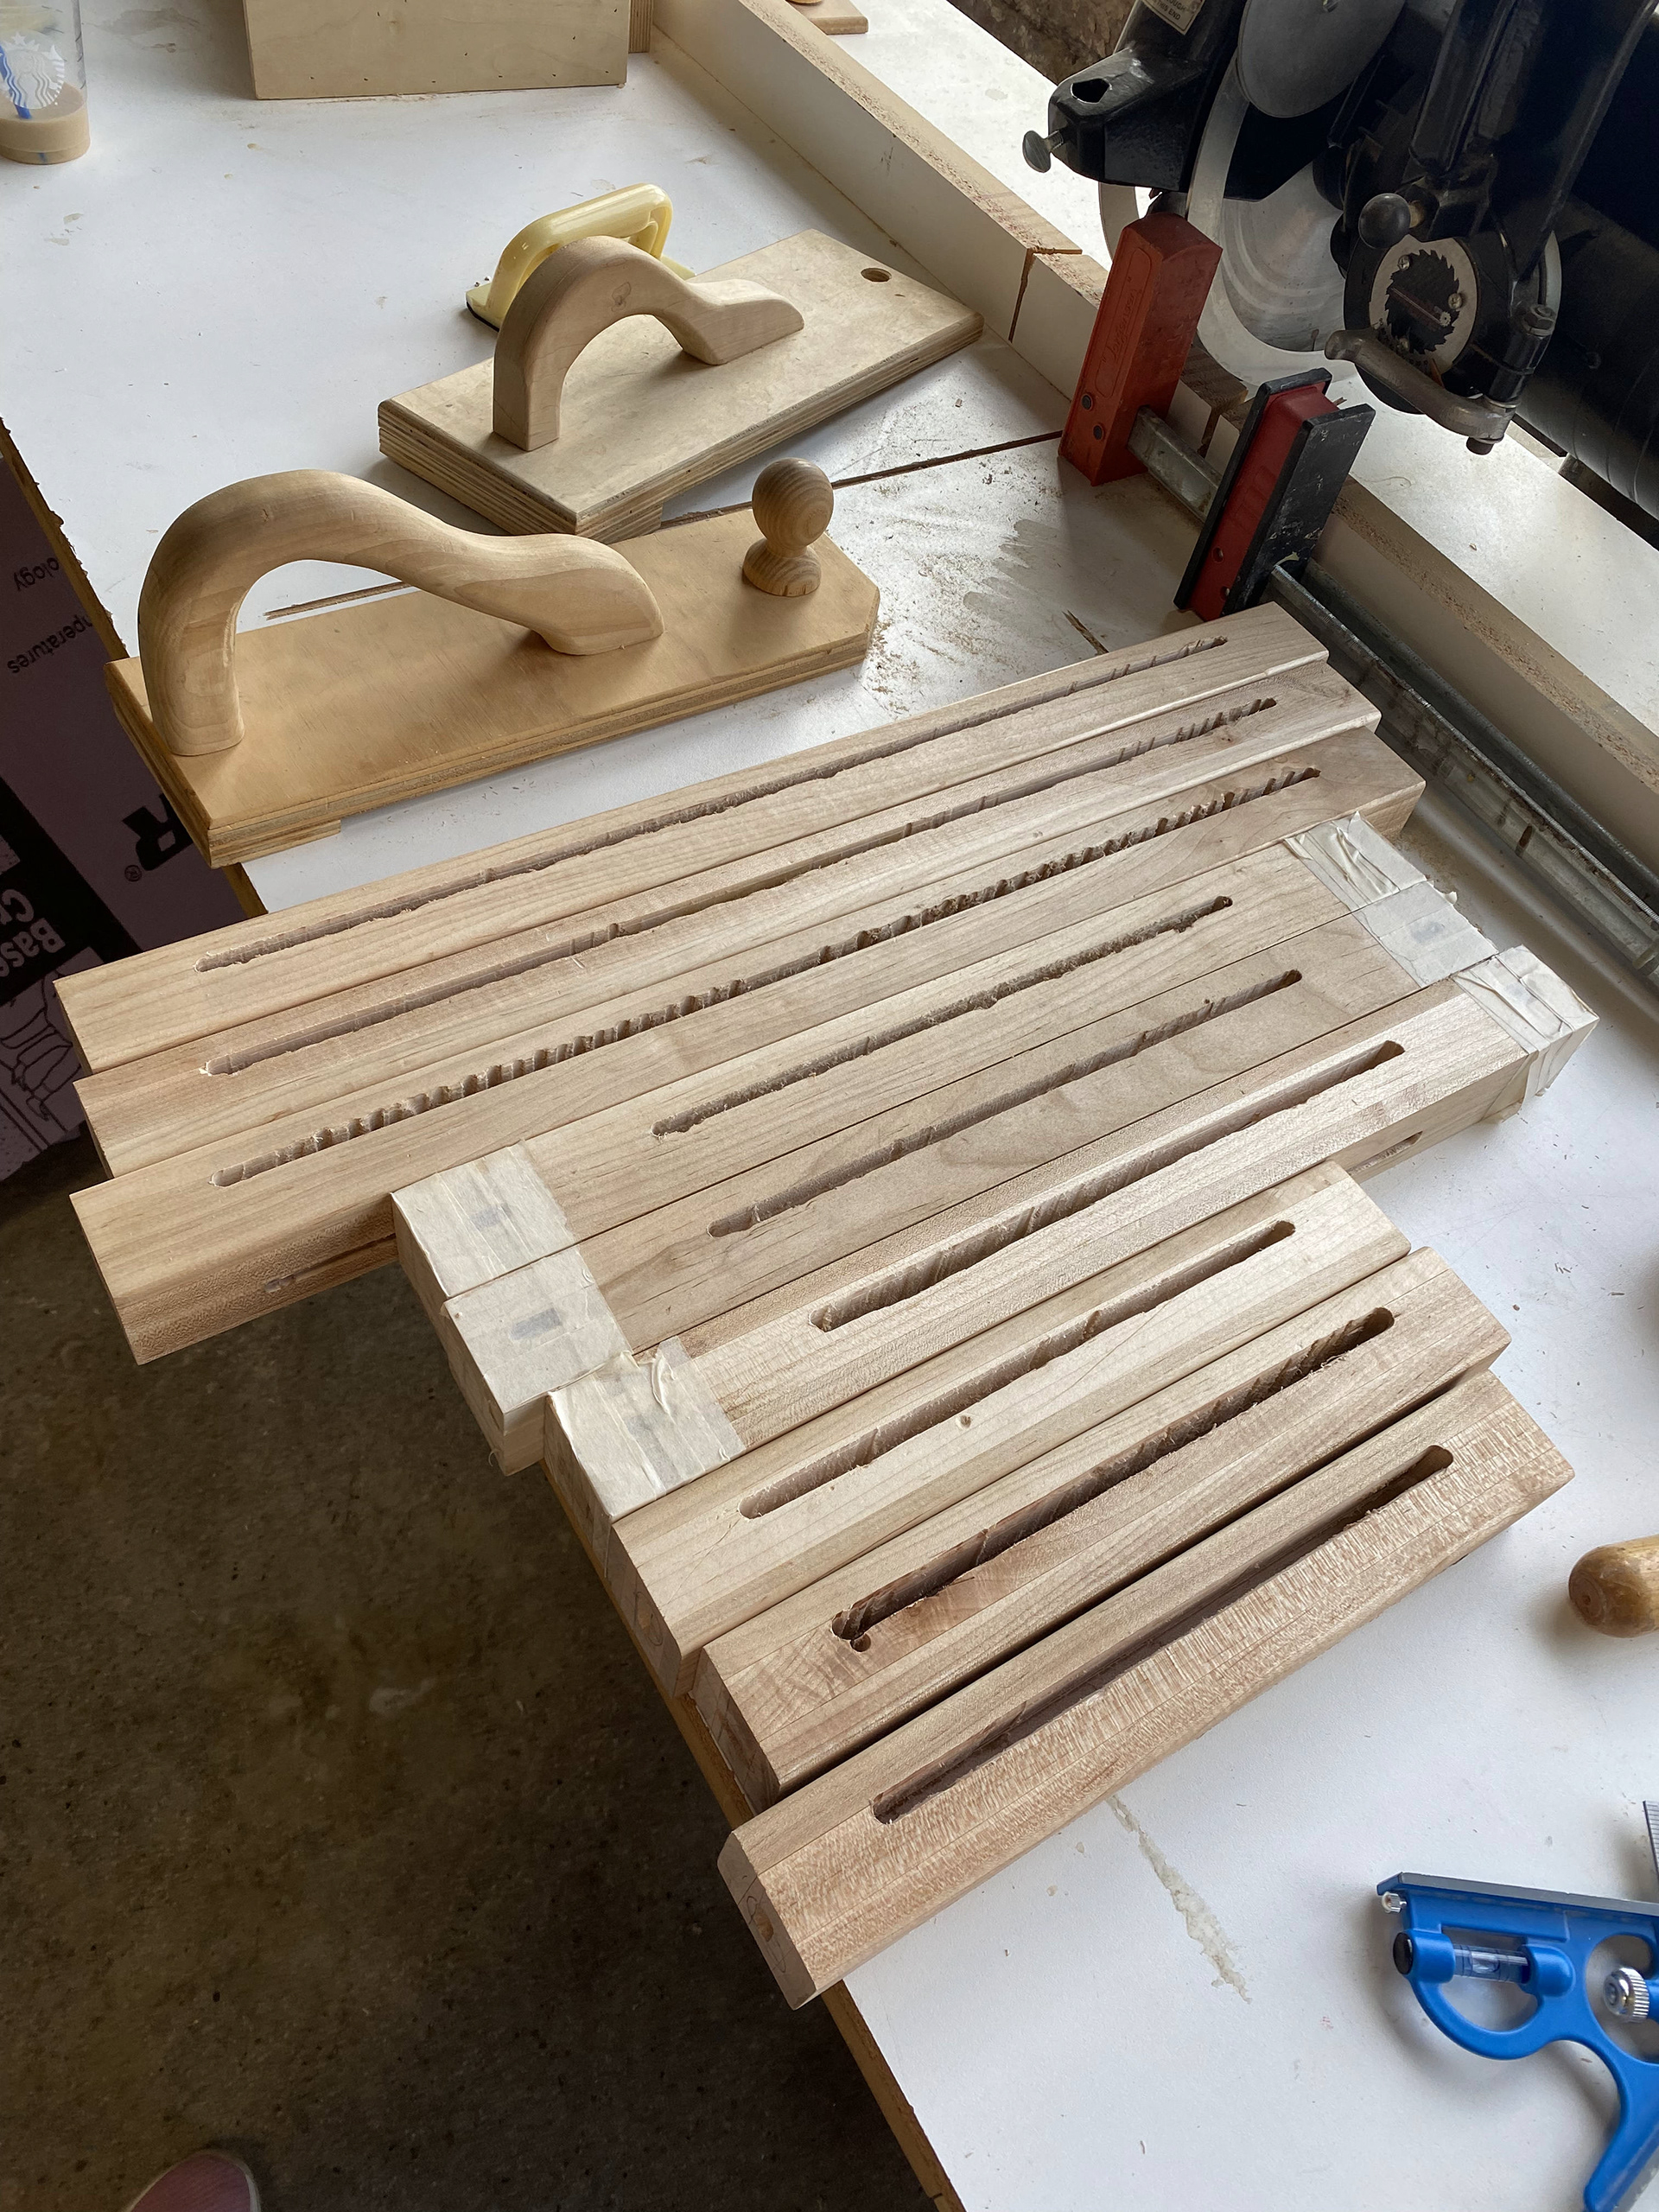
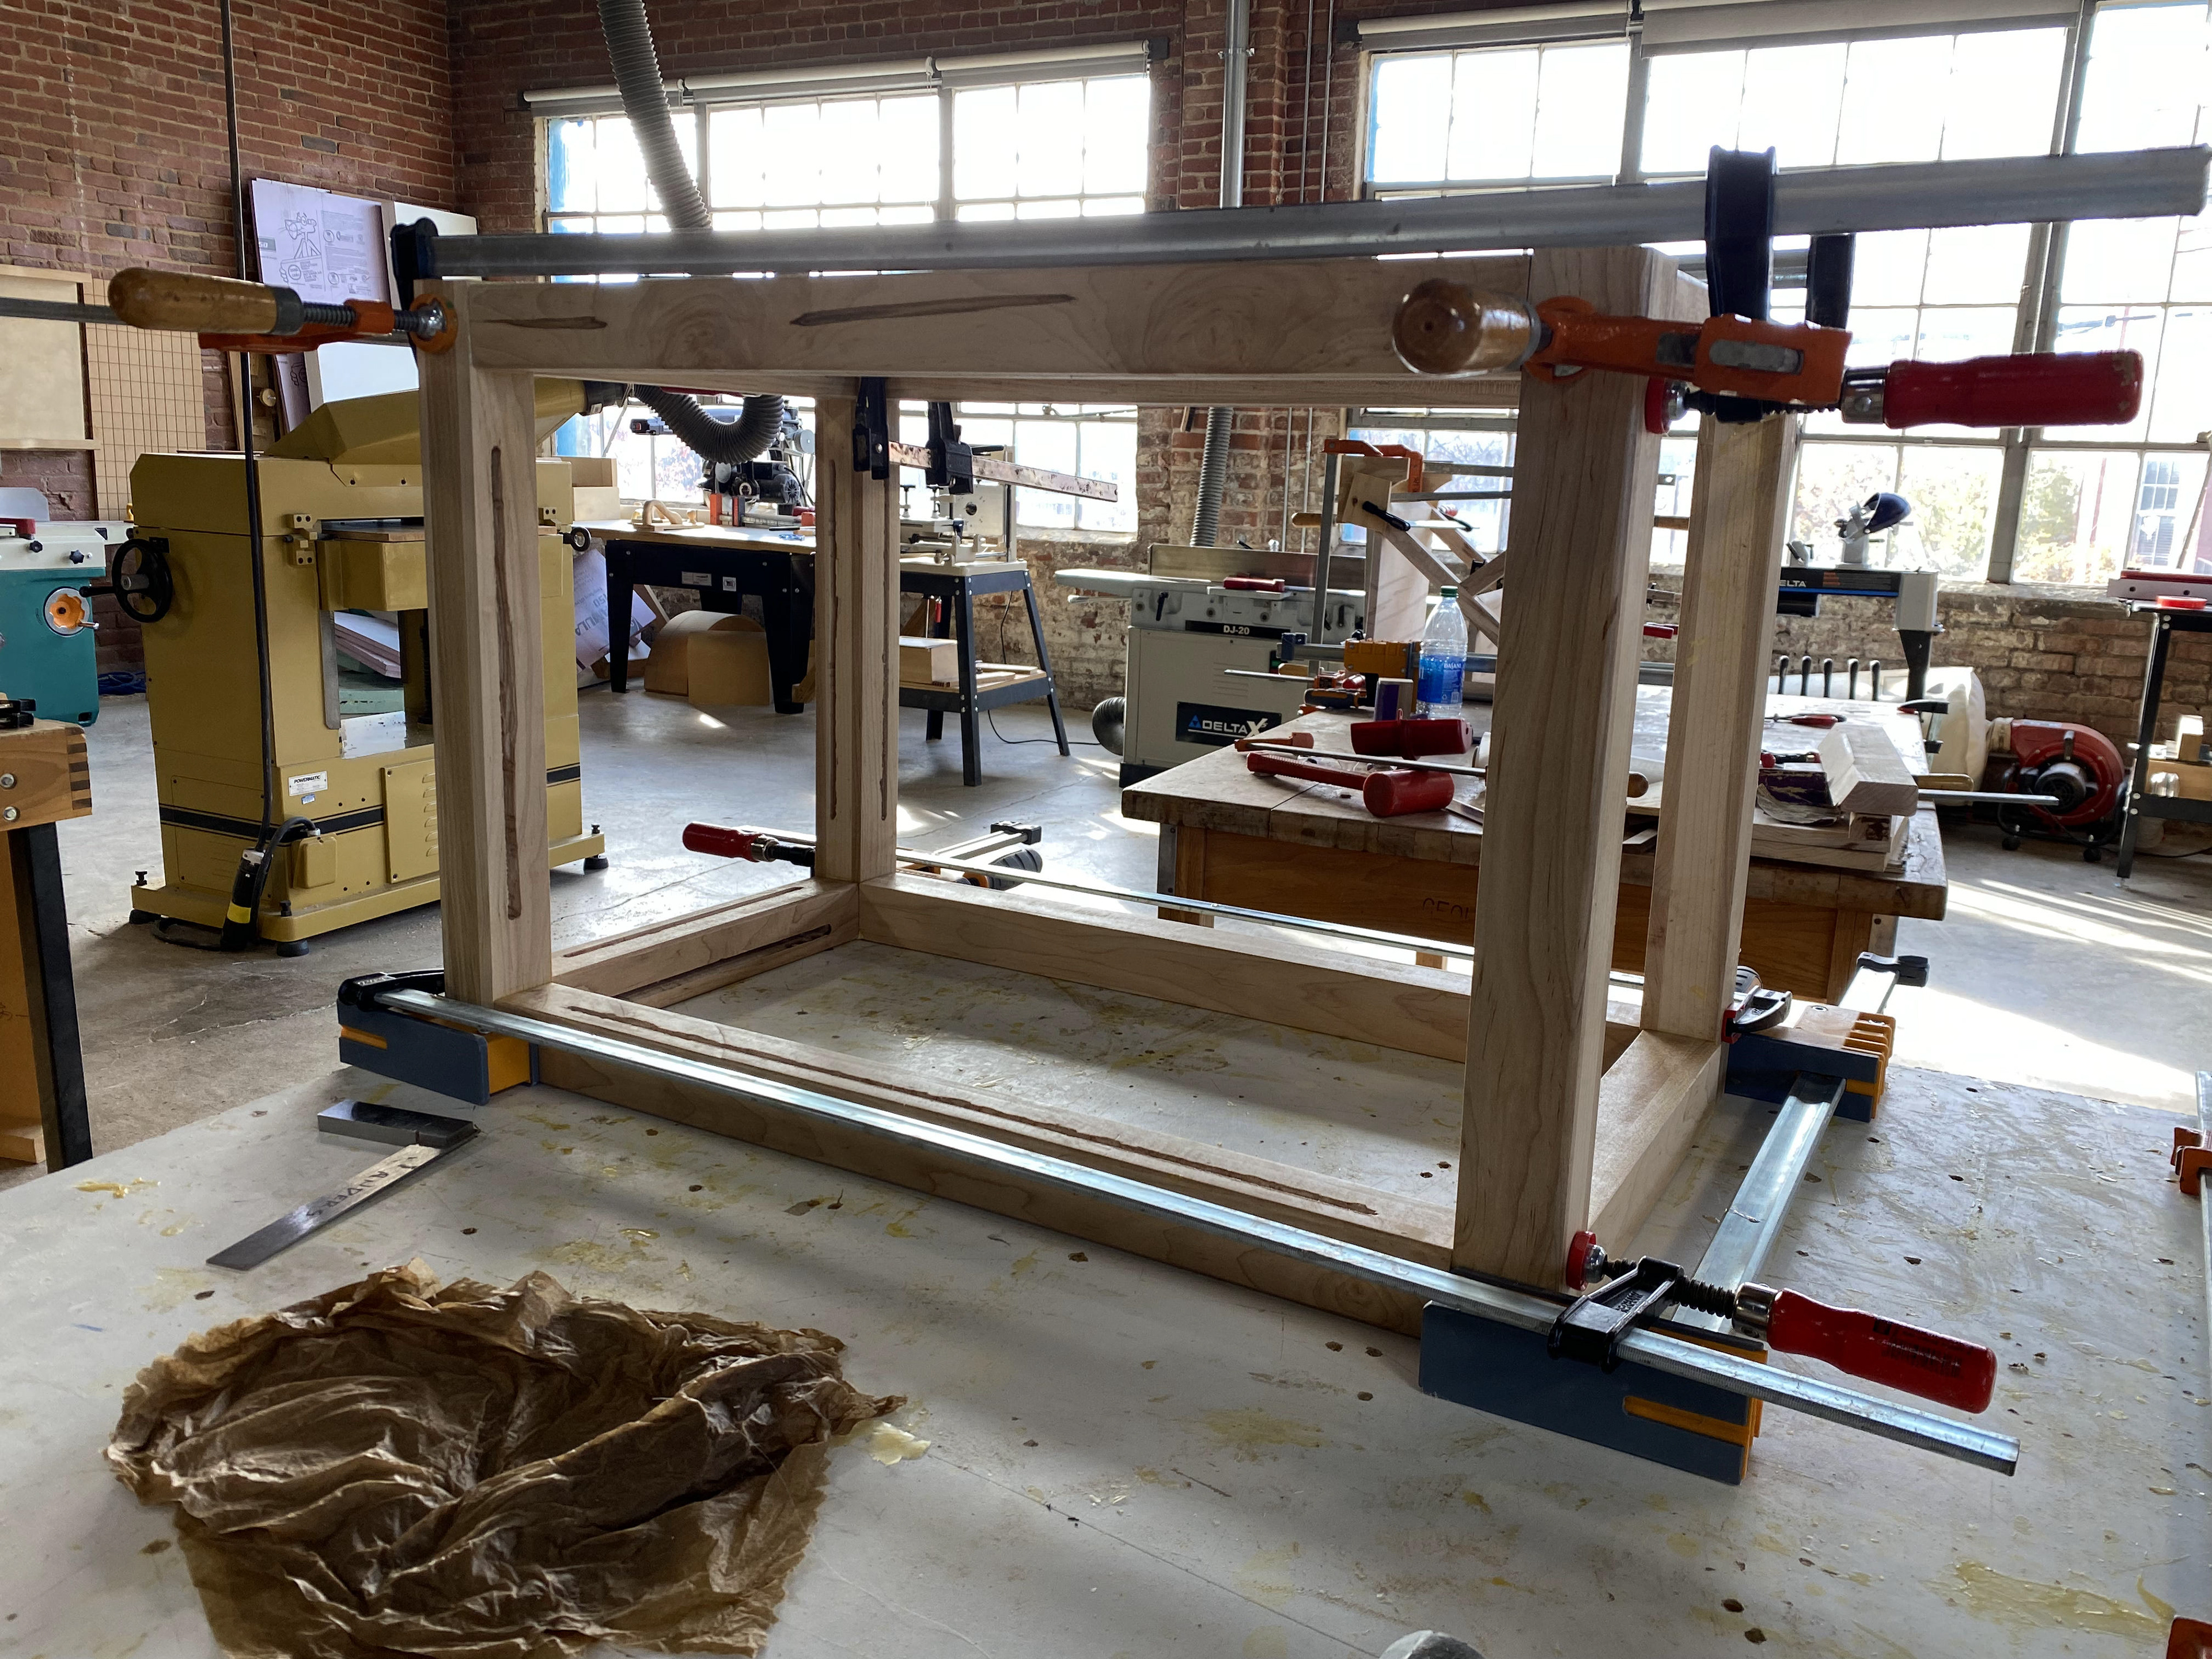
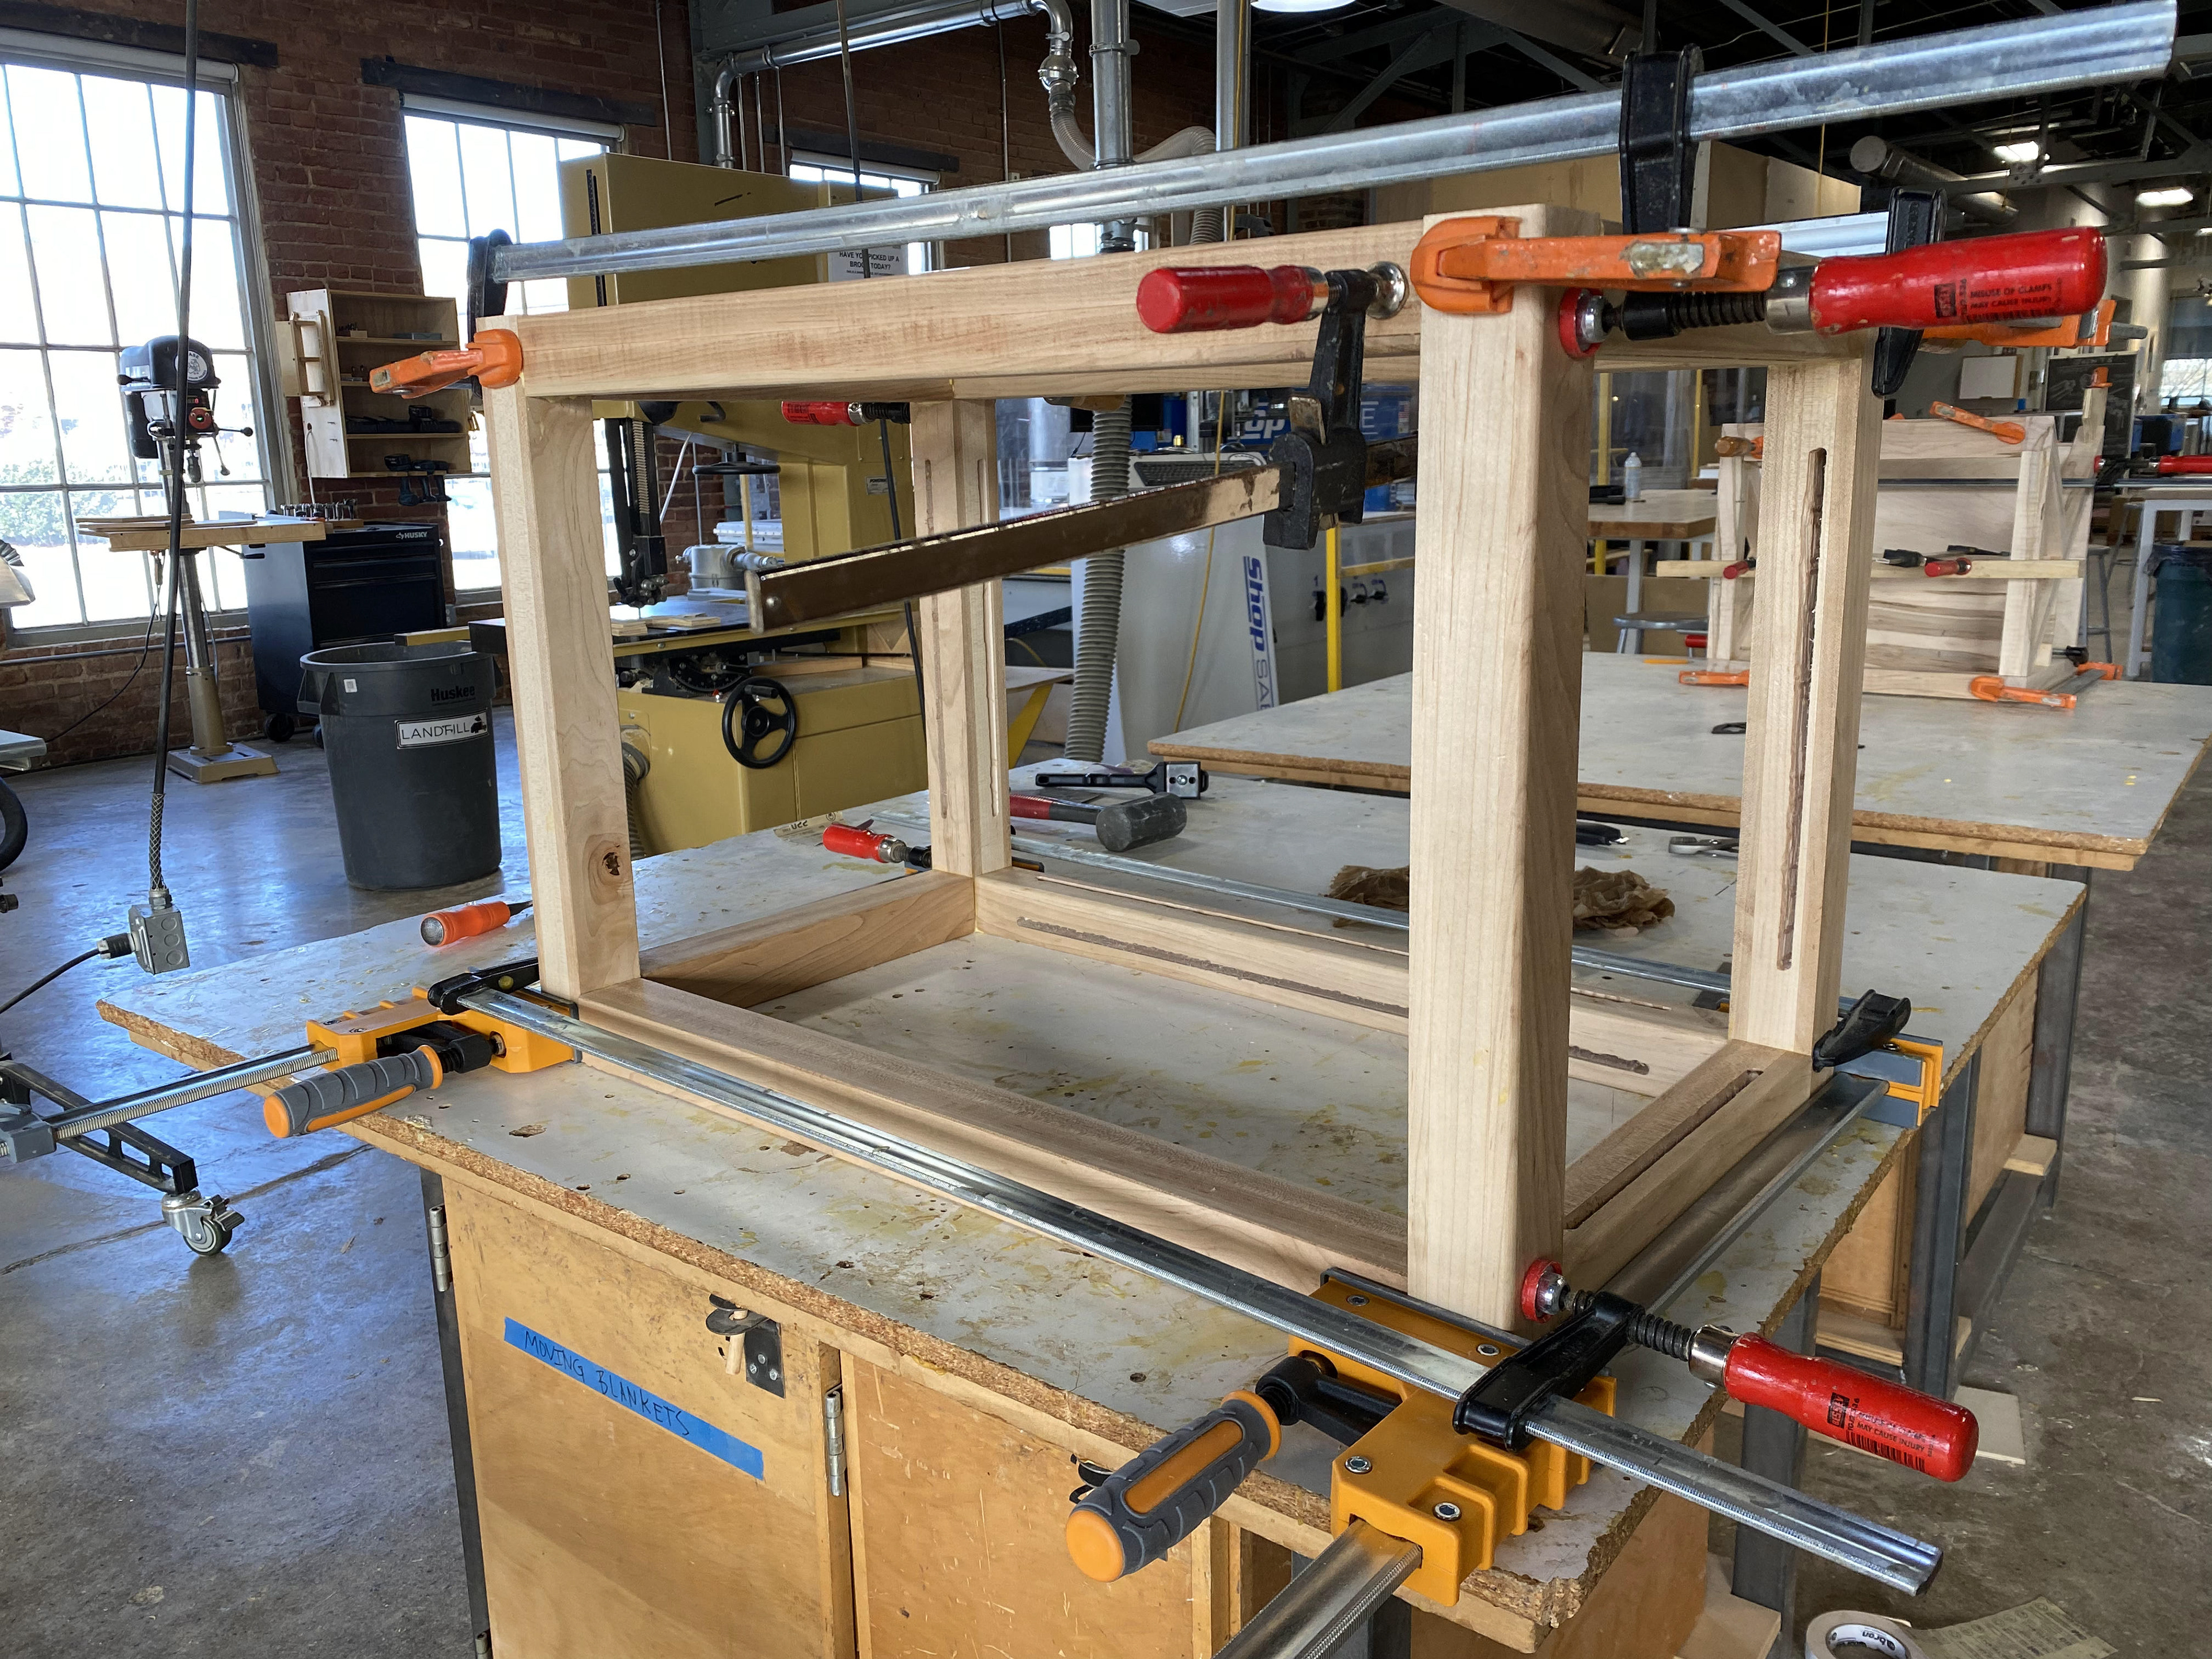
The actual fabrication of the final stools was unexpectedly difficult and time consuming due to scheduling constraints and discrepancies in measurements. The first step was to create the right wood thickness using both the jointer and the planer. Then, each leg was cut to the appropriate length. The most difficult step, cutting an L shaped slot through the legs, required a variety of strategies. Initially, I used a drill press to carve out a line of holes where the slit would be. I then took a chisel and removed a significant portion of the wood. Then, I used a specialized router to make the final slots. After these steps were completed, the stool was assembled using the FESTOOL Domino machine. After each joint was securely fashioned, the wood finish was applied. The straps, wedged through each slot and meticulously woven before being stapled, were the final step.
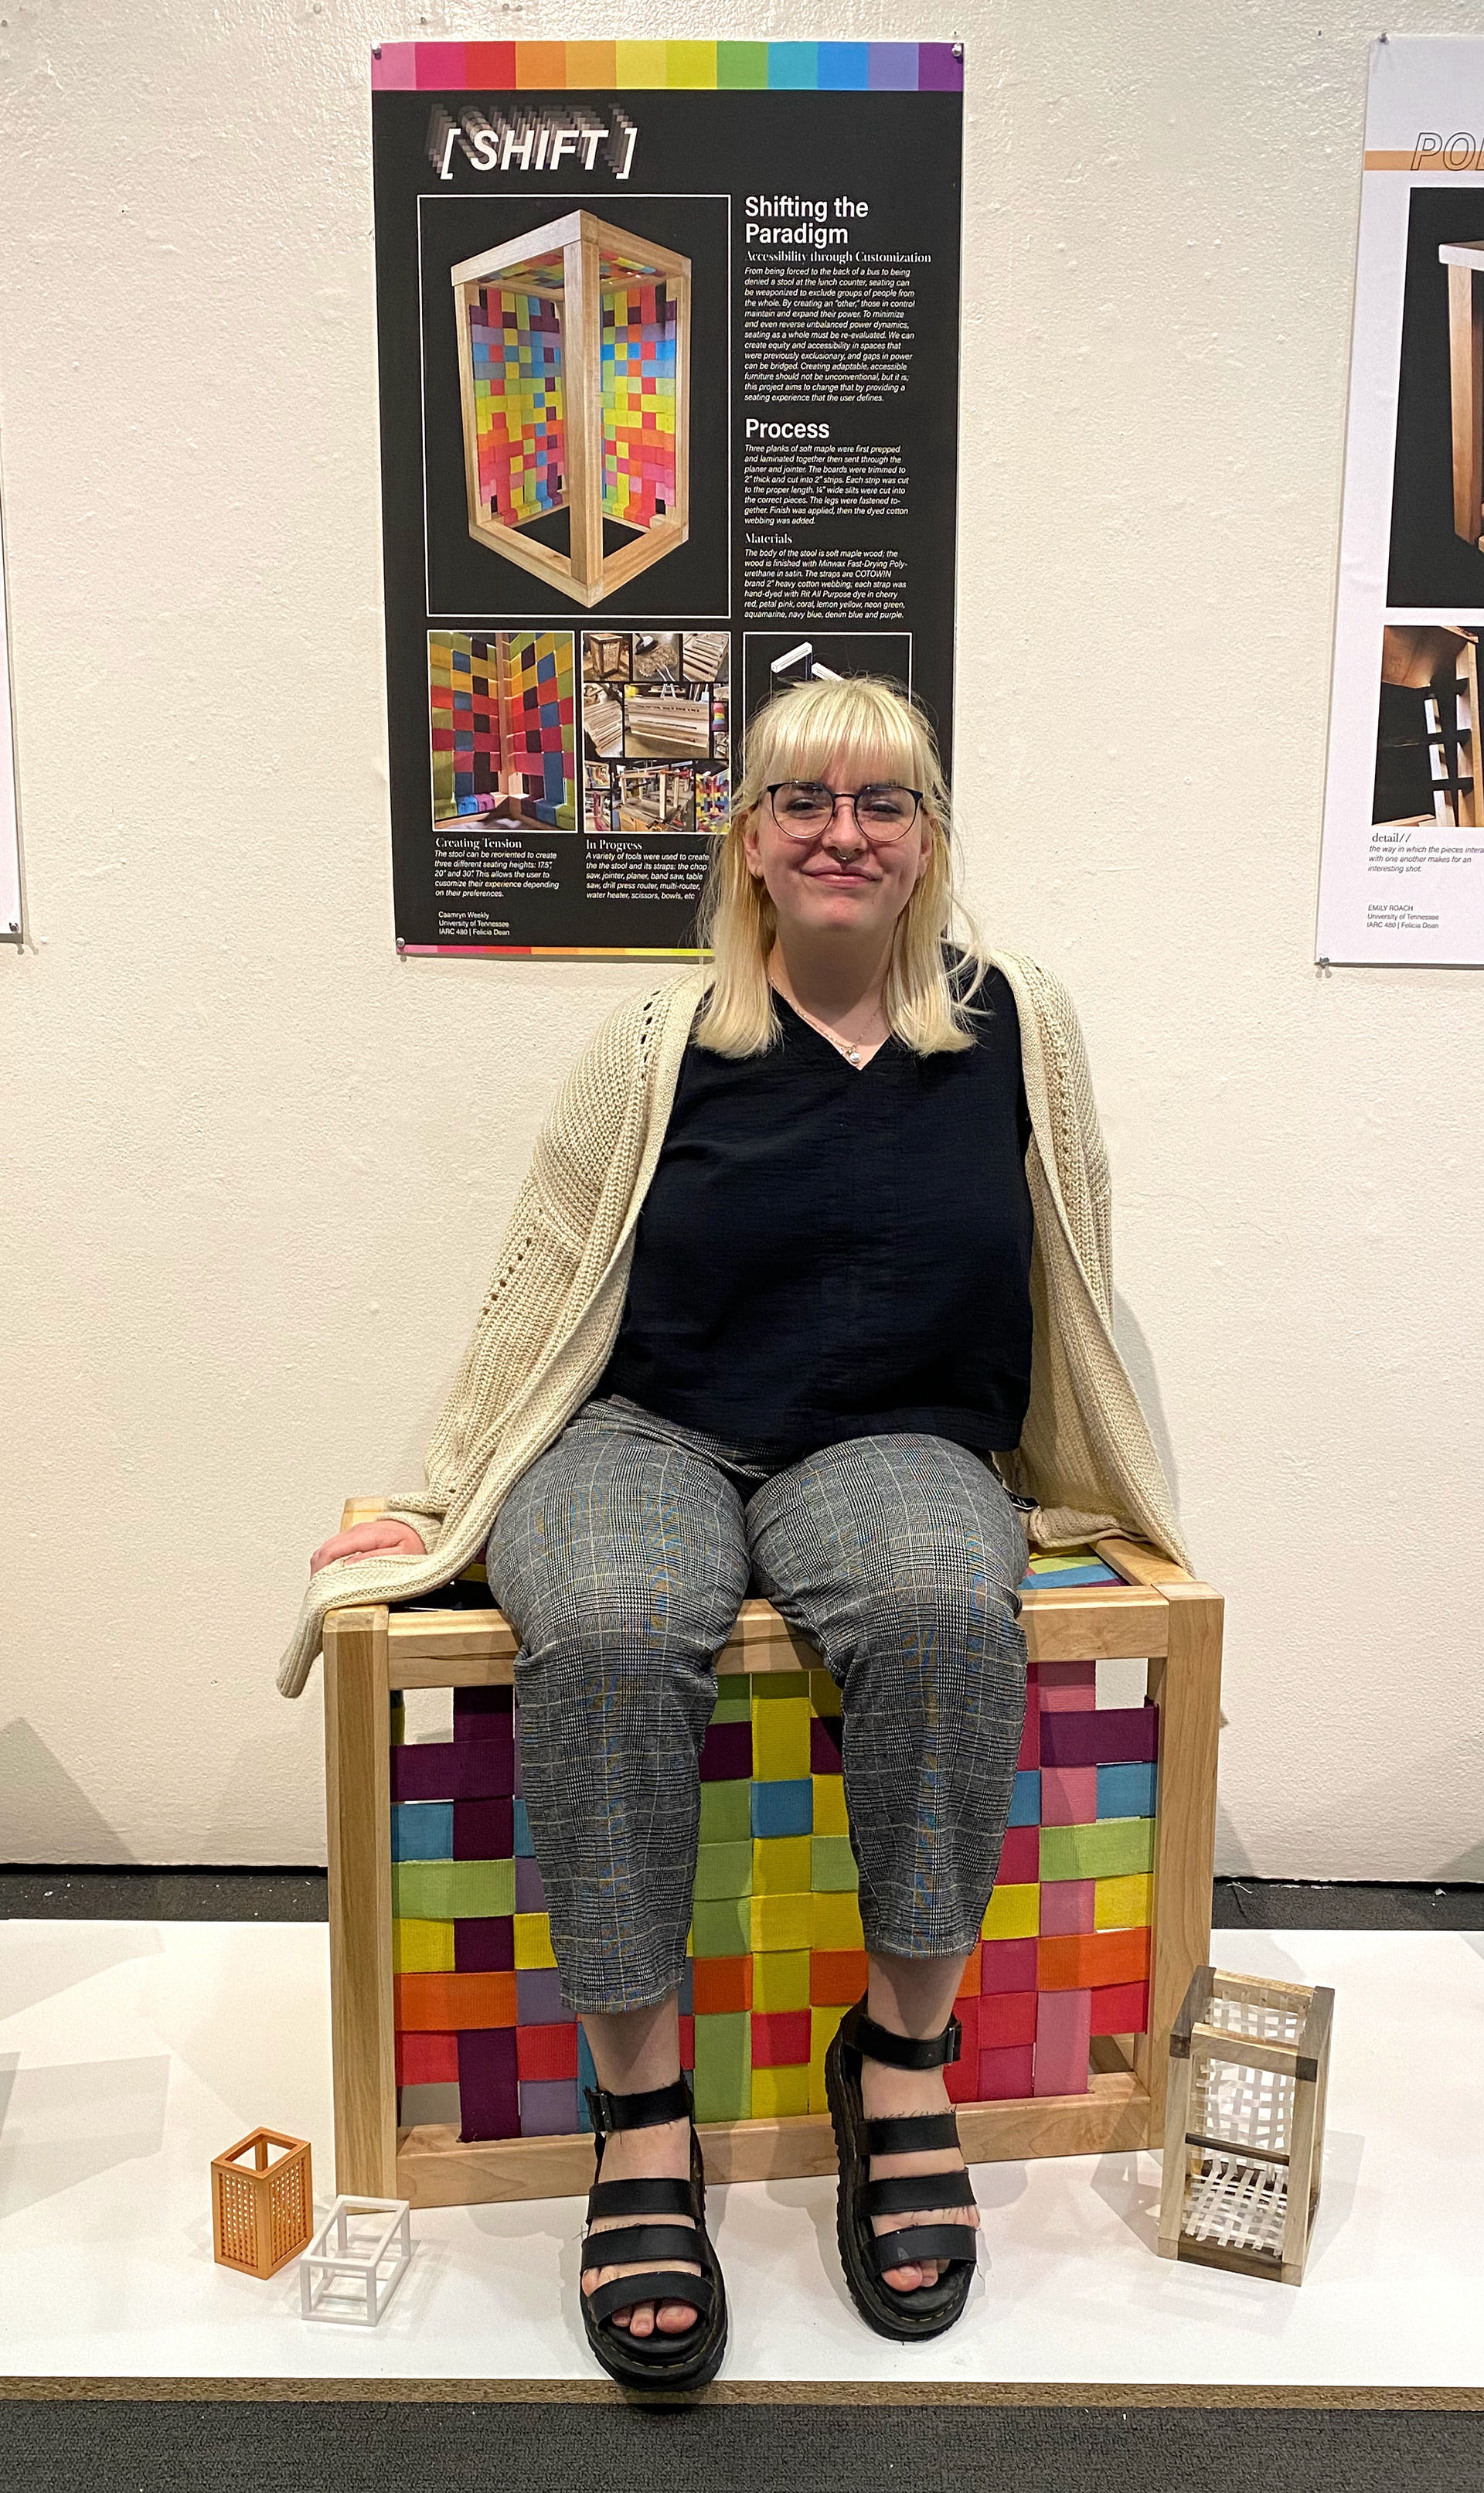
PRODUCT
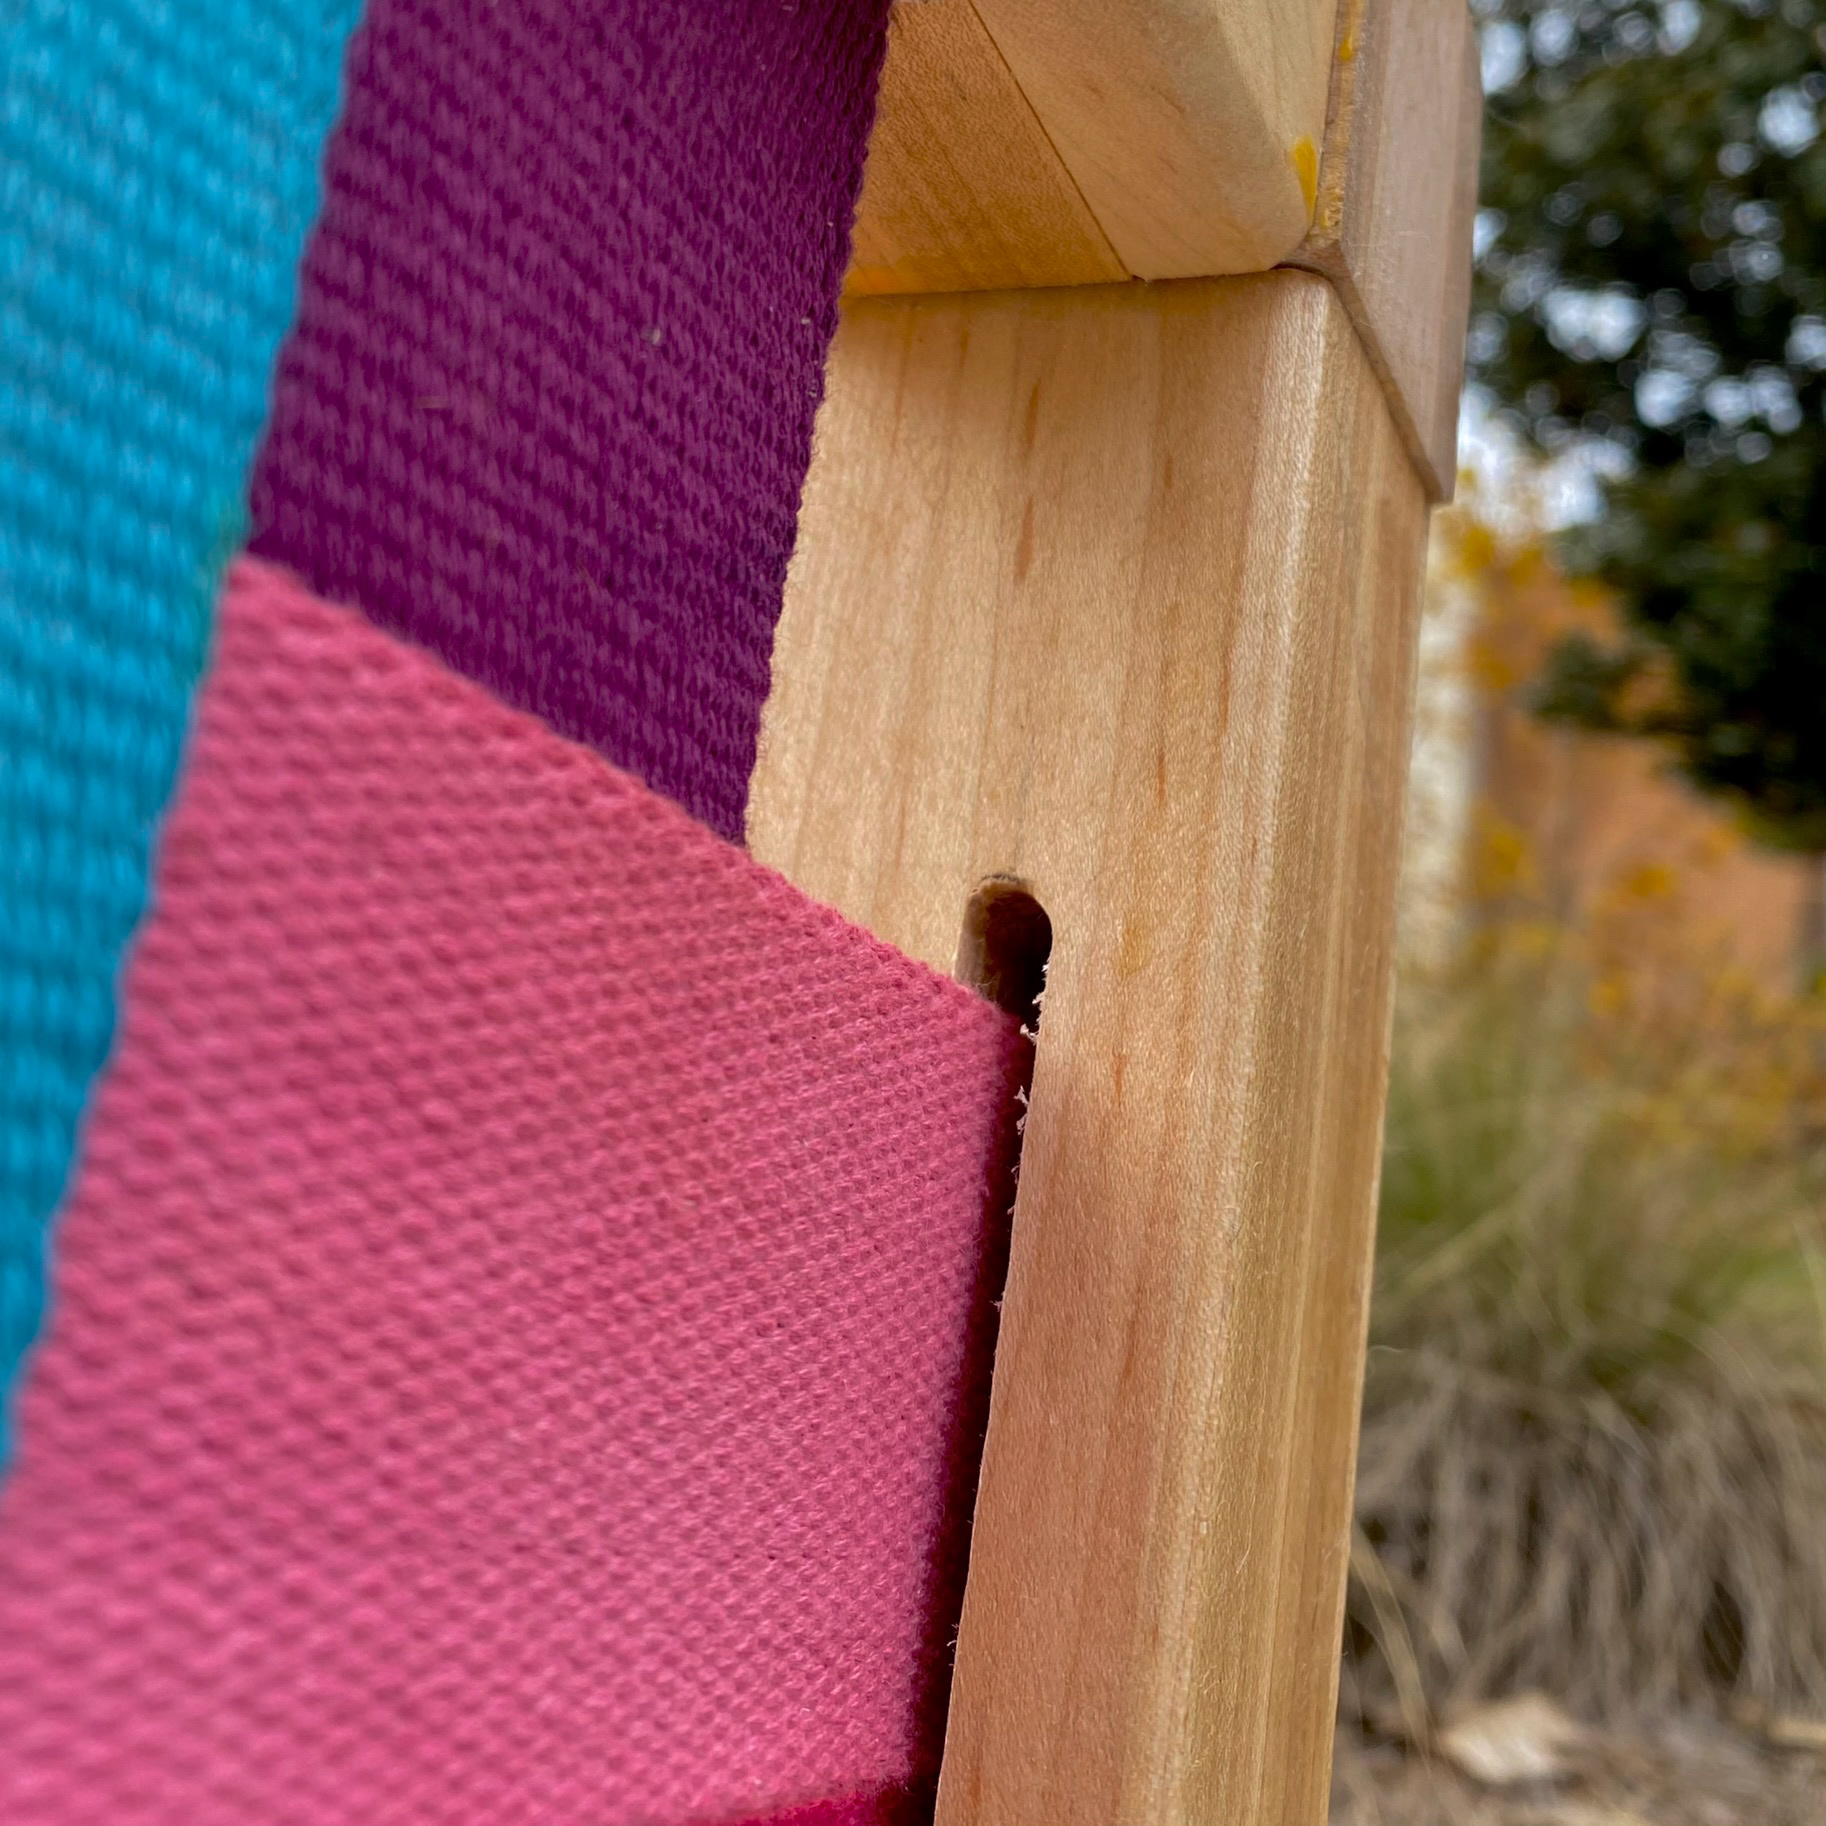
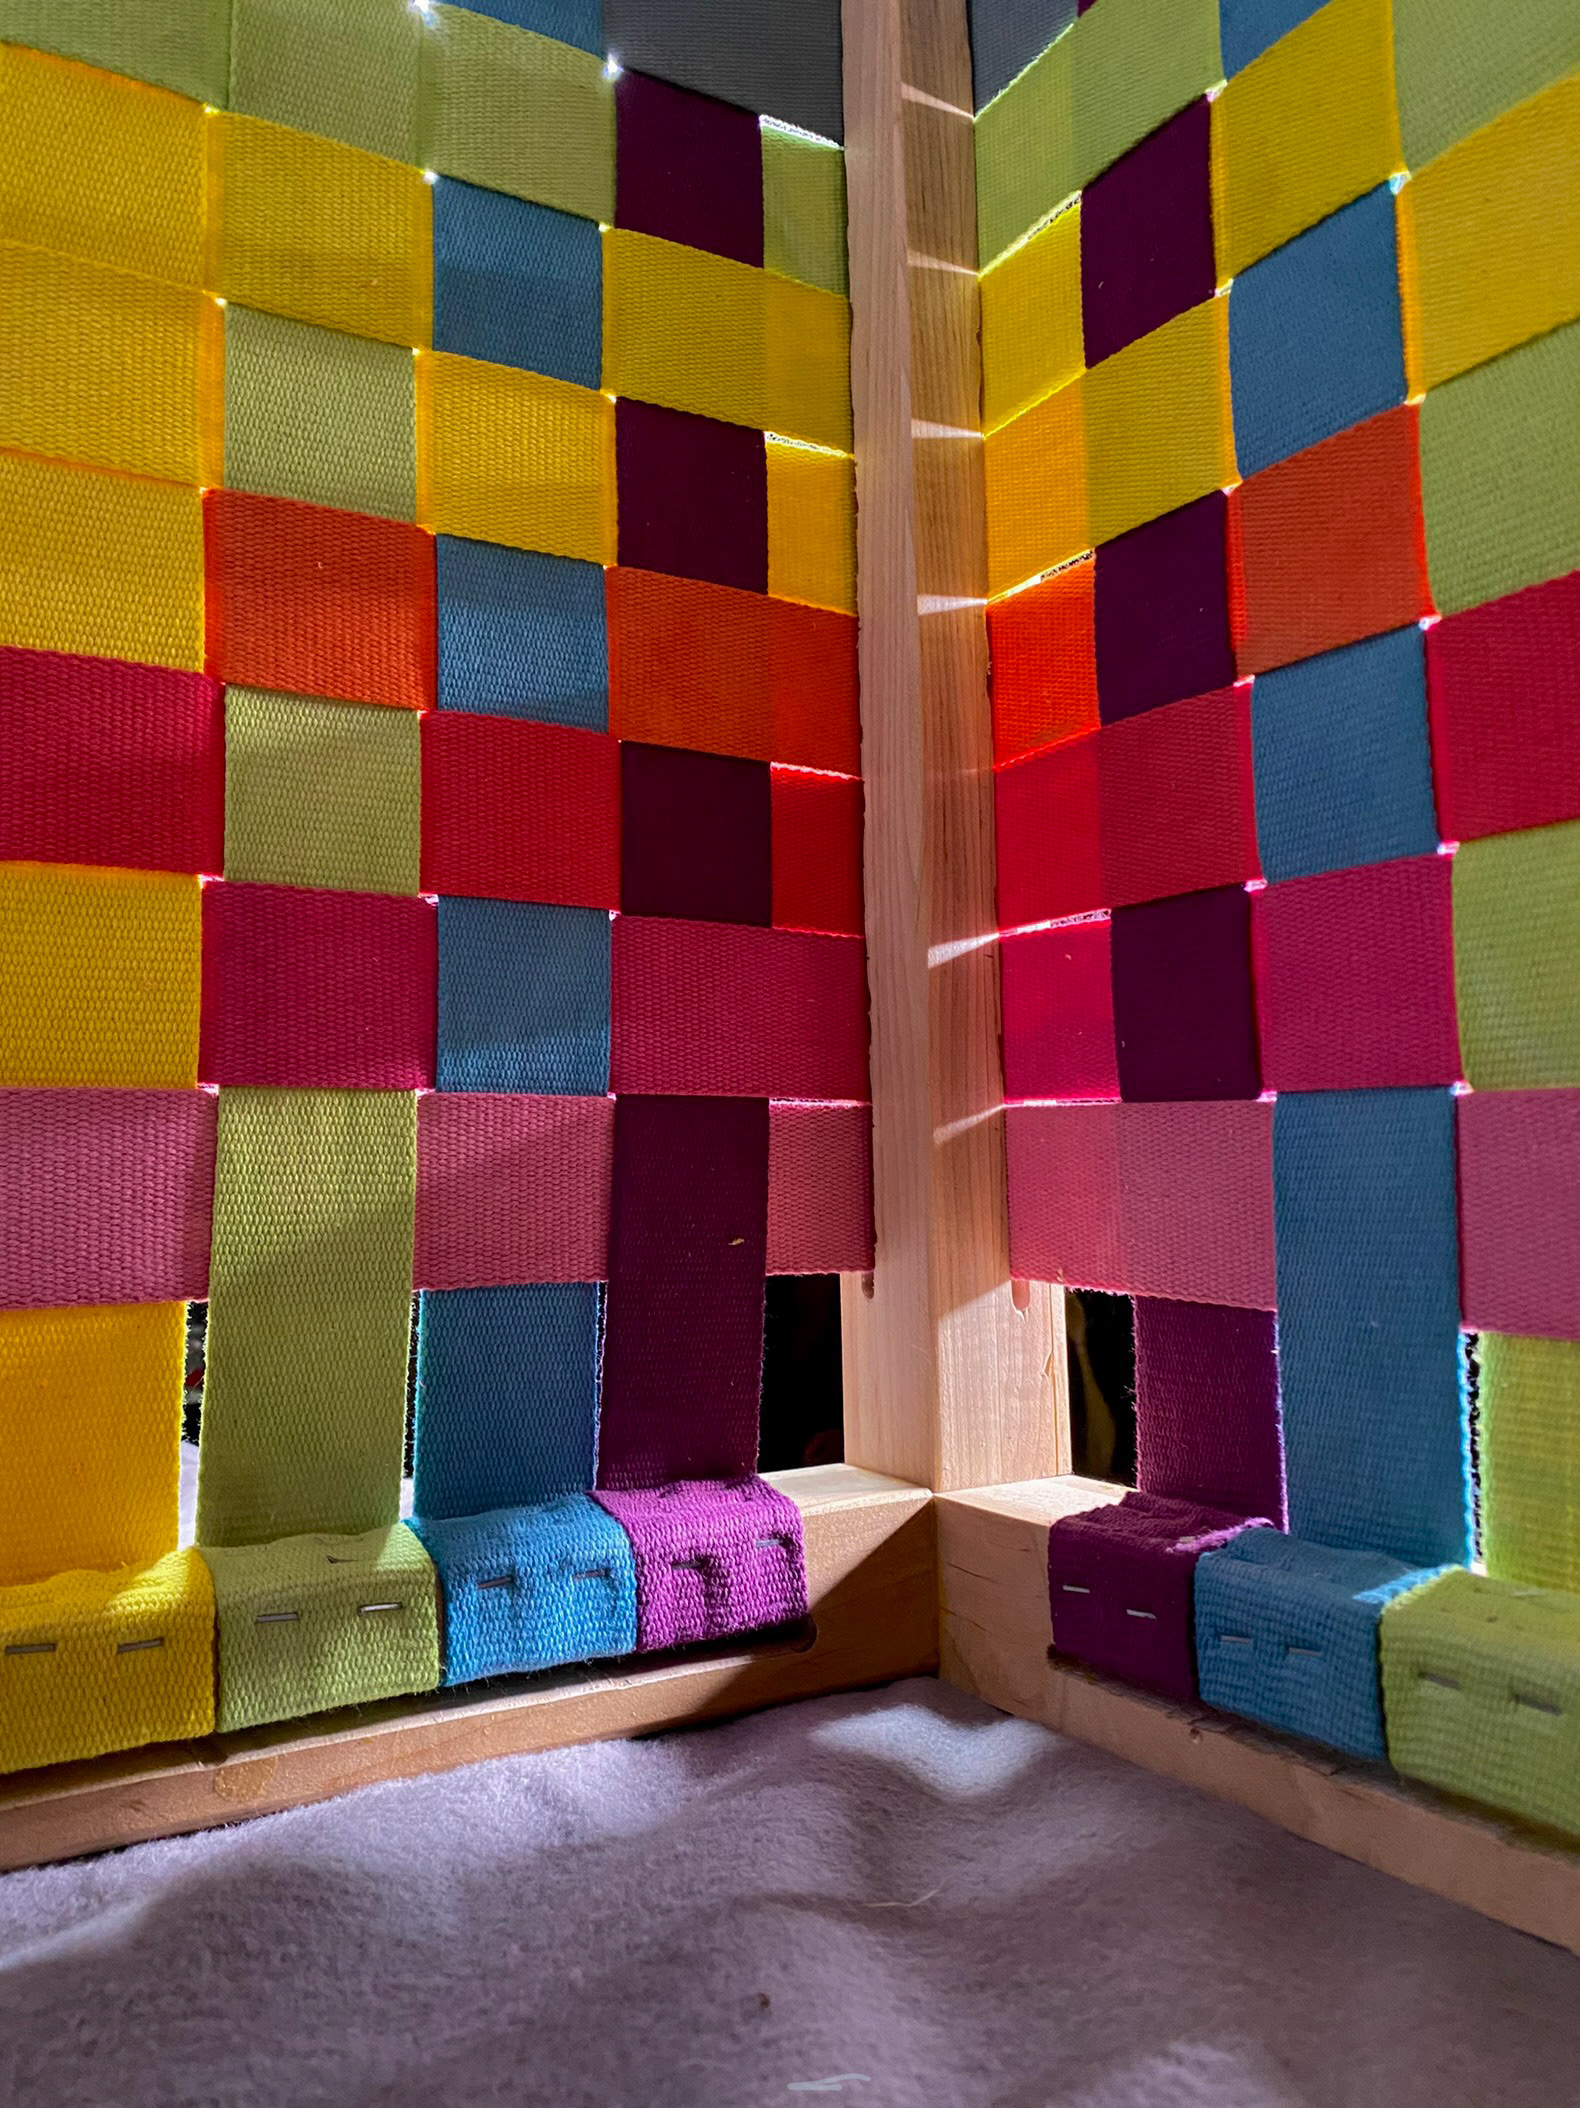
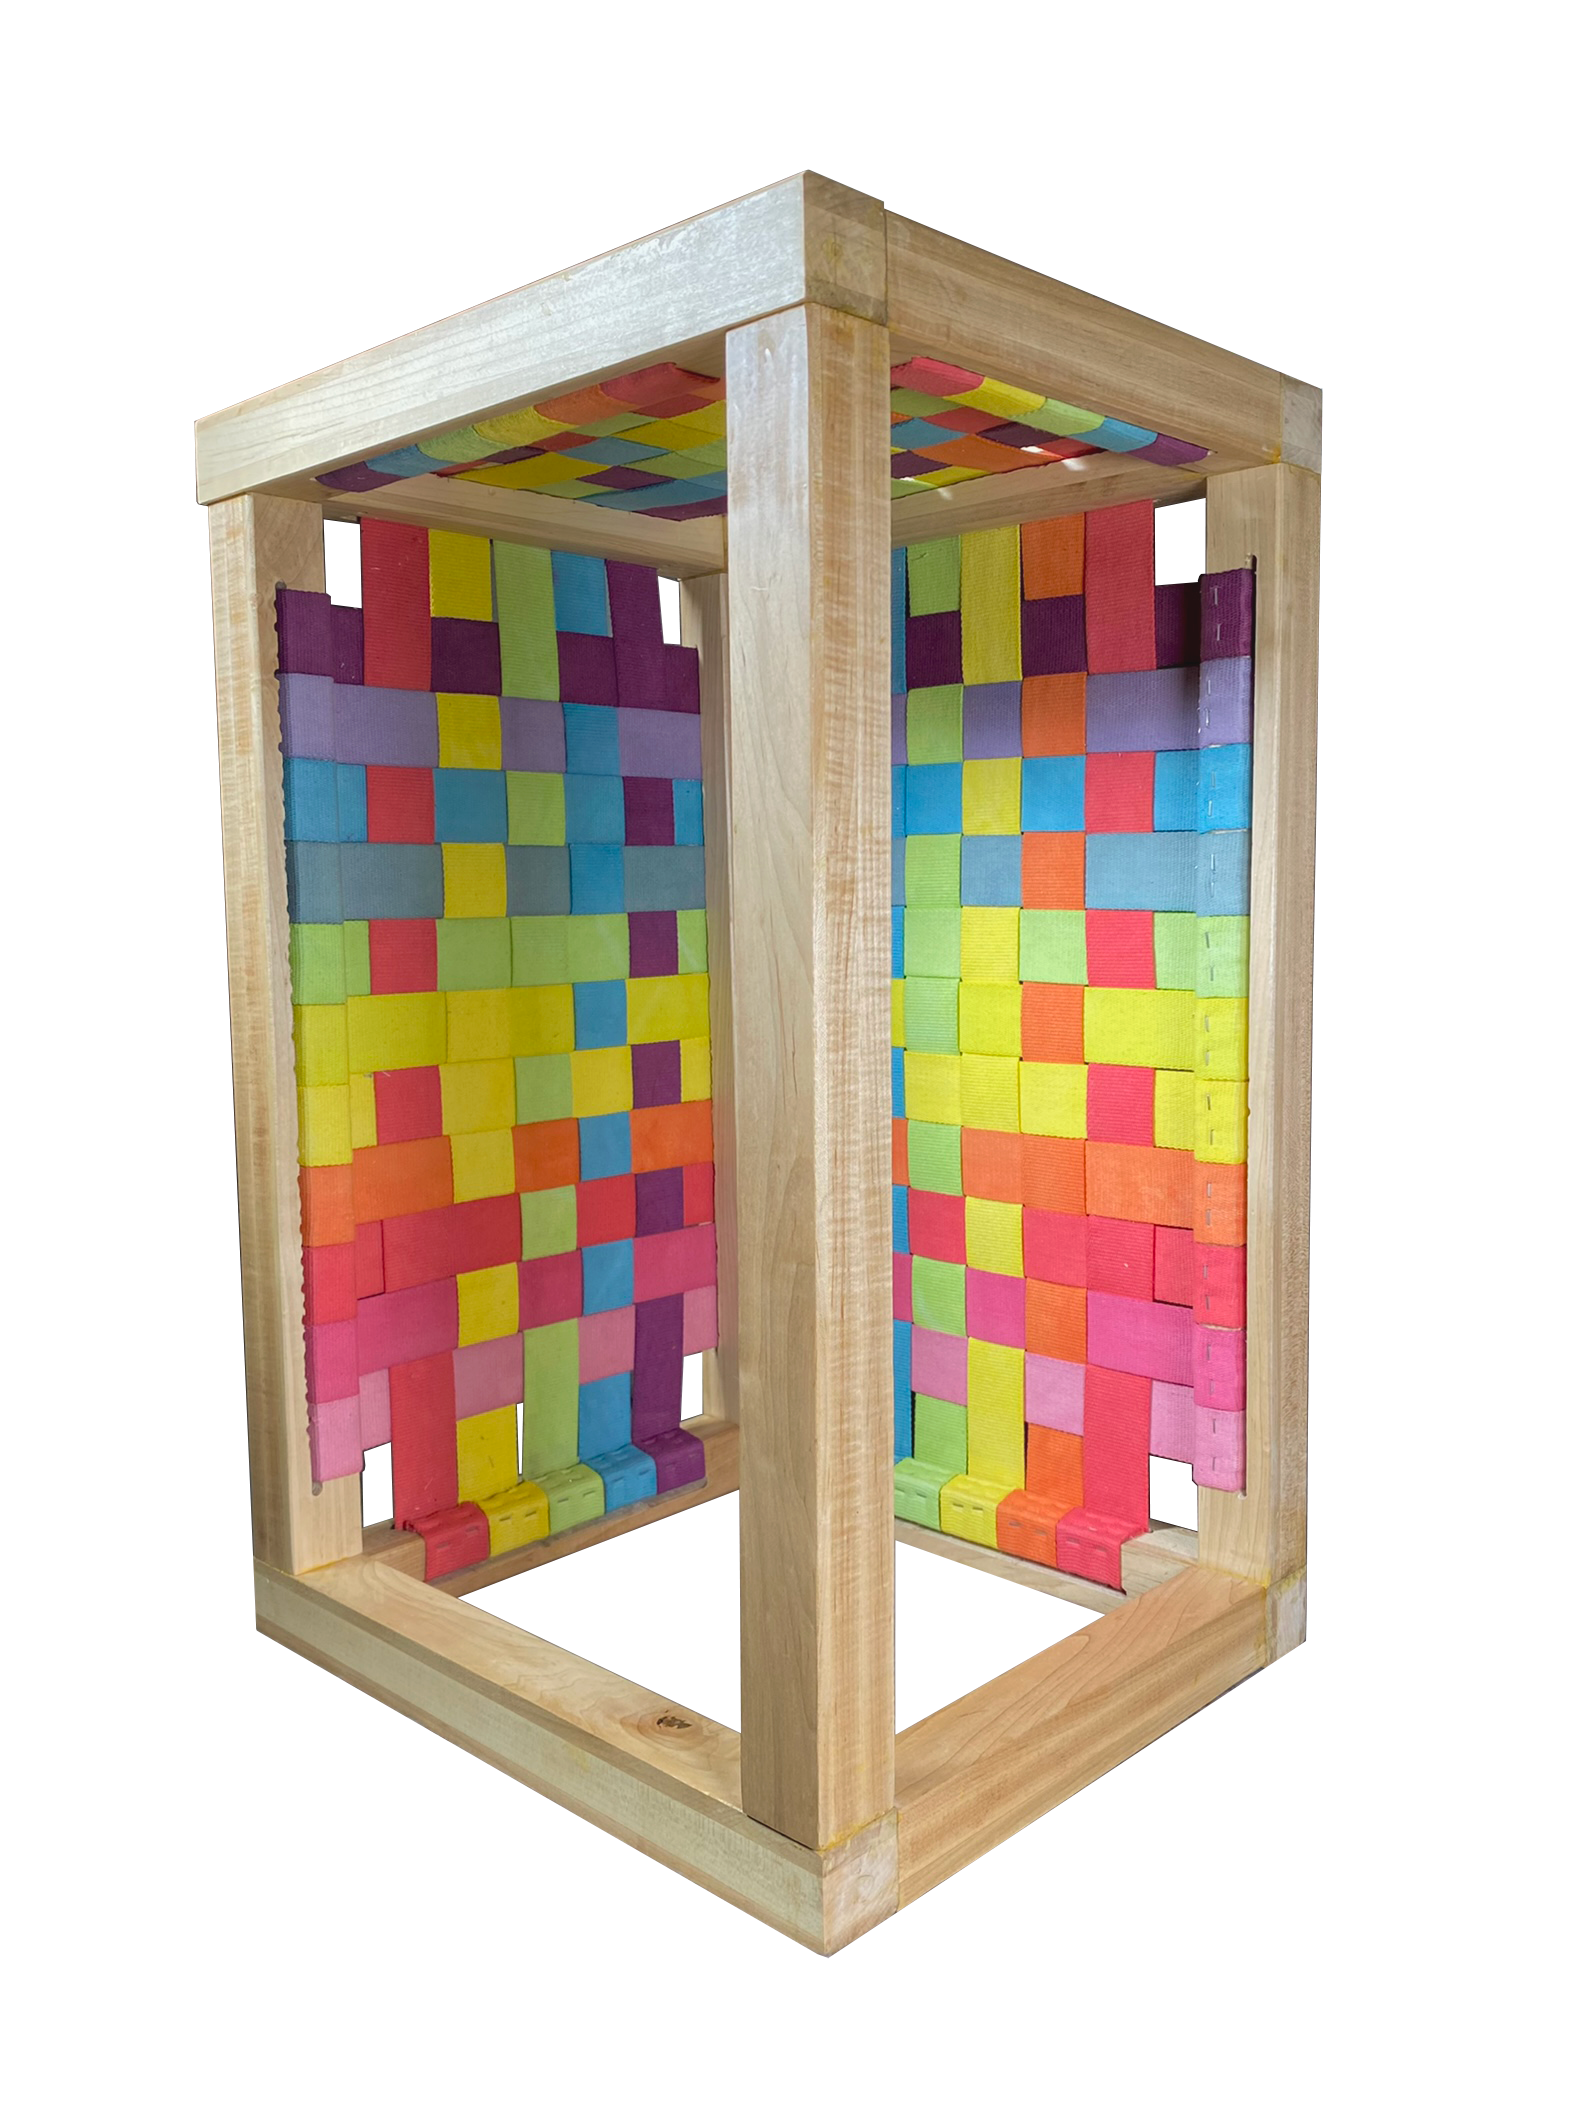
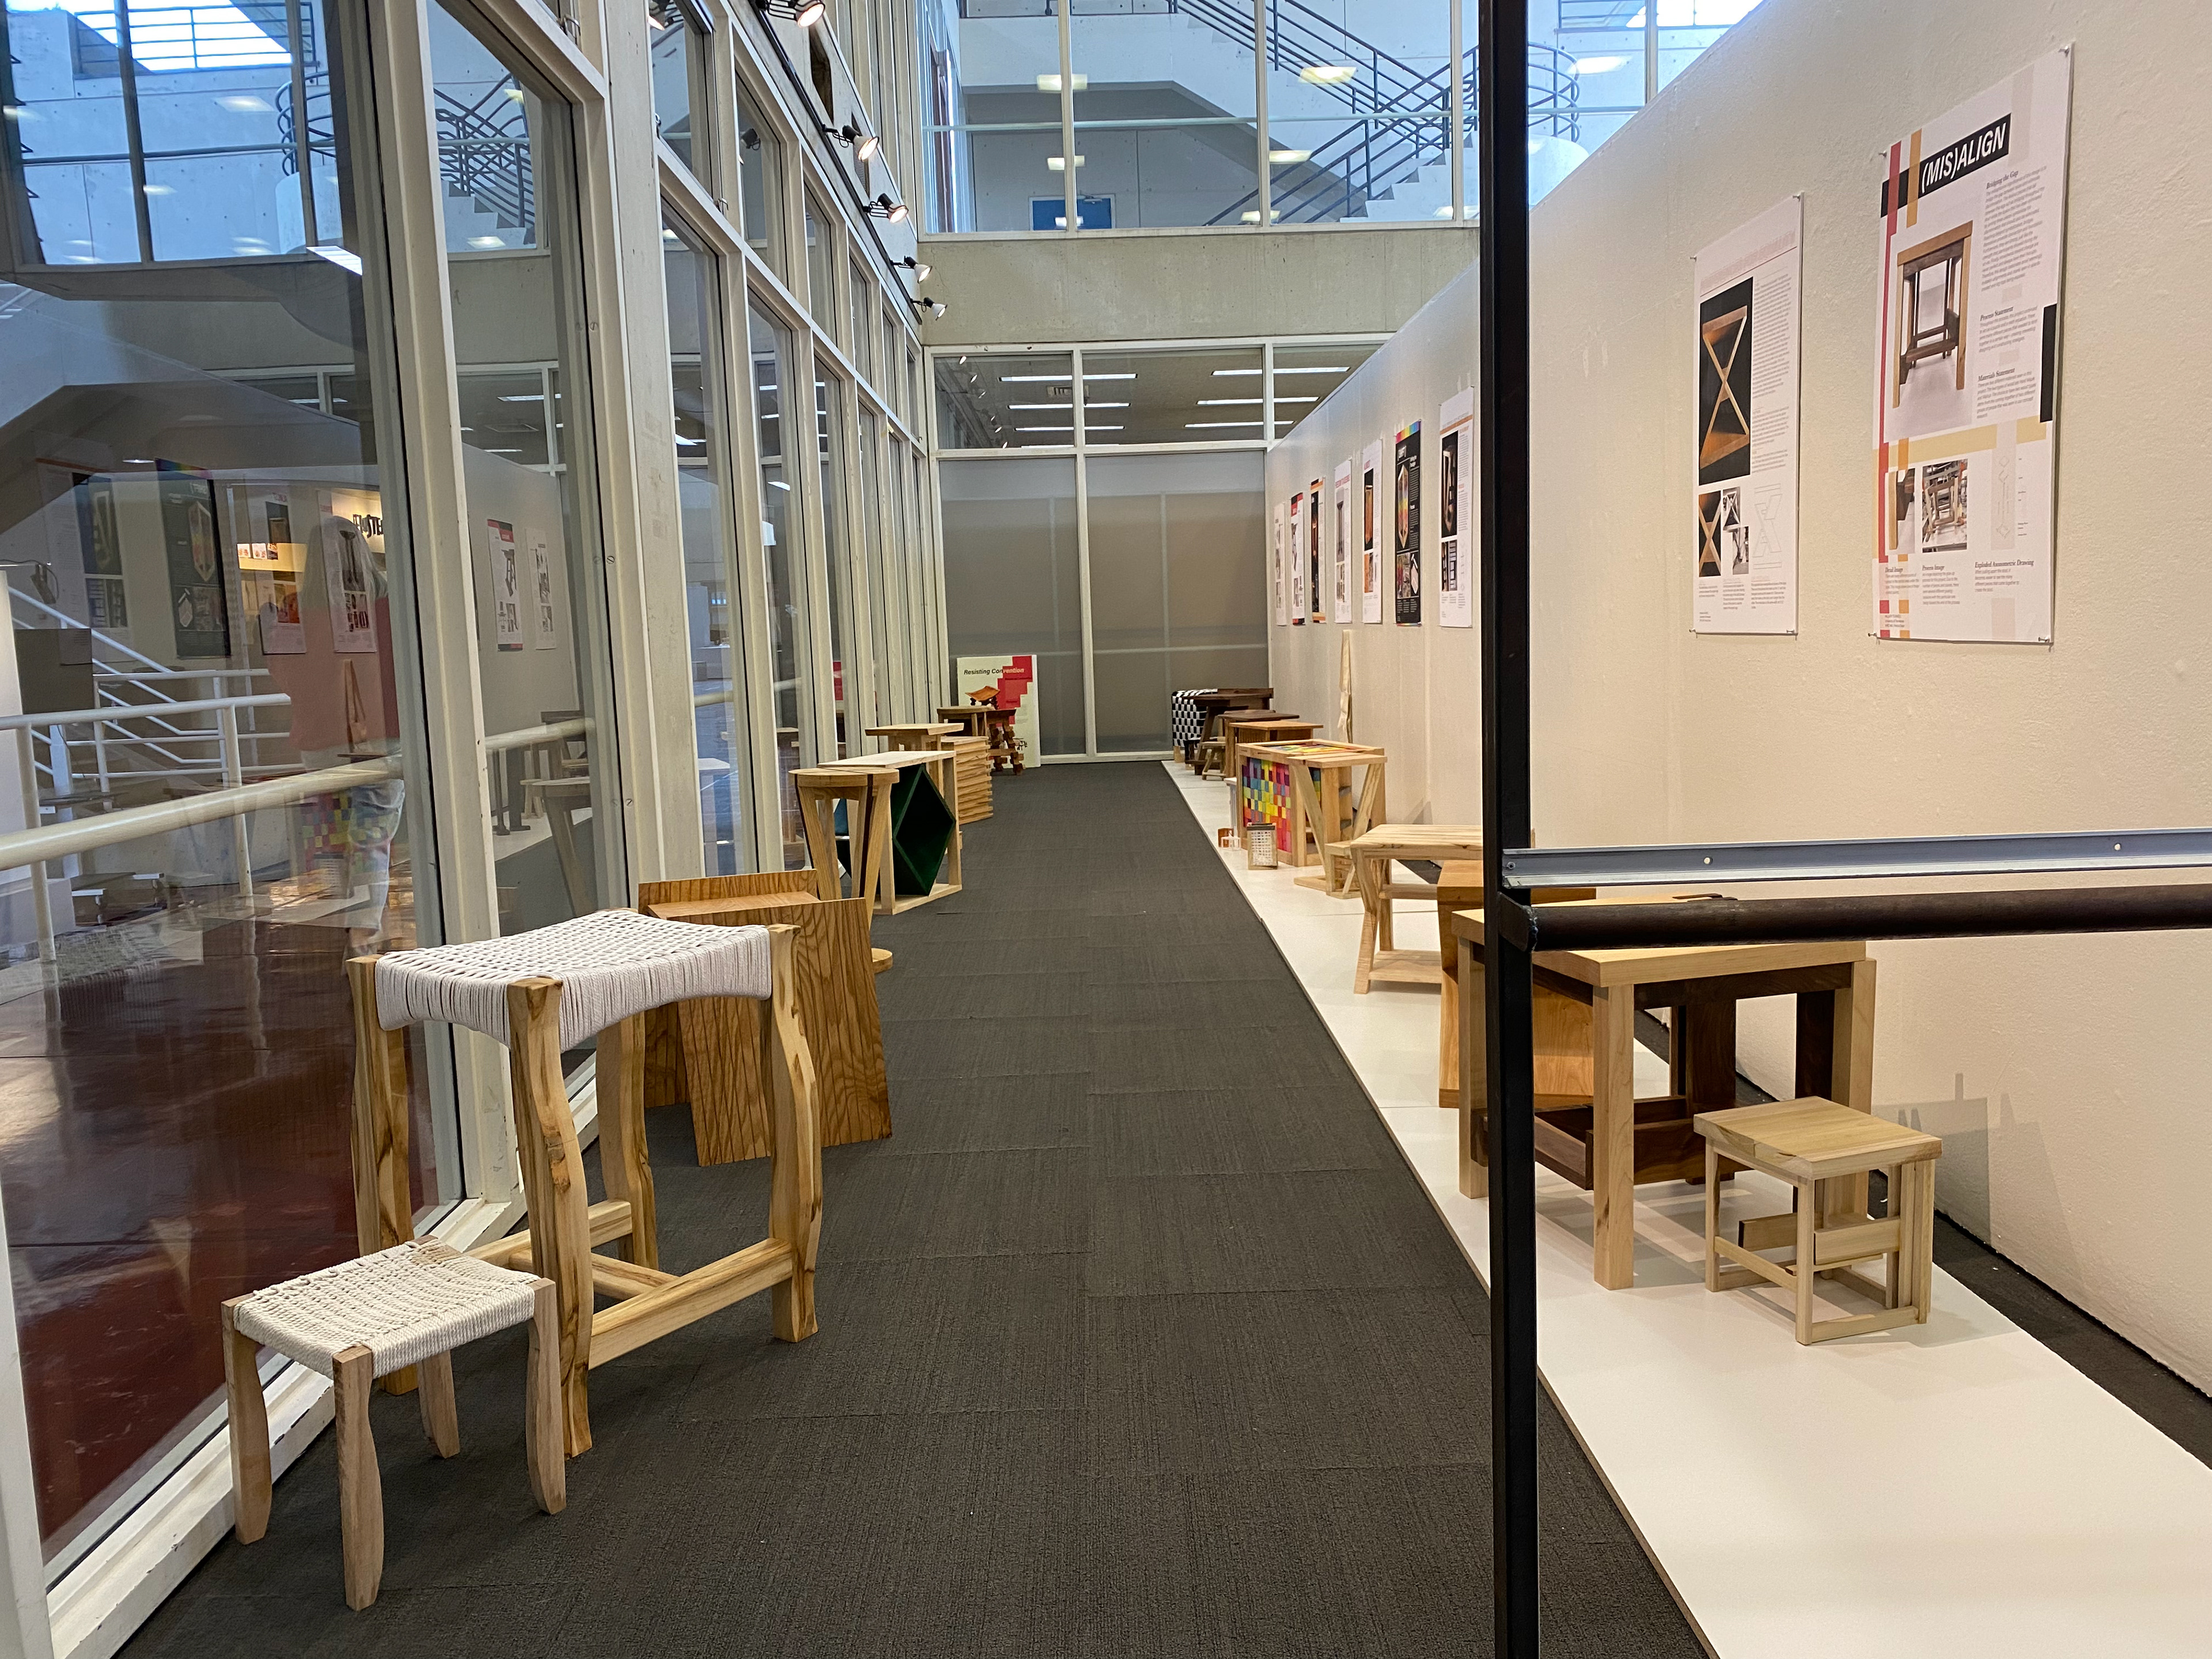
After an entire semester of work, the stool was completed. The final product consists of 12 maple legs, 9 of which have slots to hold the 22 hand-dyed straps. The stool was exhibited at the University of Tennessee from December 1st to February 28th, allowing the entire college community to see the work we accomplished over the last five months. Below is the final presentation board for the exhibit along with several images of the install. The studio also prepared a book detailing the process and research conducted during the class. This is linked below.